Oracle Cloud Account
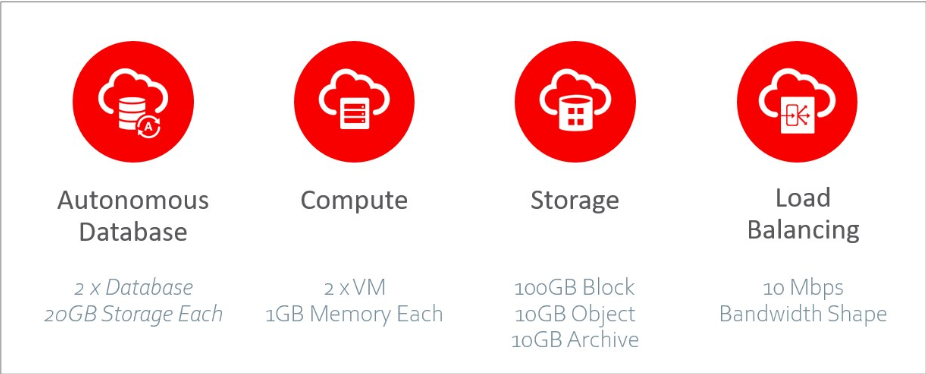
On 16th September 2019, Oracle announced a free tier. This allows students and professionals to build, test, and deploy applications on the Oracle cloud and database for free for an unlimited time. The free tier though has limits for various services. Two virtual machines and two block volumes, and 10 GB each of object and archive storage is the current limit for free cloud tier accounts.
Free Services
For cloudmesh, two services are important Oracle Cloud Compute Resources and Oracle Storage.
Account Creation
Please follow the steps to create a new oracle cloud account and set up the keys and values required for the cloudmesh config file.
Step 1: Go to the Oracle Cloud website to sign up for a free account.
https://myservices.us.oraclecloud.com/mycloud/signup?
Step 2: Fill out your email address and click on Next.
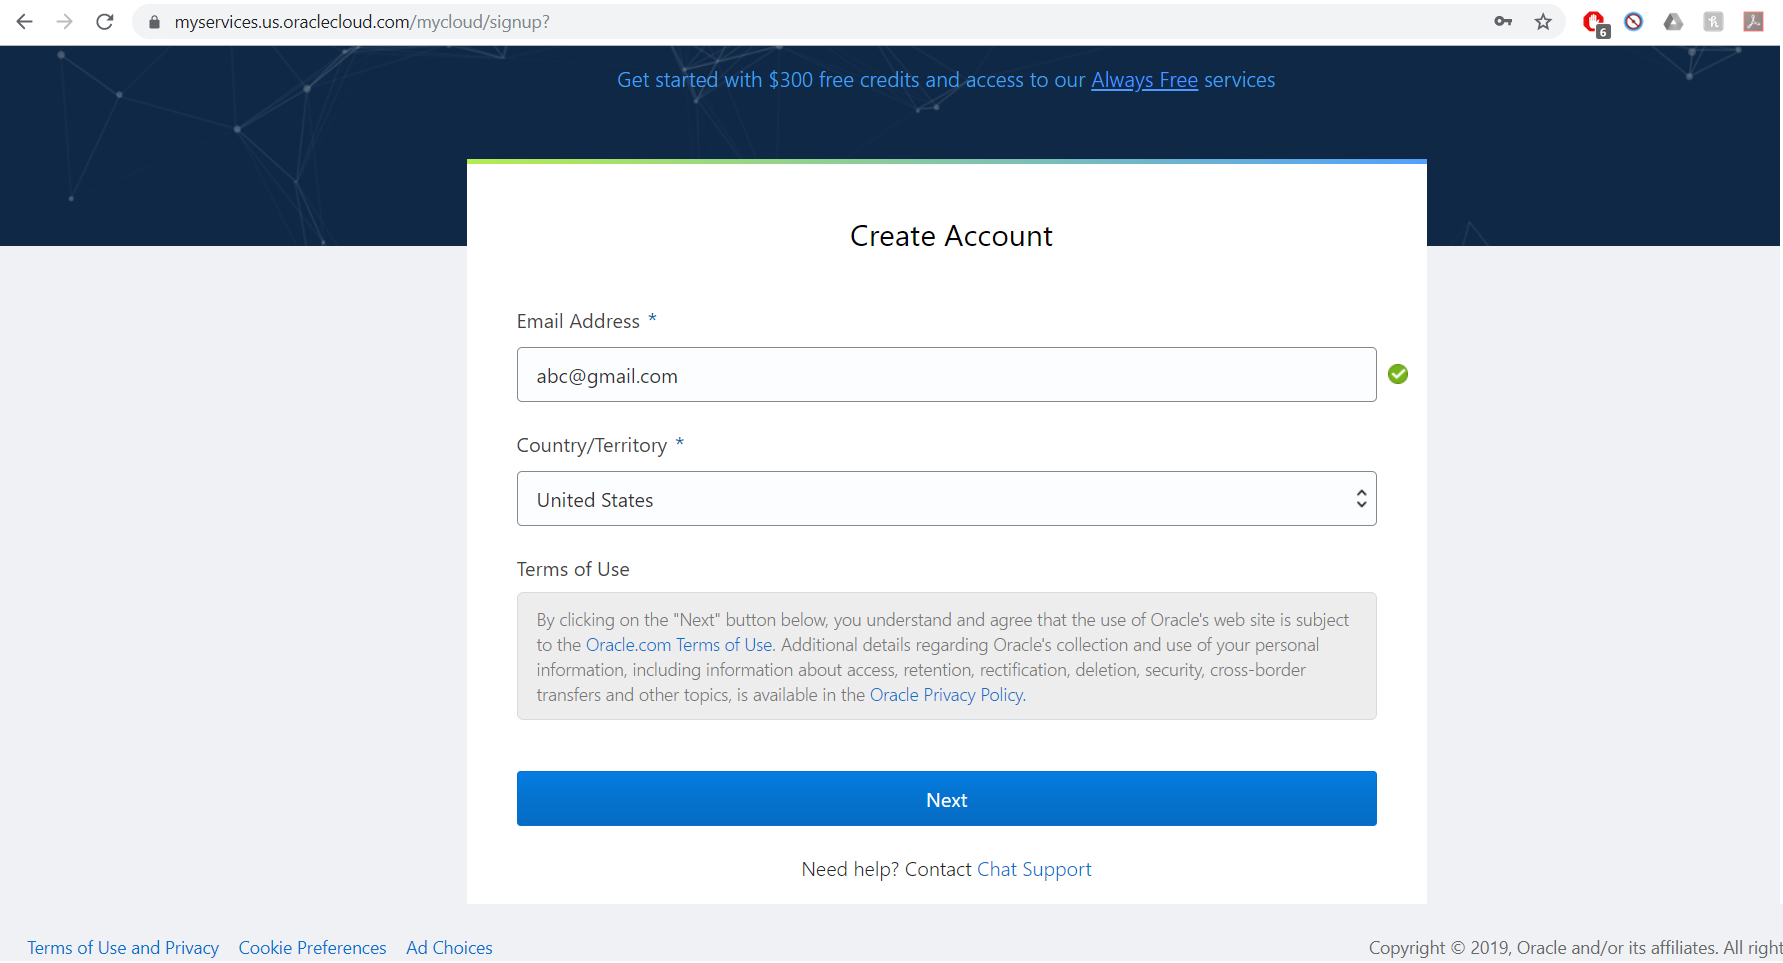
Create Account
Step 3: You will be directed to a page to enter your account details.
Select Account Type as Personal. Fill out all the other fields
and click Next.
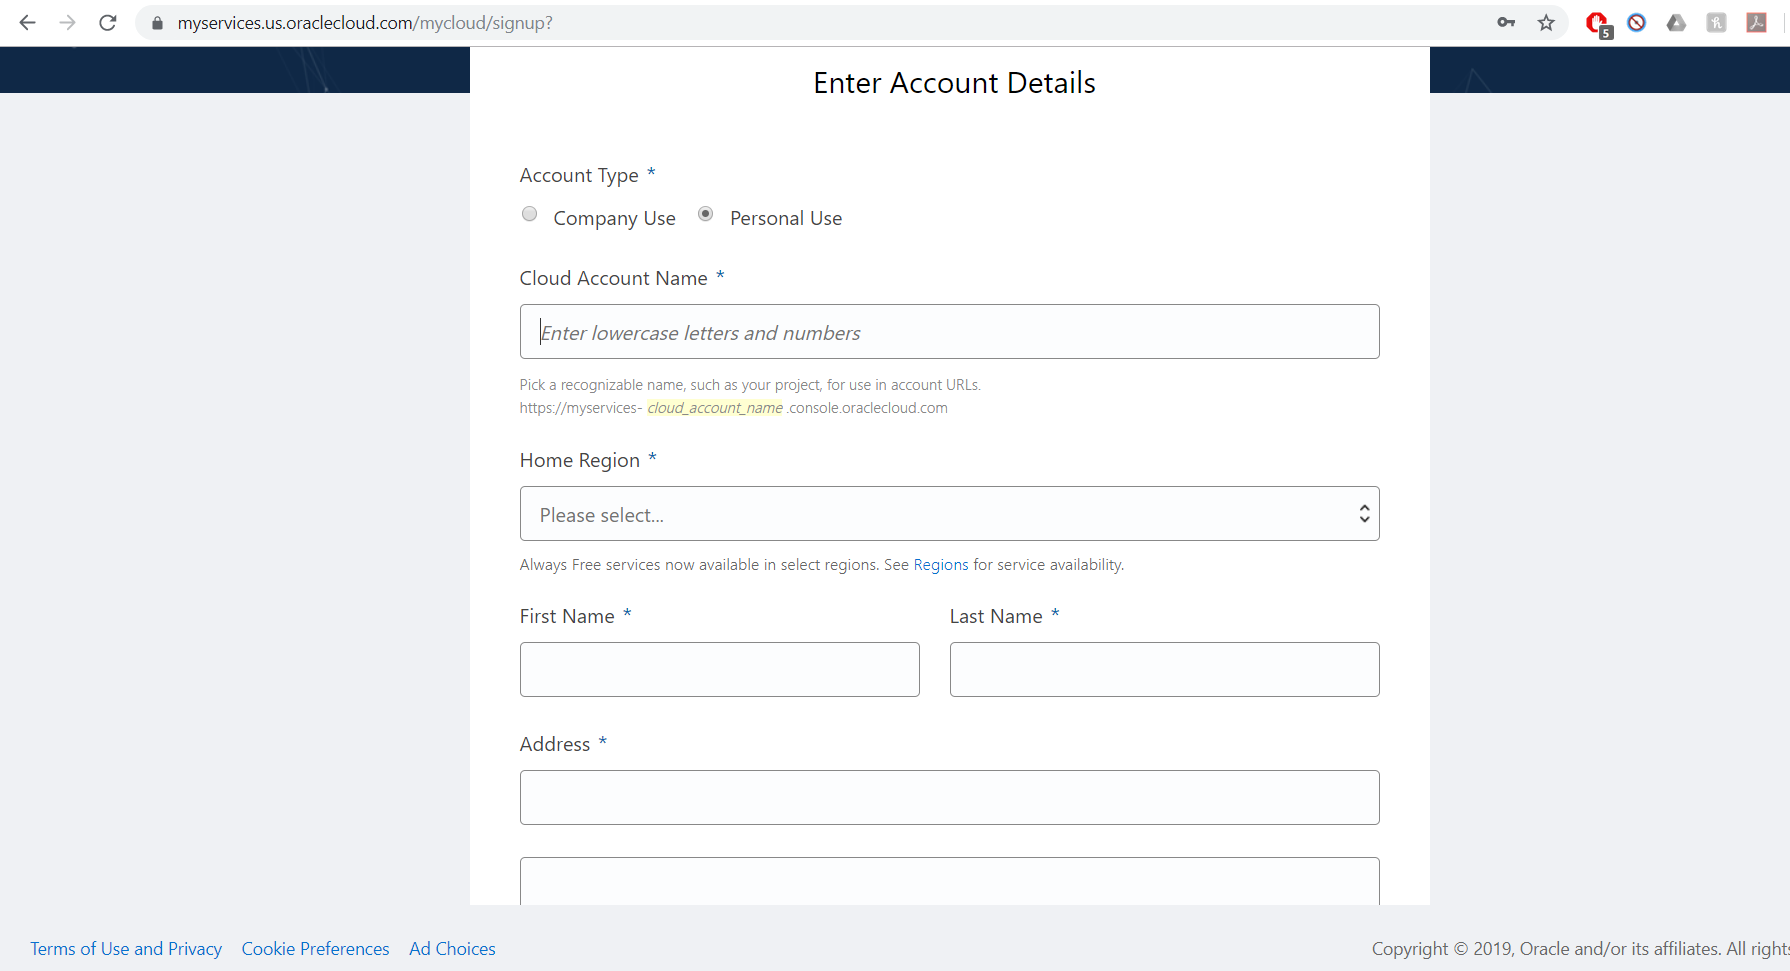
Account Details
Step 4: Verify your mobile number using the code that will be messaged to you.
Step 5: Next, you will be asked to select a password. Please select one and click ‘Next’.

Password
Step 6: Fill out your payment information and proceed.
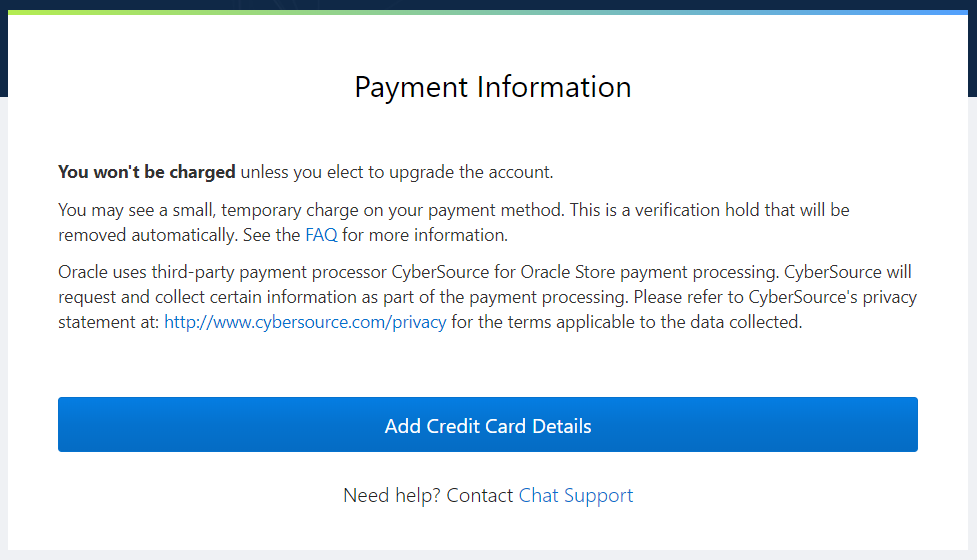
Payment
Oracle has now created for you a free account with $300 credit for 30 days. After 30 days you can still use the ‘Always Free’ resources. Unless you upgrade, your account will always be free.

Trial
Account Login
To login to your account, follow the steps.
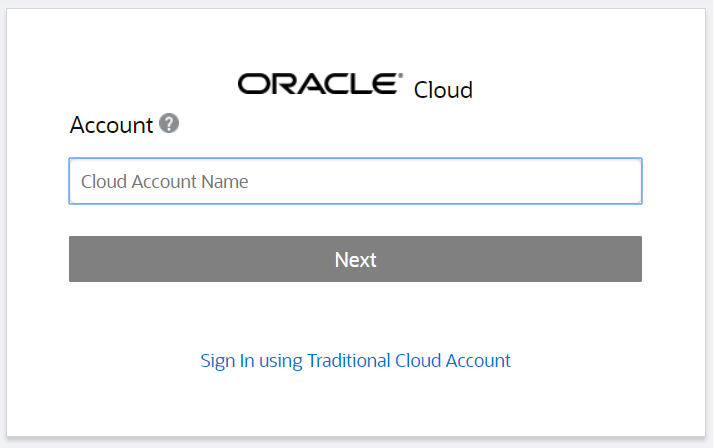
Step 1: Go to https://www.oracle.com/cloud/sign-in.html?. Enter the
cloud account name you used while registration and click Next.
Login
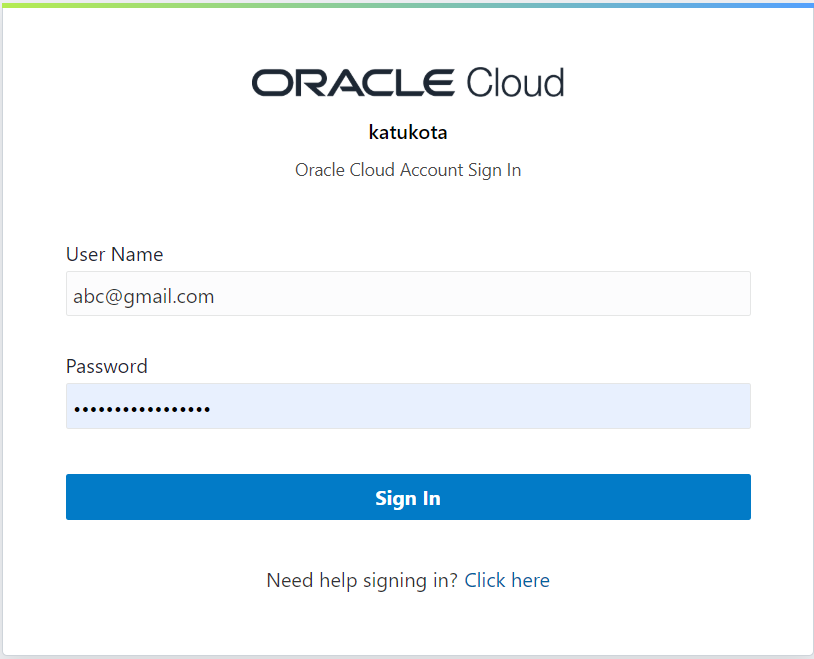
Step 2: Enter the email address and password you used for registration,
and click on Sign In.
Login-Next
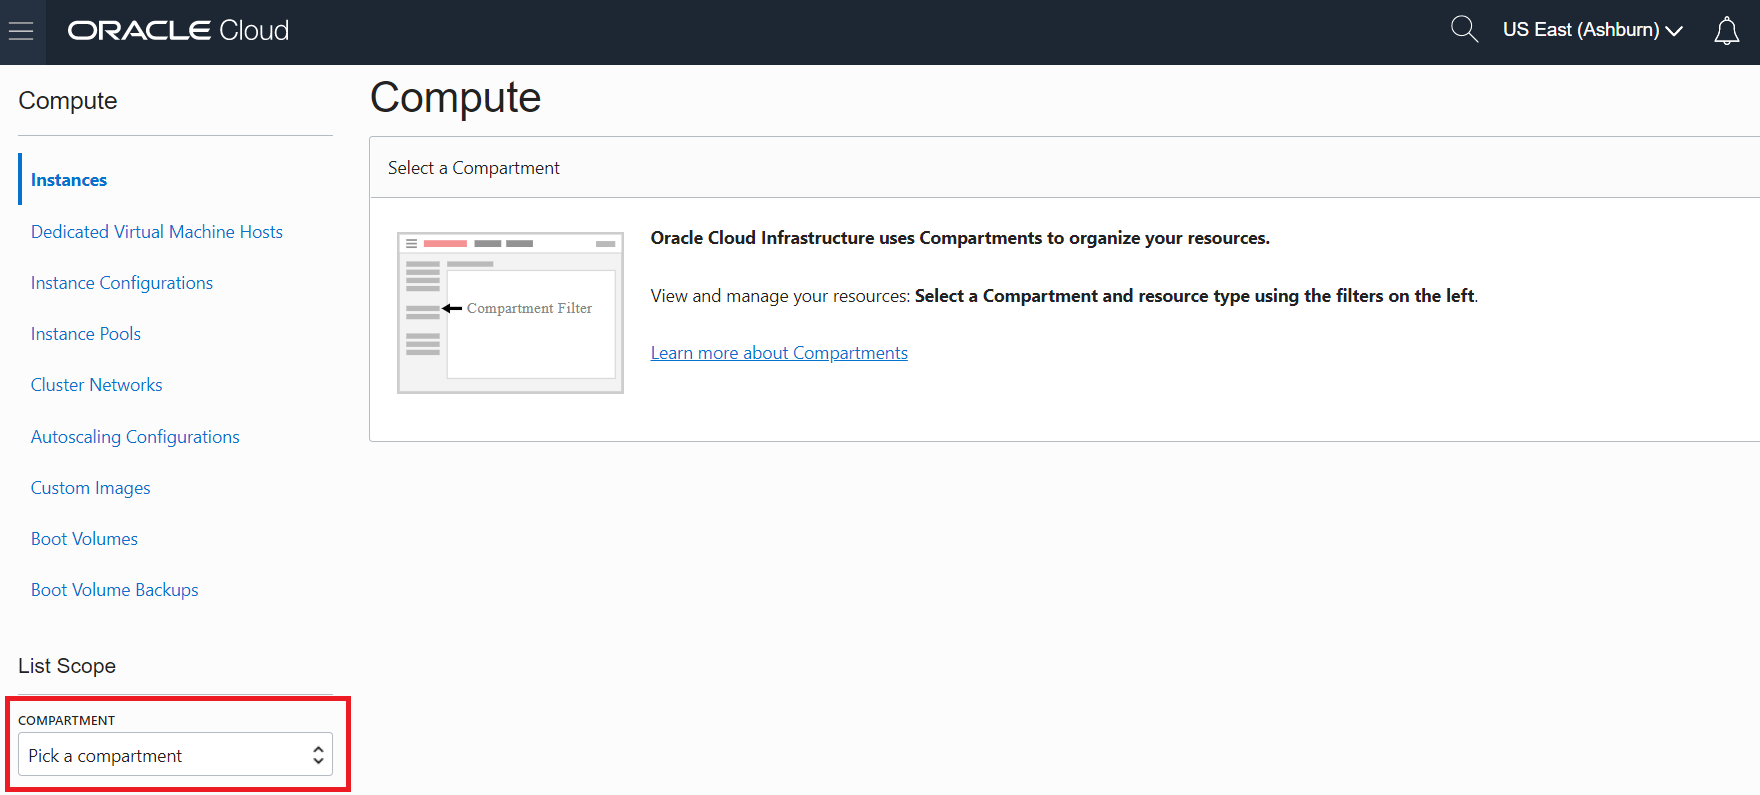
Now you’ve successfully signed in to the Oracle Cloud.
You can click on the menu on the left to explore different oracle services. When you try to access compute or storage services, you will first need to select a compartment. A compartment is a logical container to organize your resources. A default compartment with the same name as your cloud name is created. It is easiest to select that compartment.
Compartment
Oracle API
To develop or run code related to Oracle, its API called OCI (Oracle Cloud Infrastructure) needs to be installed. To do this, run the command using the command line.
$ pip install oci
Cloudmesh Config File
Cloudmesh config file (cloudmesh.yaml) will have the following entries for compute and storage respectively. Add them to the config file if not already there.
Note: the image names are dated, and it is possible that this default image
won’t be available if you created your account recently. If so, you will need
to run cms image list --refresh to see available images and update the YAML files
Compute Entry
cloudmesh:
  ...
  cloud:
    oracle:
      cm:
        active: true
        heading: ORACLE
        host: cloud.oracle.com
        label: oracle
        kind: oracle
        version: TBD
        service: compute
      default:
        image: Oracle-Linux-7.7-2020.03.23-0
        size: VM.Standard.E2.1
      credentials:
        user : TBD
        fingerprint : TBD
        key_file : ~/.oci/oci_api_key.pem
        pass_phrase : TBD
        tenancy : TBD
        compartment_id : TBD
        region : us-ashburn-1
Storage Entry
cloudmesh:
  ...
  storage:
    oracle:
      cm:
        active: true
        heading: Oracle
        host: cloud.oracle.com
        label: oracle
        kind: oracle
        version: TBD
        service: storage
      default:
        directory: TBD
        bucket: home
      credentials:
        user : TBD
        fingerprint : TBD
        key_file : ~/.oci/oci_api_key.pem
        pass_phrase : TBD
        tenancy : TBD
        compartment_id : TBD
        region : us-ashburn-1
Required Keys and OCIDs
The keys marked as TBD in the config file needs to be filled in using the values from your account. To do this, please follow the steps.
Create API Signing Key
Run the following commands using the command line.
Step 1: Create a directory .oci to store the credentials.
$ mkdir ~/.oci
Step 2: Generate the key using the command:
$ openssl genrsa -out ~/.oci/oci_api_key.pem -aes128 -passout stdin 2048
Step 3: You will then be prompted for a passphrase. Select a passphrase
and hit Enter.
Step 4: To ensure that only you can read the key, run the following command:
$ chmod go-rwx ~/.oci/oci_api_key.pem
Step 5: Now, generate the public key and hit enter. You will again be
prompted for the passphrase. Please enter the passphrase created while
creating the private key and hit Enter.
$ openssl rsa -pubout -in ~/.oci/oci_api_key.pem \
              -out ~/.oci/oci_api_key_public.pem \
              -passin stdin
Step 6: Copy the contents of the public key to the clipboard as you will require this.
Step 7: Add the passphrase to your config file cloudmesh.yaml under
oracle section.
- o2
you should have a program that does this for you such as
cms register oracle [--dir=~/.oci]
User
The value for user in the config file is the OCID of your use of
the oracle cloud account. You can find this using the following steps:
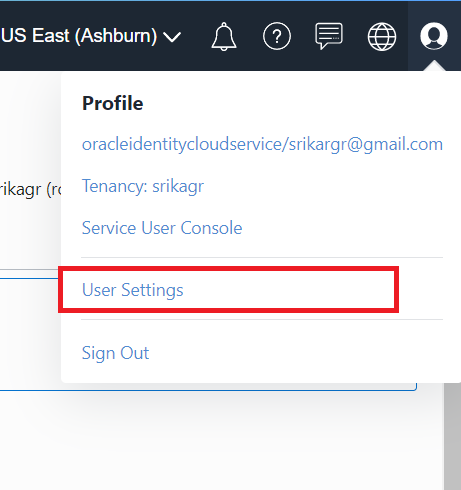
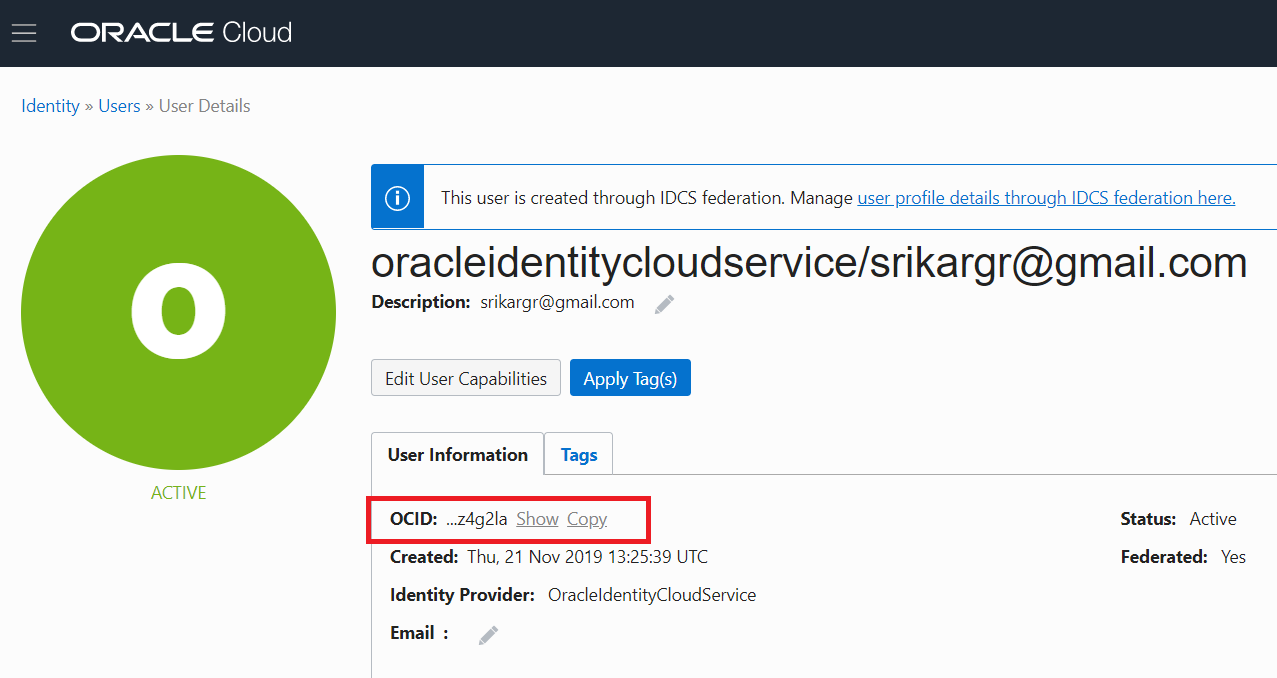
Step 1: Click on the profile menu on the right and click on
User Settings.
User-Details
Step 2: The user OCID can be found under User Information. Copy and
paste it to the config file.
User
Step 3: Go to the end of web page and click on Add Public Key under
API Keys.

Public Key
Step 4: Paste the contents of the public key
~/.oci/oci_api_key_public.pem to the text-box in the pop-up and
click Add.
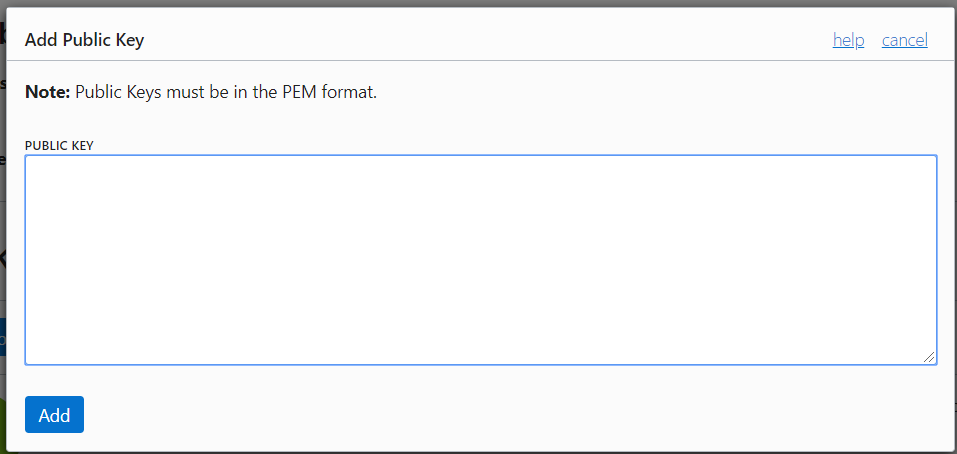
Add Public Key
Step 5: A new key will be added to the API Keys. Copy the
Fingerprint of the key and paste it in the config file.
Tenancy
The value for tenancy in the config file is the OCID of your tenancy
account. You can find this using the following steps:
Step 1: Click on the navigation menu on the left, go to
Administration and click on Tenancy Details.
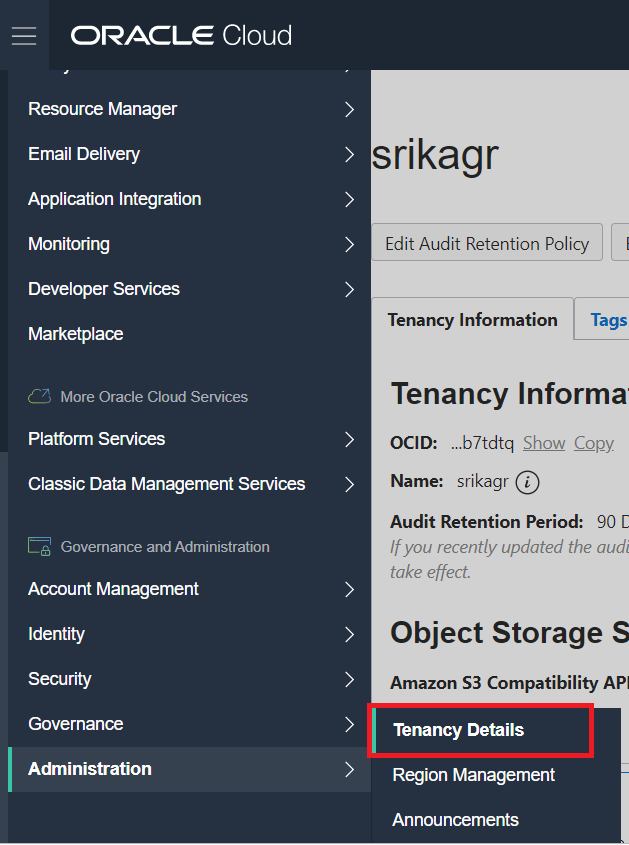
Tenancy
Step 2: The tenancy OCID can be found under Tenancy Information.
Copy and paste it to the config file.
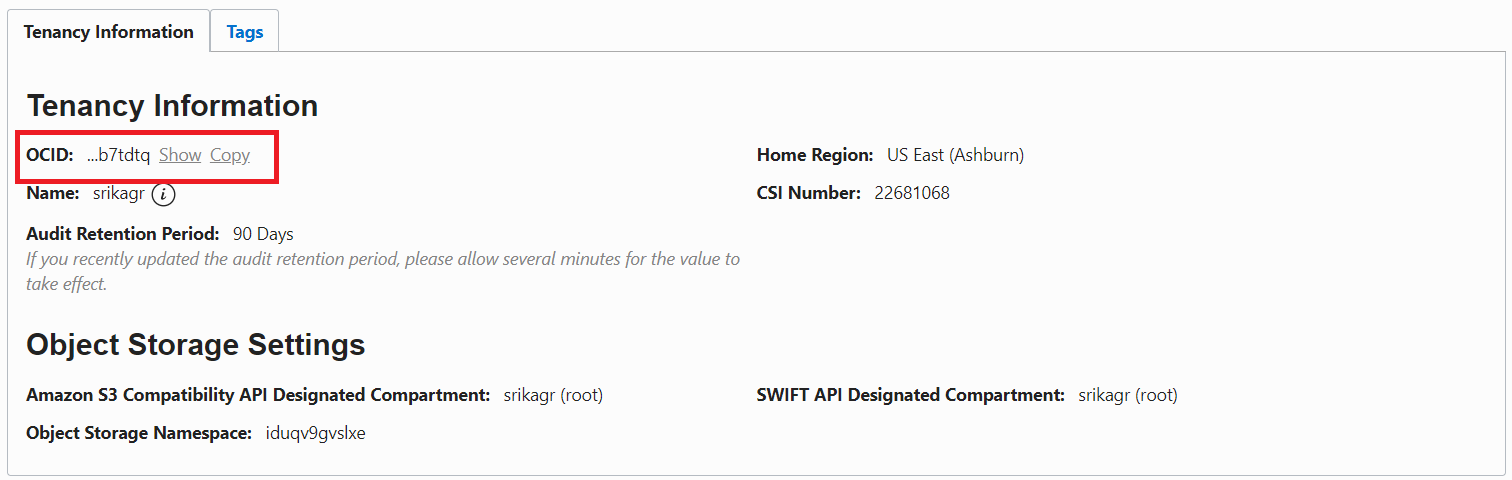
Tenancy Details
Compartment
The value for compartment in the config file is the OCID of your
selected compartment. You can find this using the following steps:
Step 1: Click on the navigation menu on the left, go to Identity and
click on Compartments.
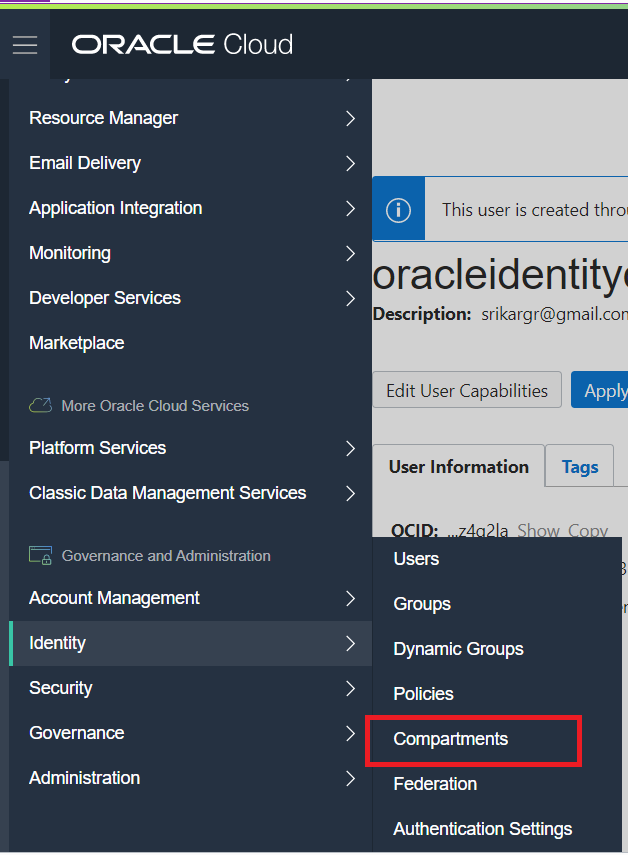
Identity
Step 2: Select your root compartment from the compartment list.
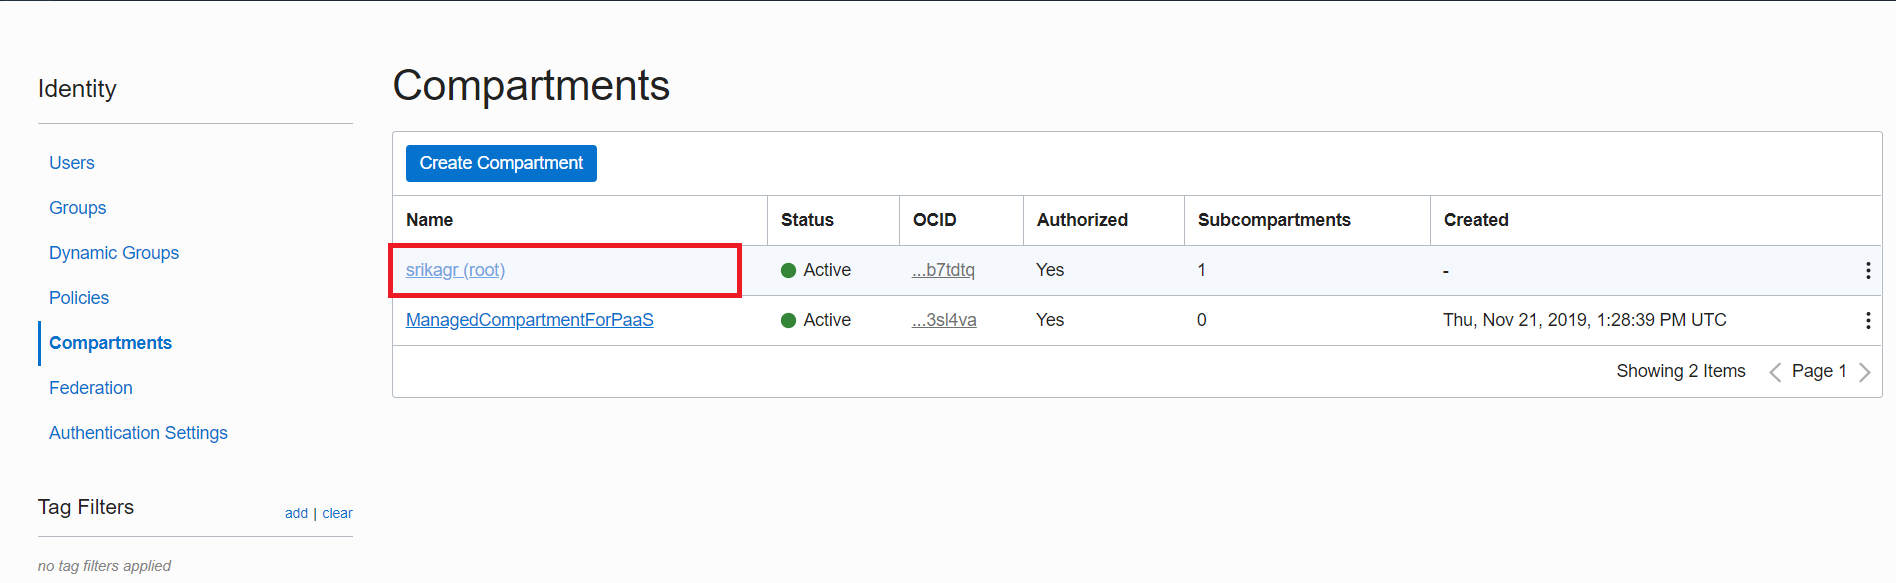
Select Compartment
Step 3: The compartment OCID can be found under
Compartment Information. Copy and paste it to the config file.
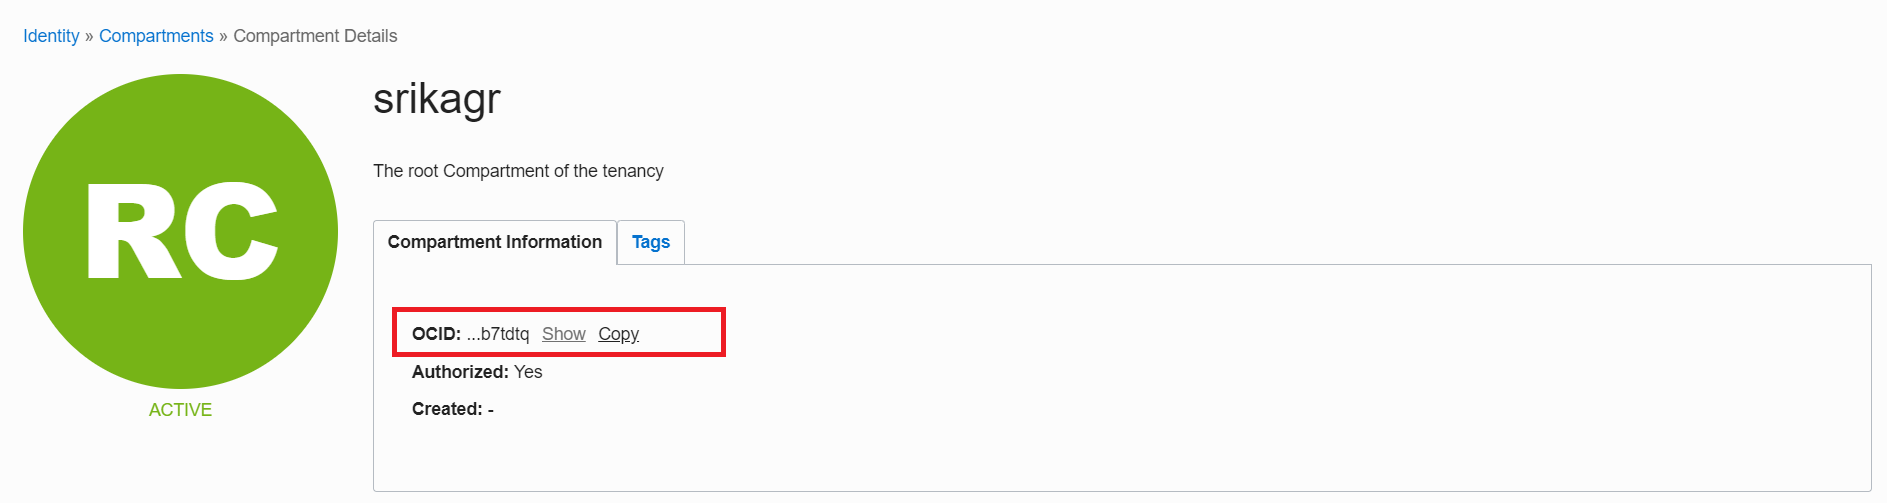
Compartment Details
Public Key
Add the path to the ssh public key in the cloudmesh.yaml file in cloudmesh /profile/publickey.
Compute Service
The first thing we need to make sure is that a private public ssh key
pair has been set up in the default directory ~\.ssh\id_rsa.pub.
This key will be used to login into the virtual machine instances
created by us.
To set the cloud to oracle, use the command:
$ cms set cloud=oracle
To create a new instance on oracle cloud, use the command:
$ cms vm boot
To login into the instance, use the command:
$ cms vm ssh
To stop the instance, use the command:
$ cms vm stop 'vm-name'
To terminate the instance, use the command:
$ cms vm terminate 'vm-name'
Storage Service
The first time you try to access storage services, it will be empty and
any operation to list/get/delete will result in an error. Hence, to
start first put a new file on the cloud. This will result in
the creation of a new bucket with the name specified in cloudmesh.yaml.
create dir command to create a directory on the cloud object storage
system is not supported in Oracle. Only when uploading a file can a
directory structure be created. IF all the files in the directory are
deleted, the directory is deleted too.
To upload a new file/directory to the cloud, use the command:
$ cms storage --storage=oracle put SOURCE DESTINATION
To download a file from the cloud, use the command:
$ cms storage --storage=oracle get SOURCE DESTINATION
To list all the files from the bucket/directory, use the command:
$ cms storage --storage=oracle list SOURCE
To delete a file/directory from the cloud, use the command:
$ cms storage --storage=oracle delete SOURCE
Note that if a directory is deleted, all the files inside the directory are also deleted.
To search a file in a particular directory, use the command:
$ cms storage --storage=oracle search DIRECTORY FILENAME
References
OCI Documentation, <https://oracle-cloud-infrastructure-python-sdk.readthedocs.io/en/latest /index.html>
Required Keys and OCIDs, https://docs.cloud.oracle.com/iaas/Content/API/Concepts/apisigningkey.htm