AWS Account
Amazon Web Services (AWS) provides a wide variety of cloud-based products including analytics, application integration, AR and VR, cost management, blockchain, business applications, compute, customer engagement, database, developer tools, end-user computing, game tech, IoT, machine learning, management and governance, media services, migration and transfer, mobile, networking and content delivery, robotics, satellite, security, identity and compliance, and storage. Here at cloudmesh, we develop services through providers to support your utilization of many of these products.
Here we are especially interested in using the following services:
Amazon Elastic Compute Cloud (EC2) Amazon EC2 is a web service that enables users to perform elastic web-scalable computing while having complete control over instances. It is integrated with most AWS services such as Amazon S3, RDS, and VPC.
Amazon Simple Storage Service (S3) Amazon S3 an object storage service that offers a wide range of storage classes.
We provide a step-by-step guide on how to create an AWS account through the AWS Web page to utilize these services. For more information, you can consult the AWS FAQ.
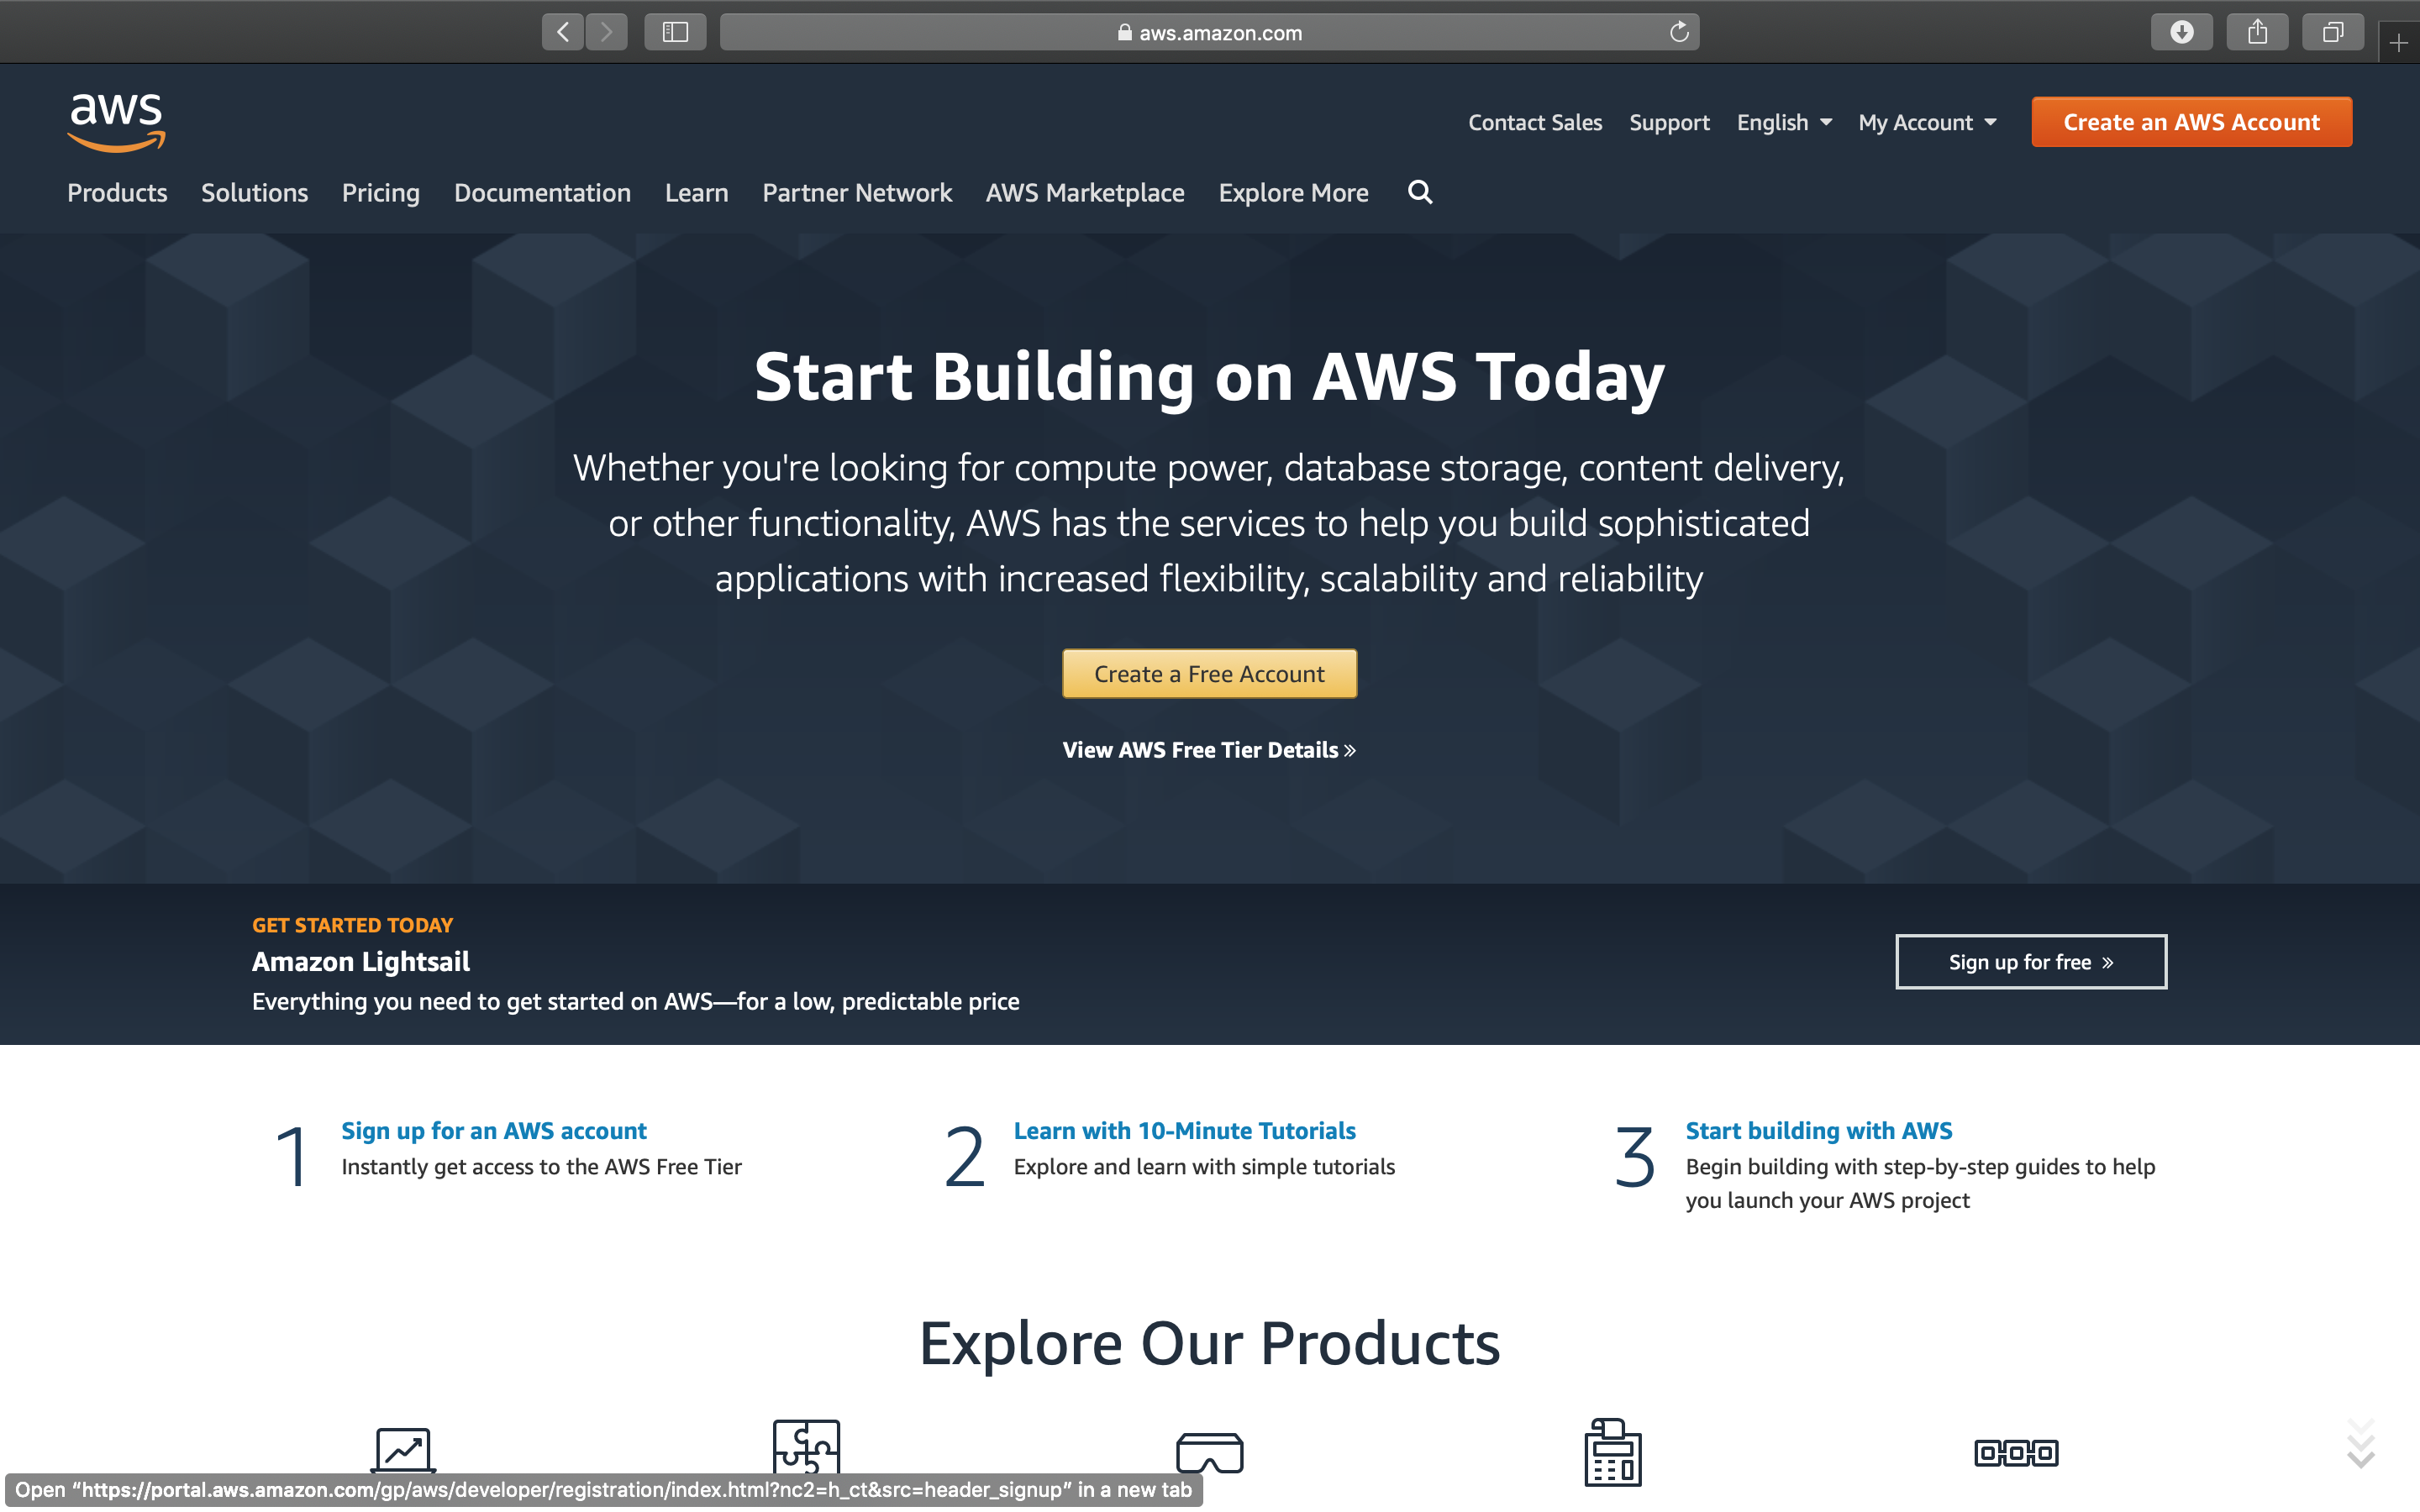
First, we go to the AWS website
and click on Create an AWS Account.
Create Account
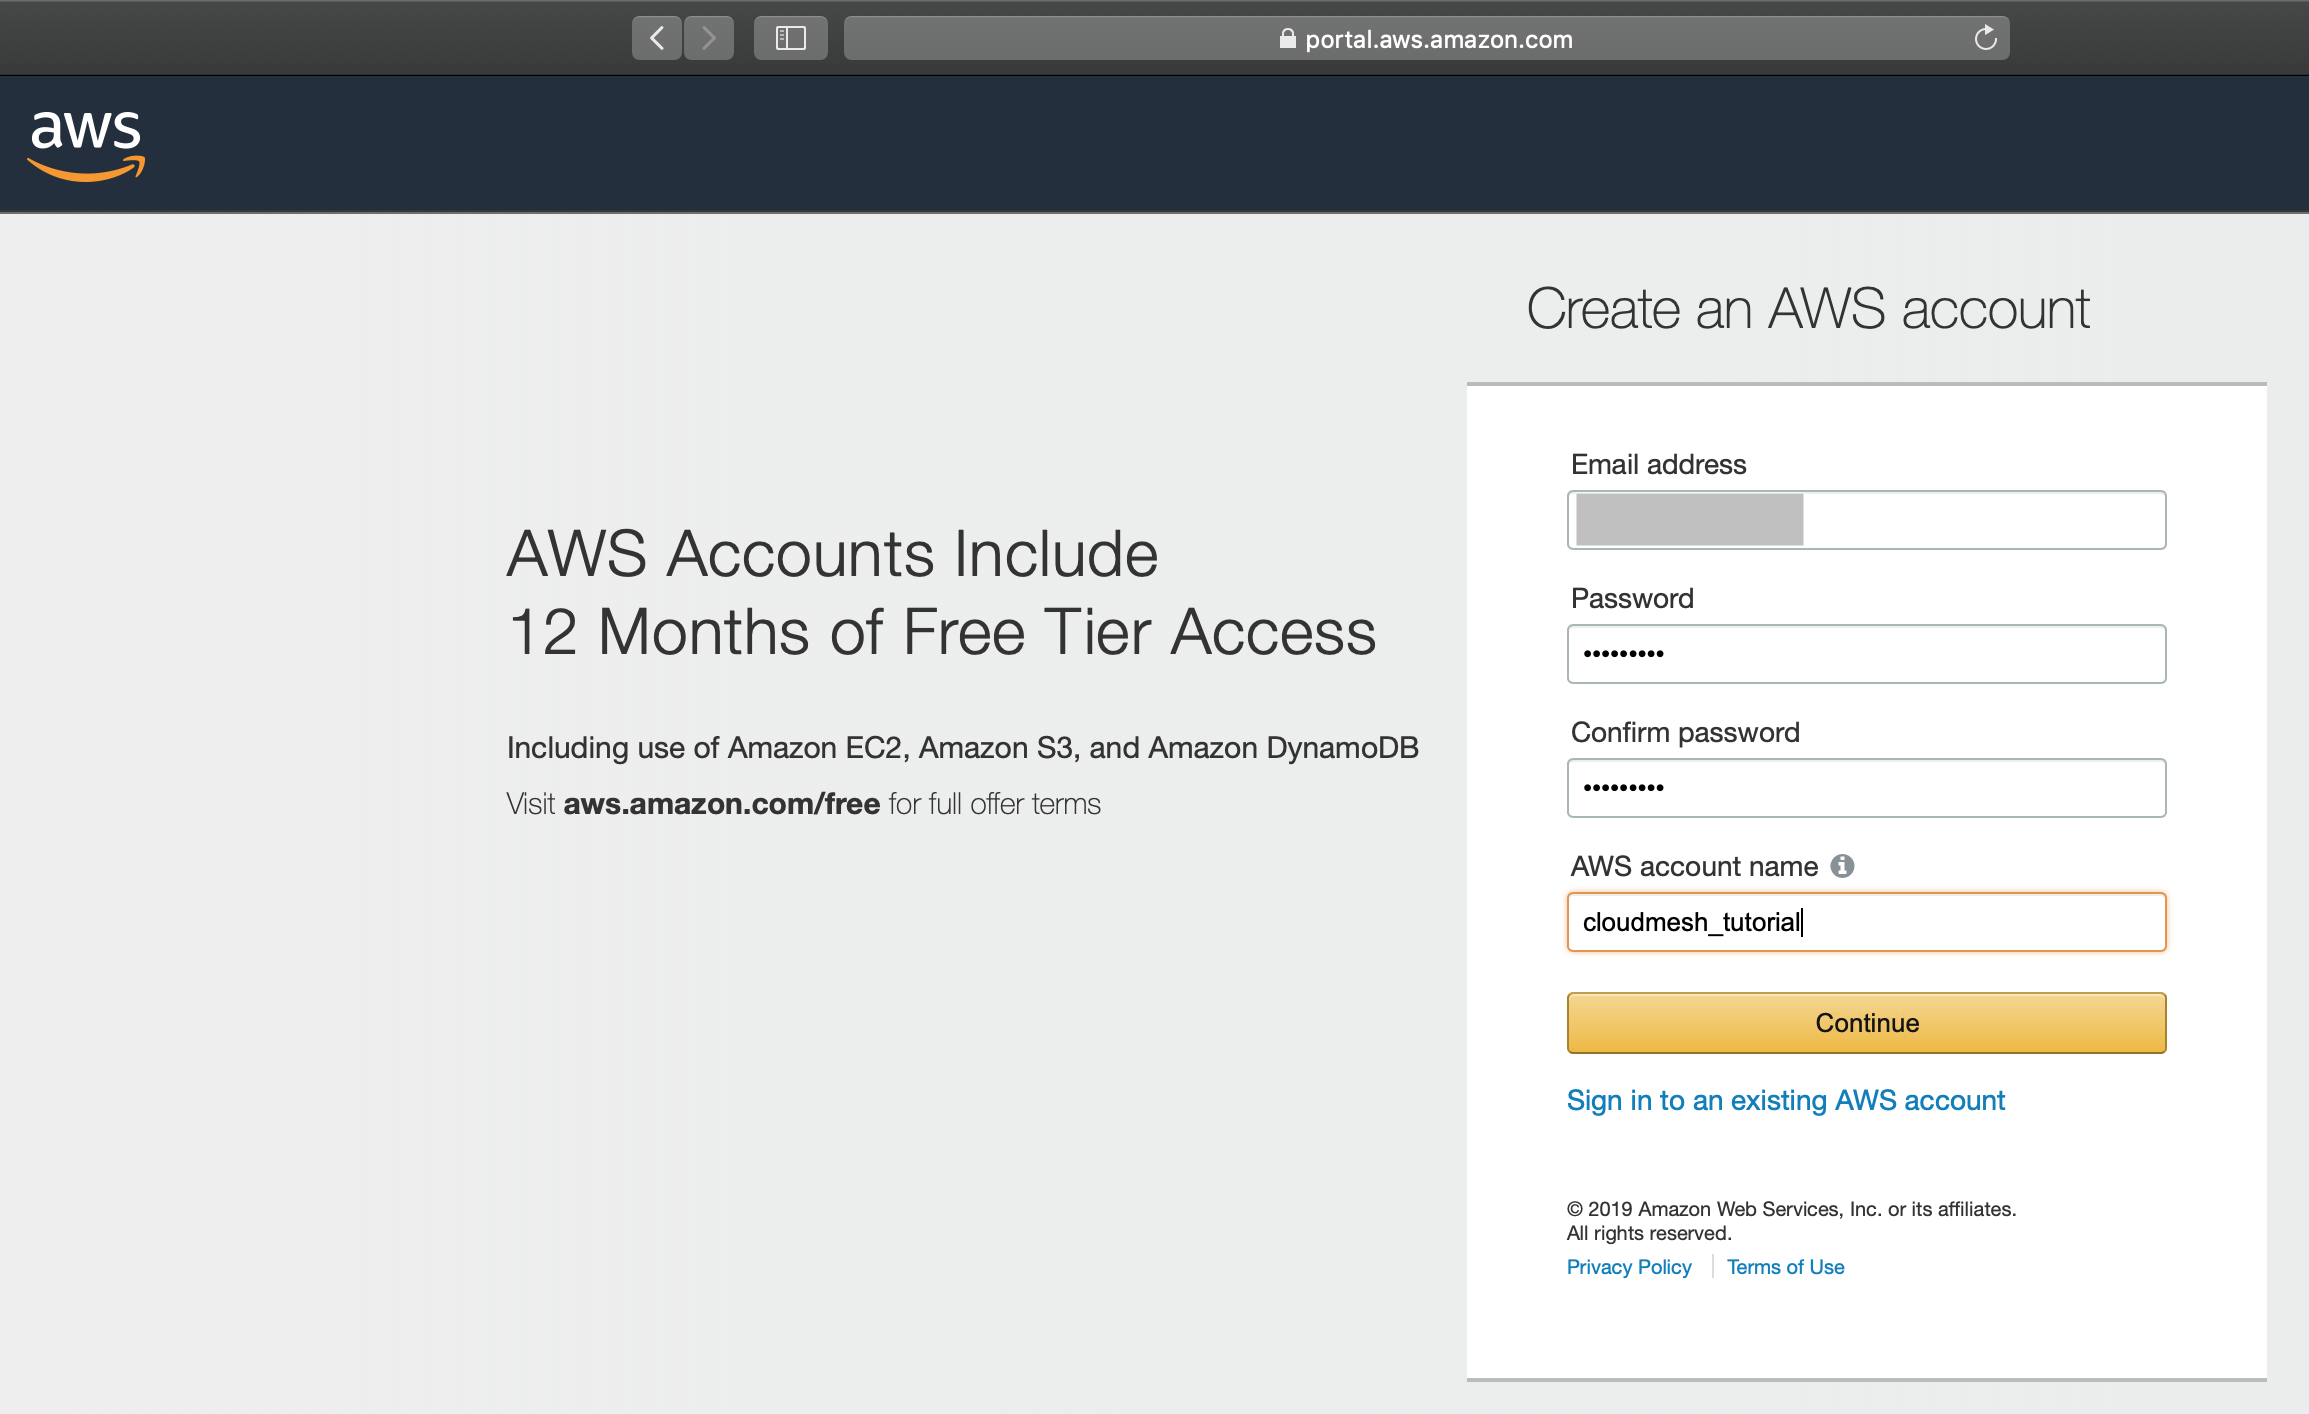
This will direct you to the account creation page. Now we fill out your
information and click Continue.
Continue
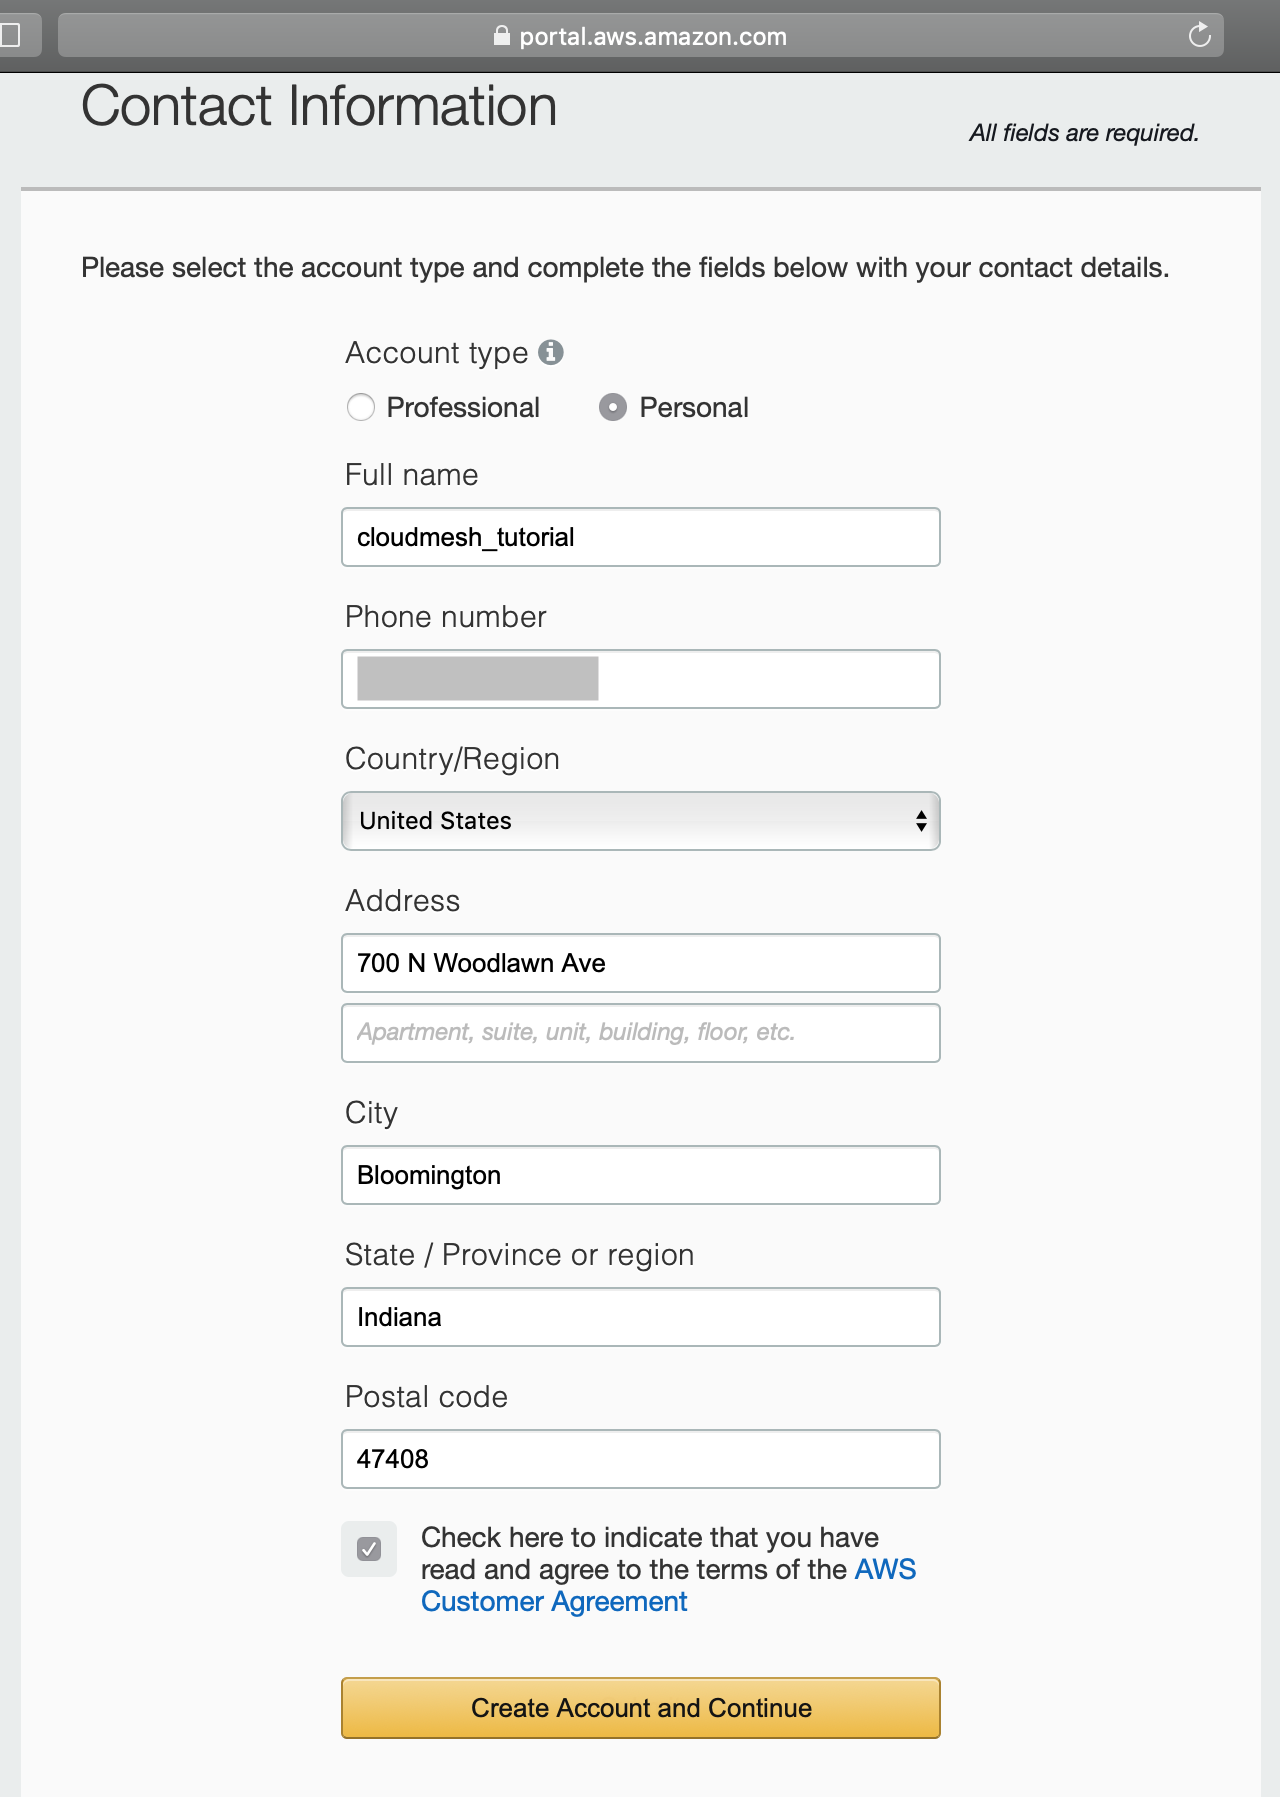
Next, you will need to fill out your contact information. You can choose
Professional or Personal as your account type. Here in this
tutorial, we selected Personal. Read the AWS Customer Agreement,
and check the box if agreed. Click on Create Account and Continue to
continue.
Contact Information
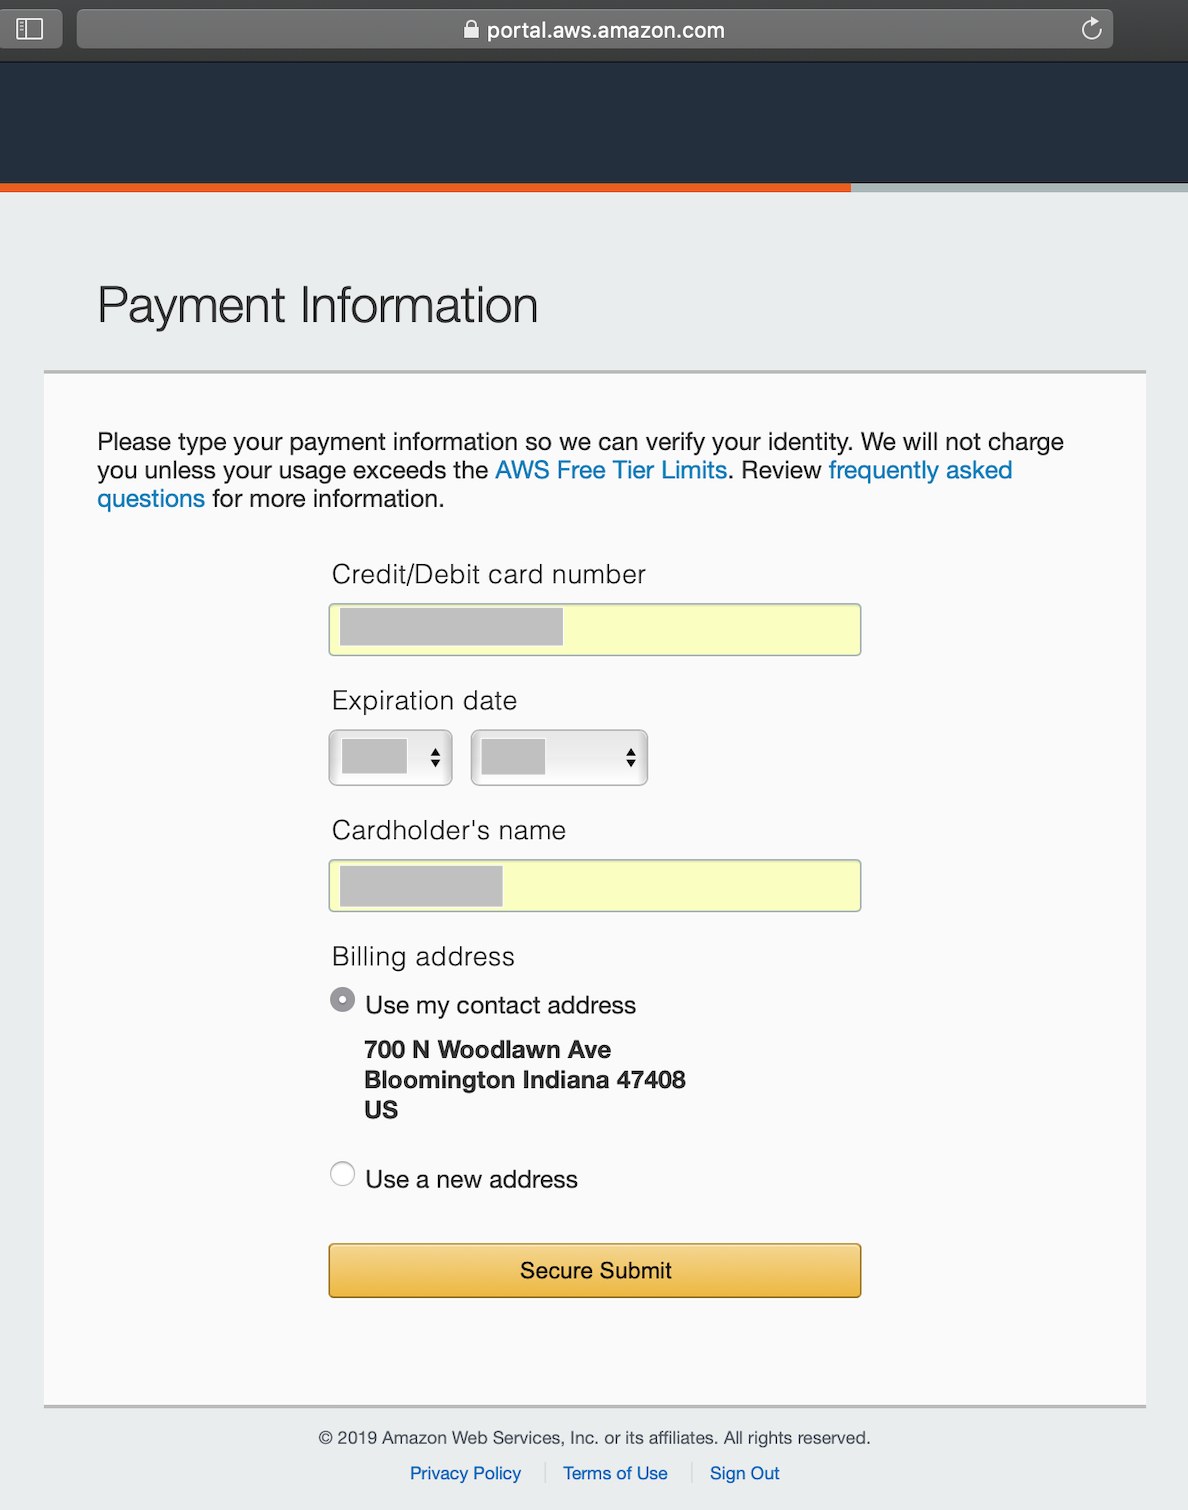
Fill out your payment information and proceed. Dependent on your level of security, you may want to explore using a prepaid credit card if you do not want to use your regular credit card.
If you just started using AWS, you will have a free account for a while as AWS will state:
We will not charge you unless your usage exceeds the AWS Free Tier Limits. - Amazon AWS
Please review the terms of the free tier carefully.
Payment
Next your need to confirm your identity. You can choose either
Text message (SMS) or Voice call to receive your verification
code. Here we choose Text message (SMS). Enter your phone number and
the security check code and click Send SMS.
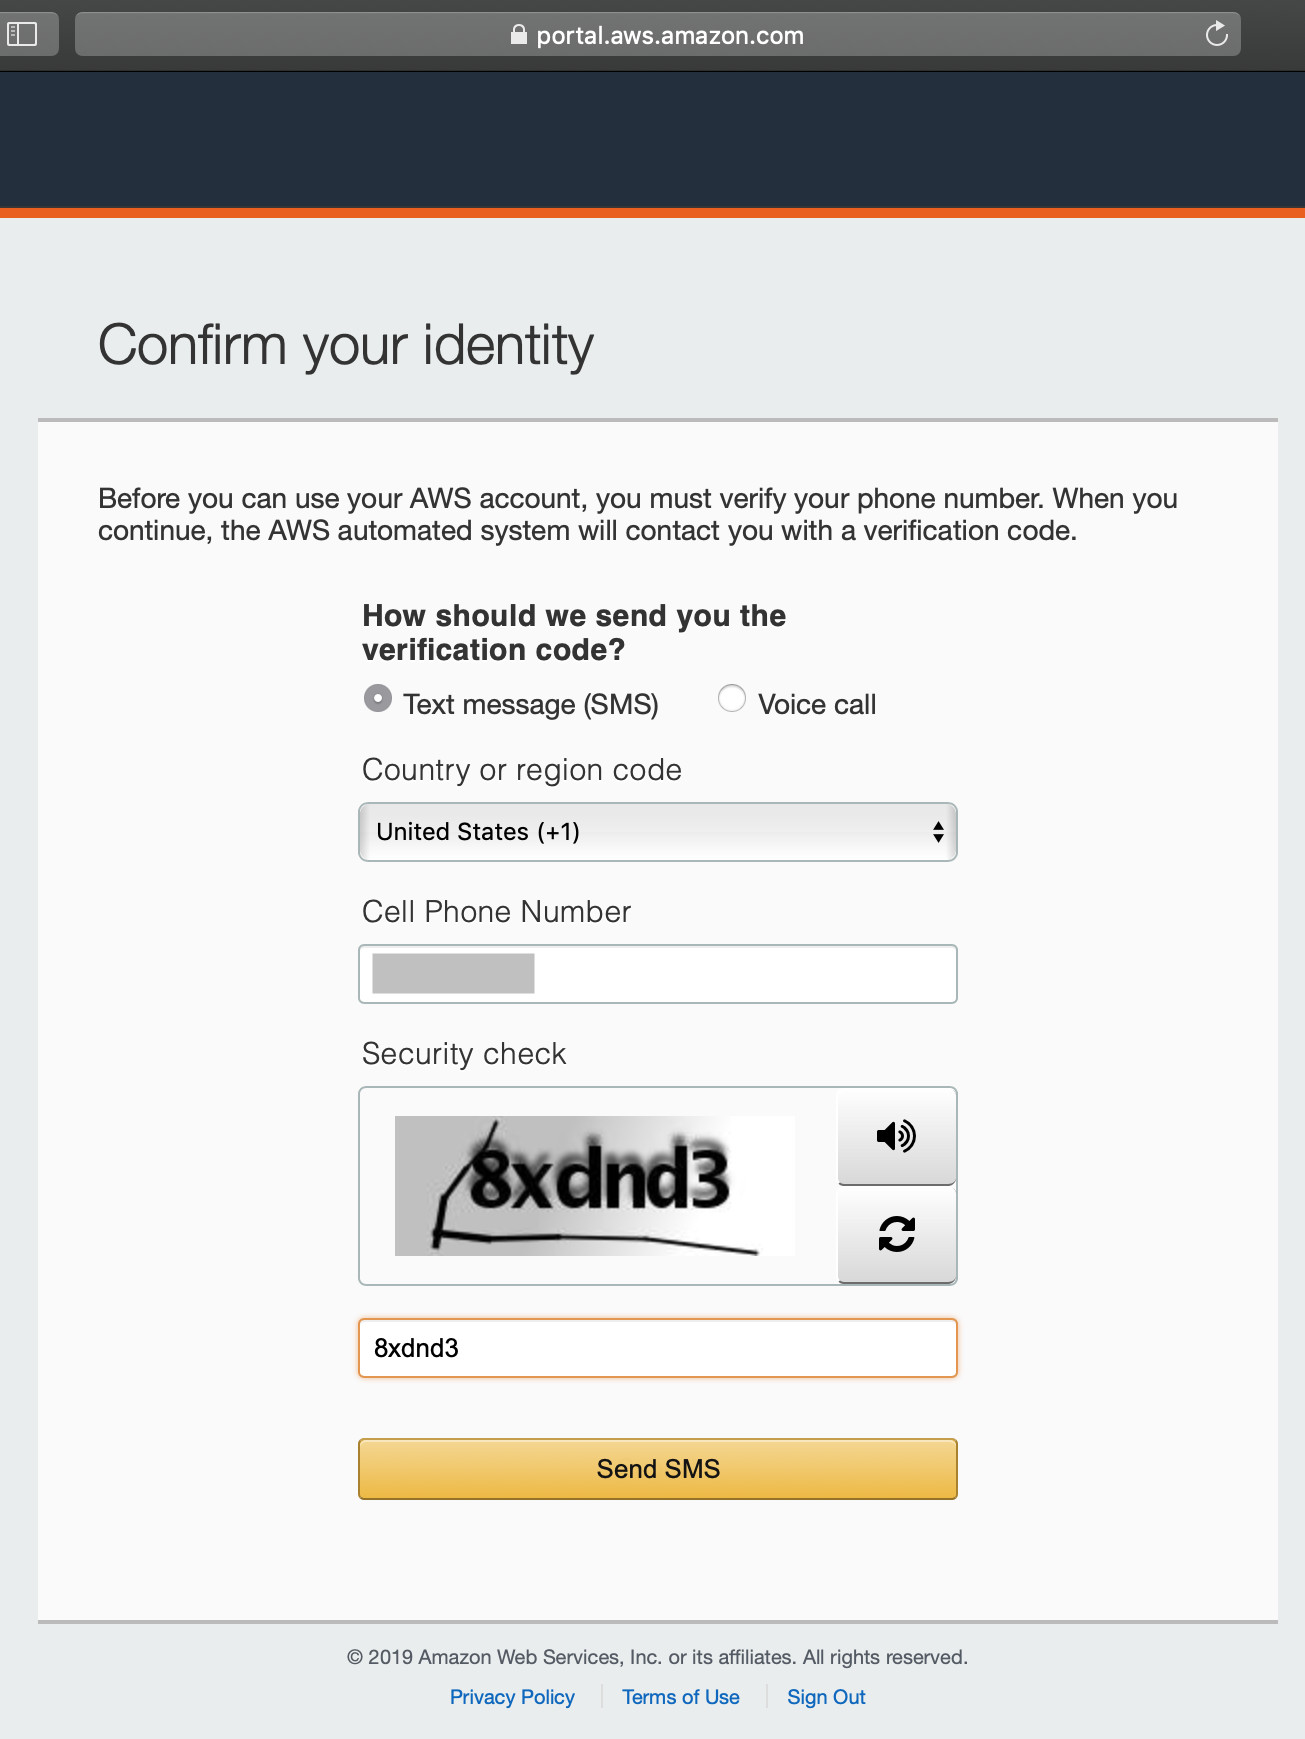
Identity confirmation
Enter the 4-digit verification code you received from your phone, and
click on Verify Code.
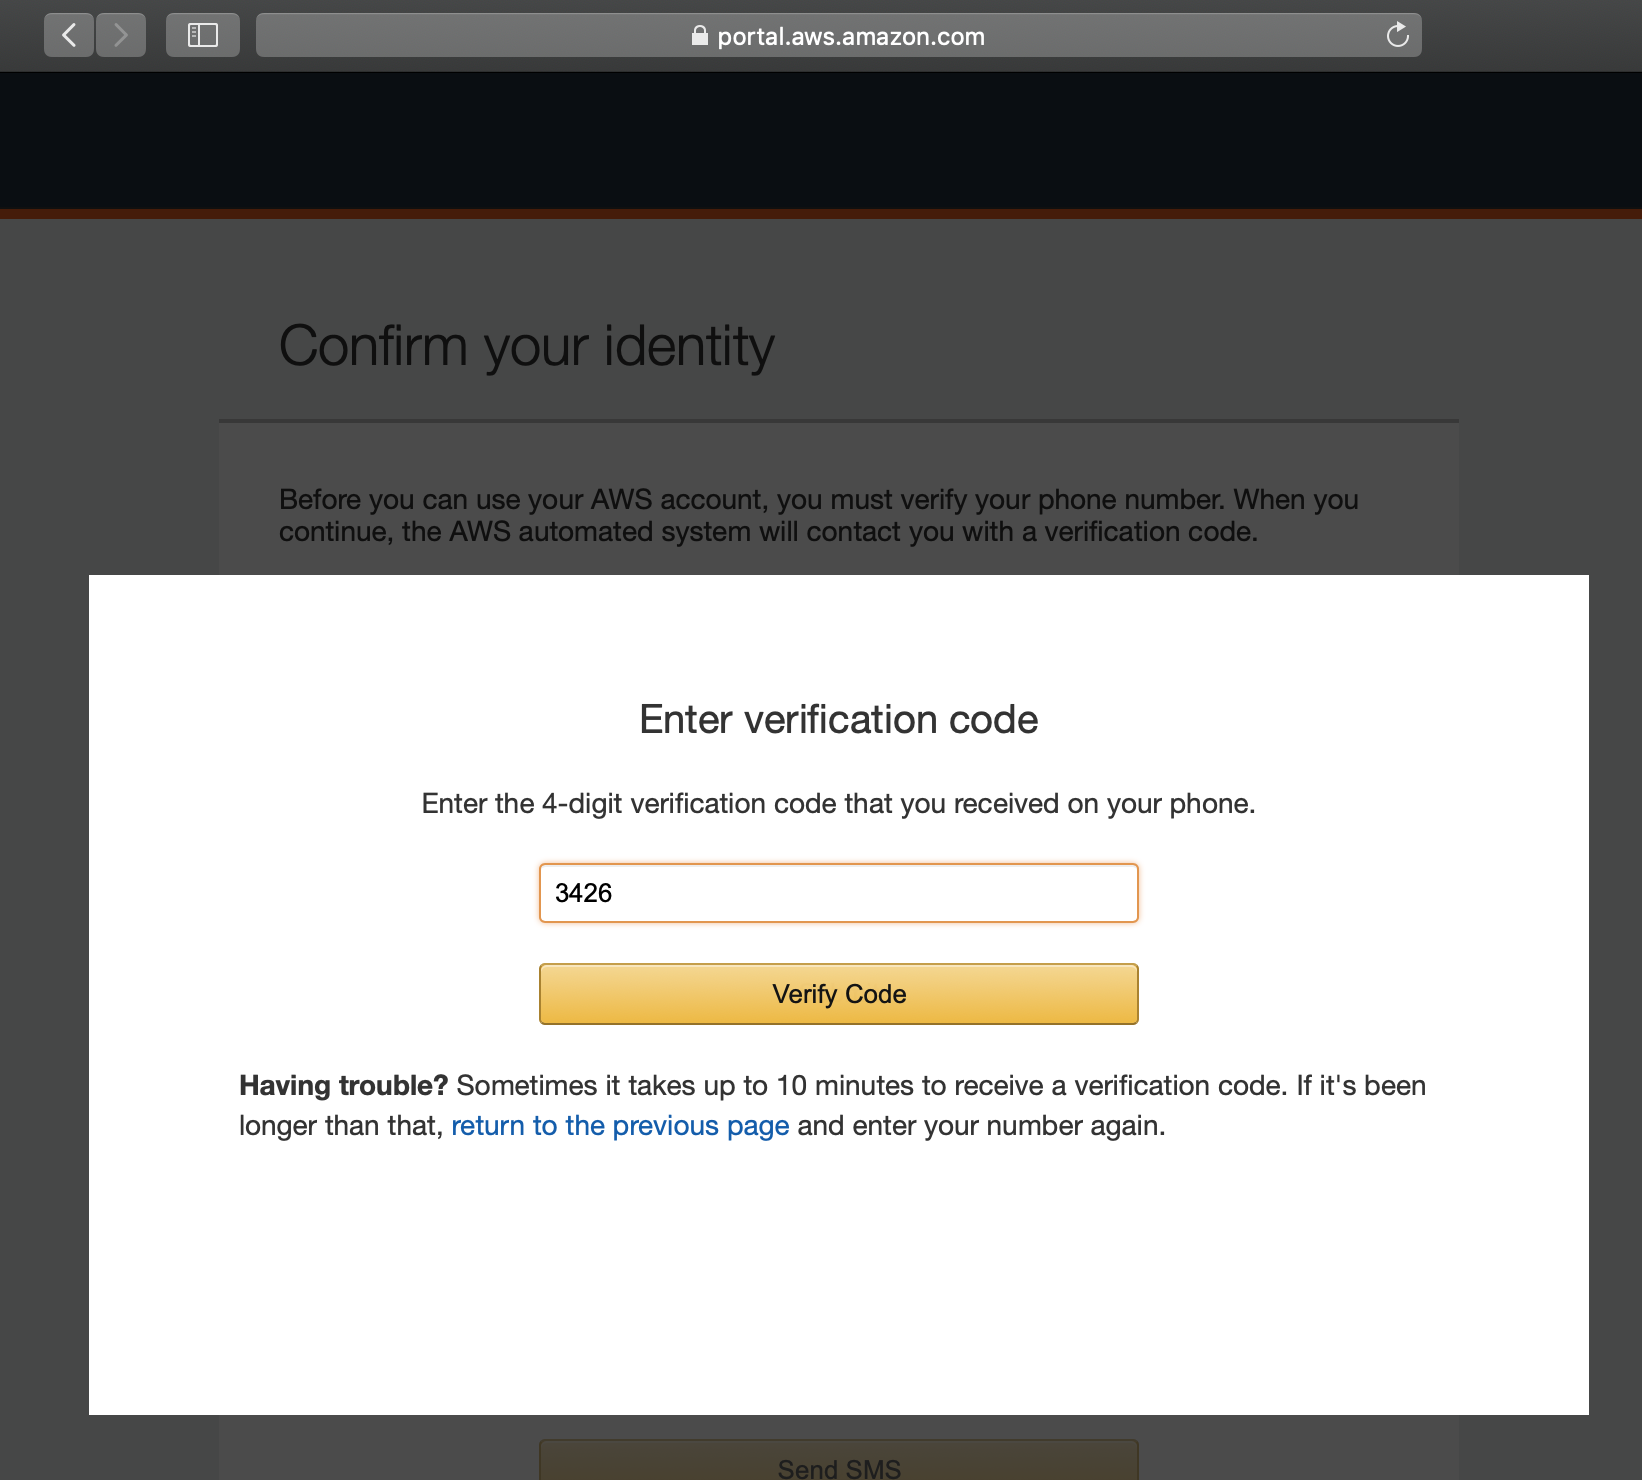
Verification
If you entered the correct verification code, you will see this page.
Click on Continue.
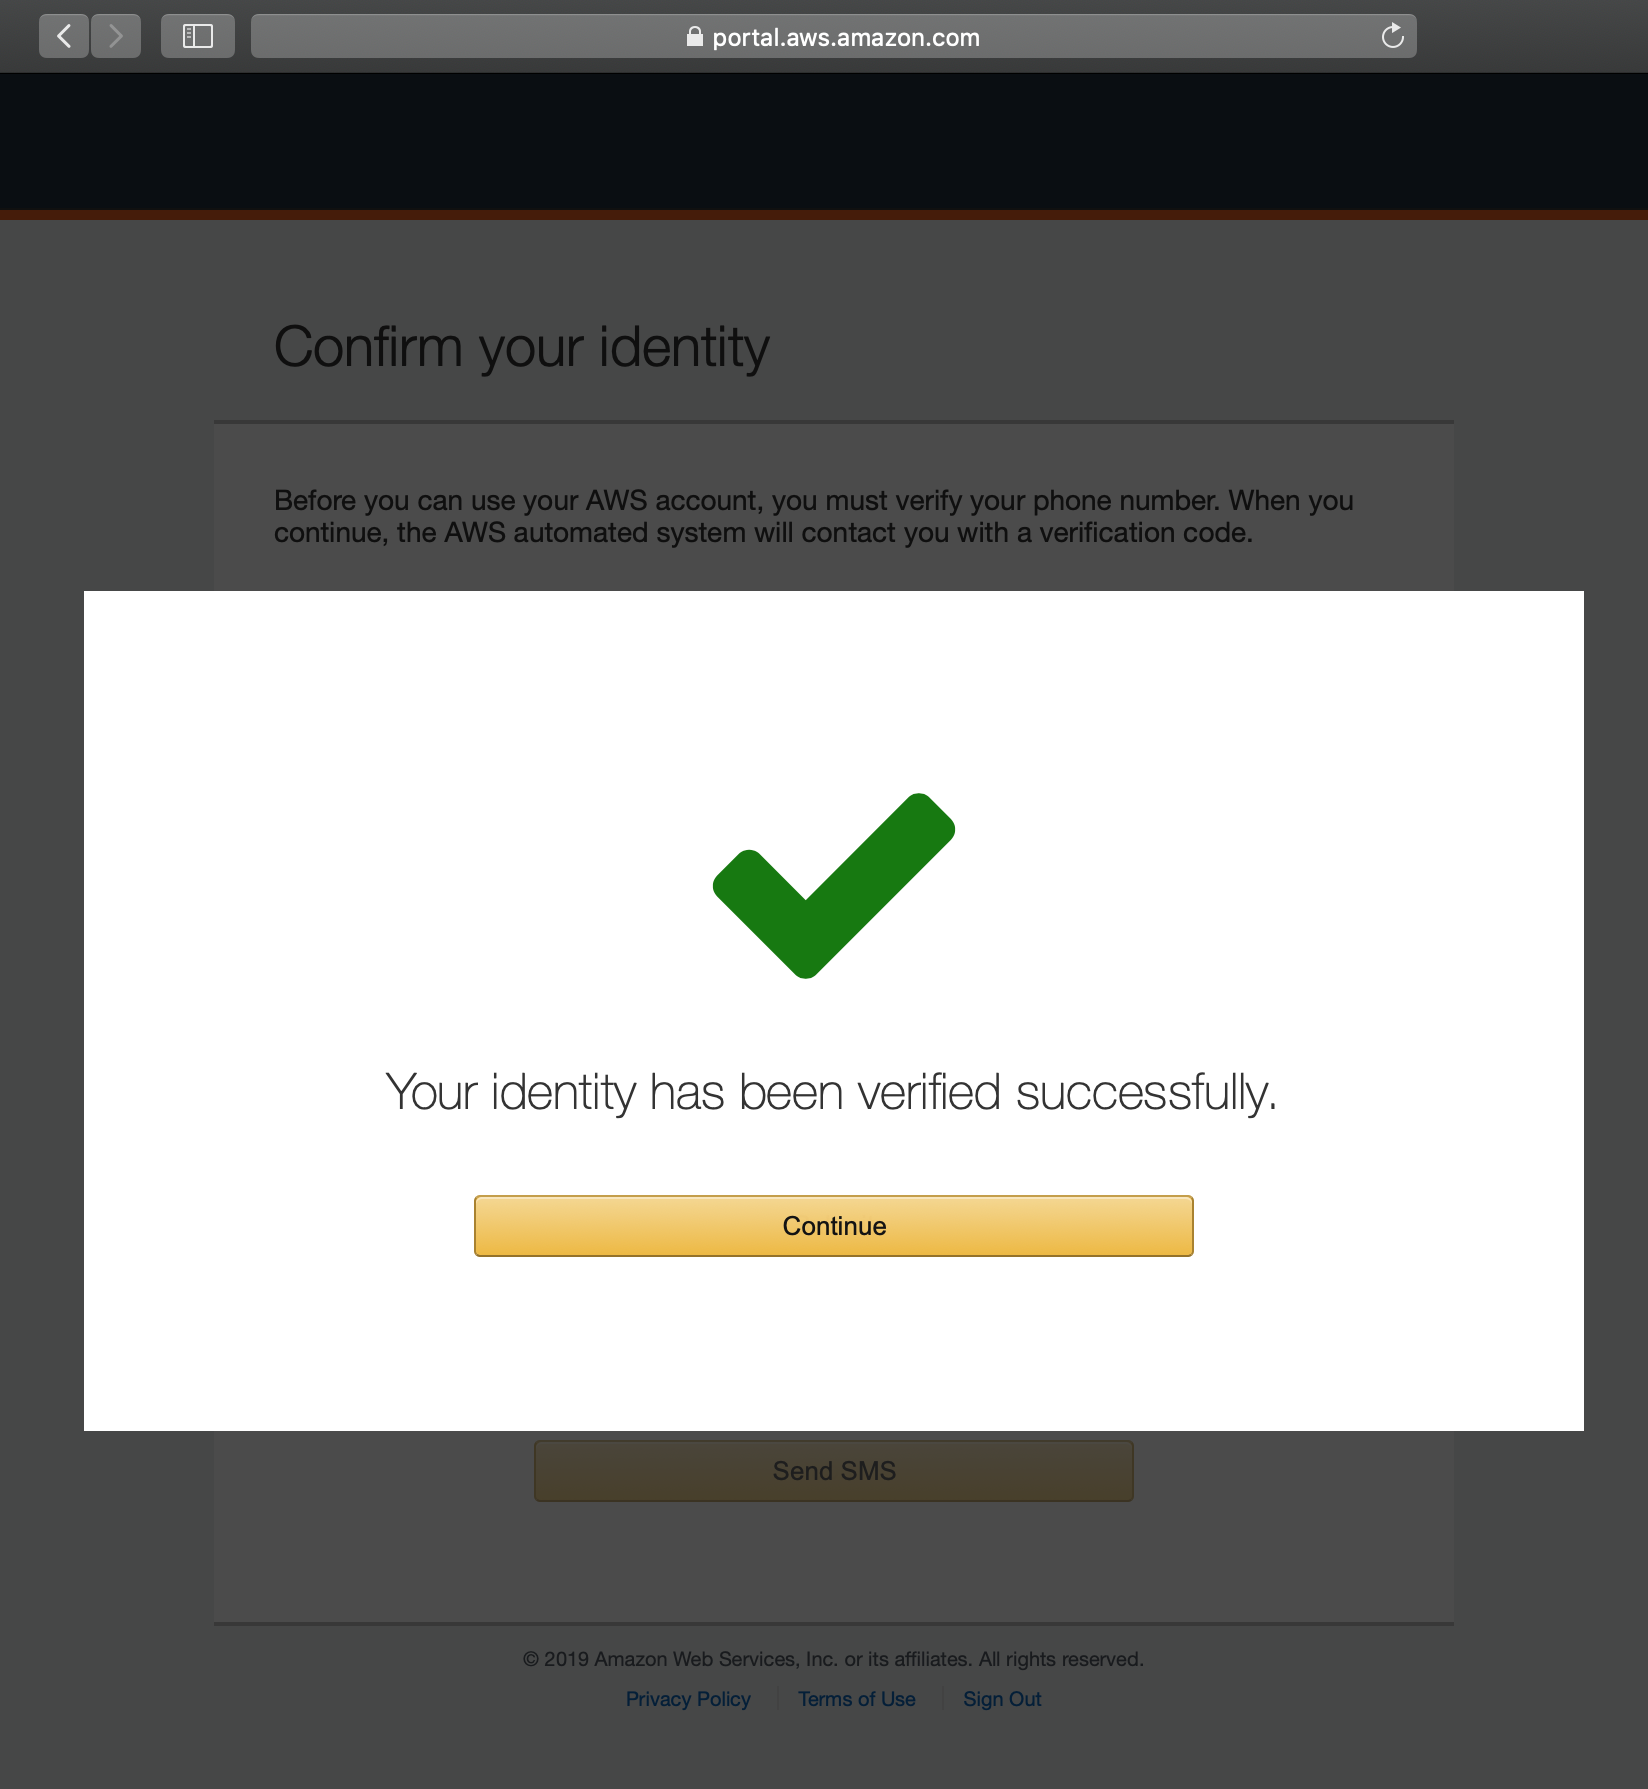
Continue
You will need to choose your support plan. We chose Amazon’s free tier
Basic Plan.
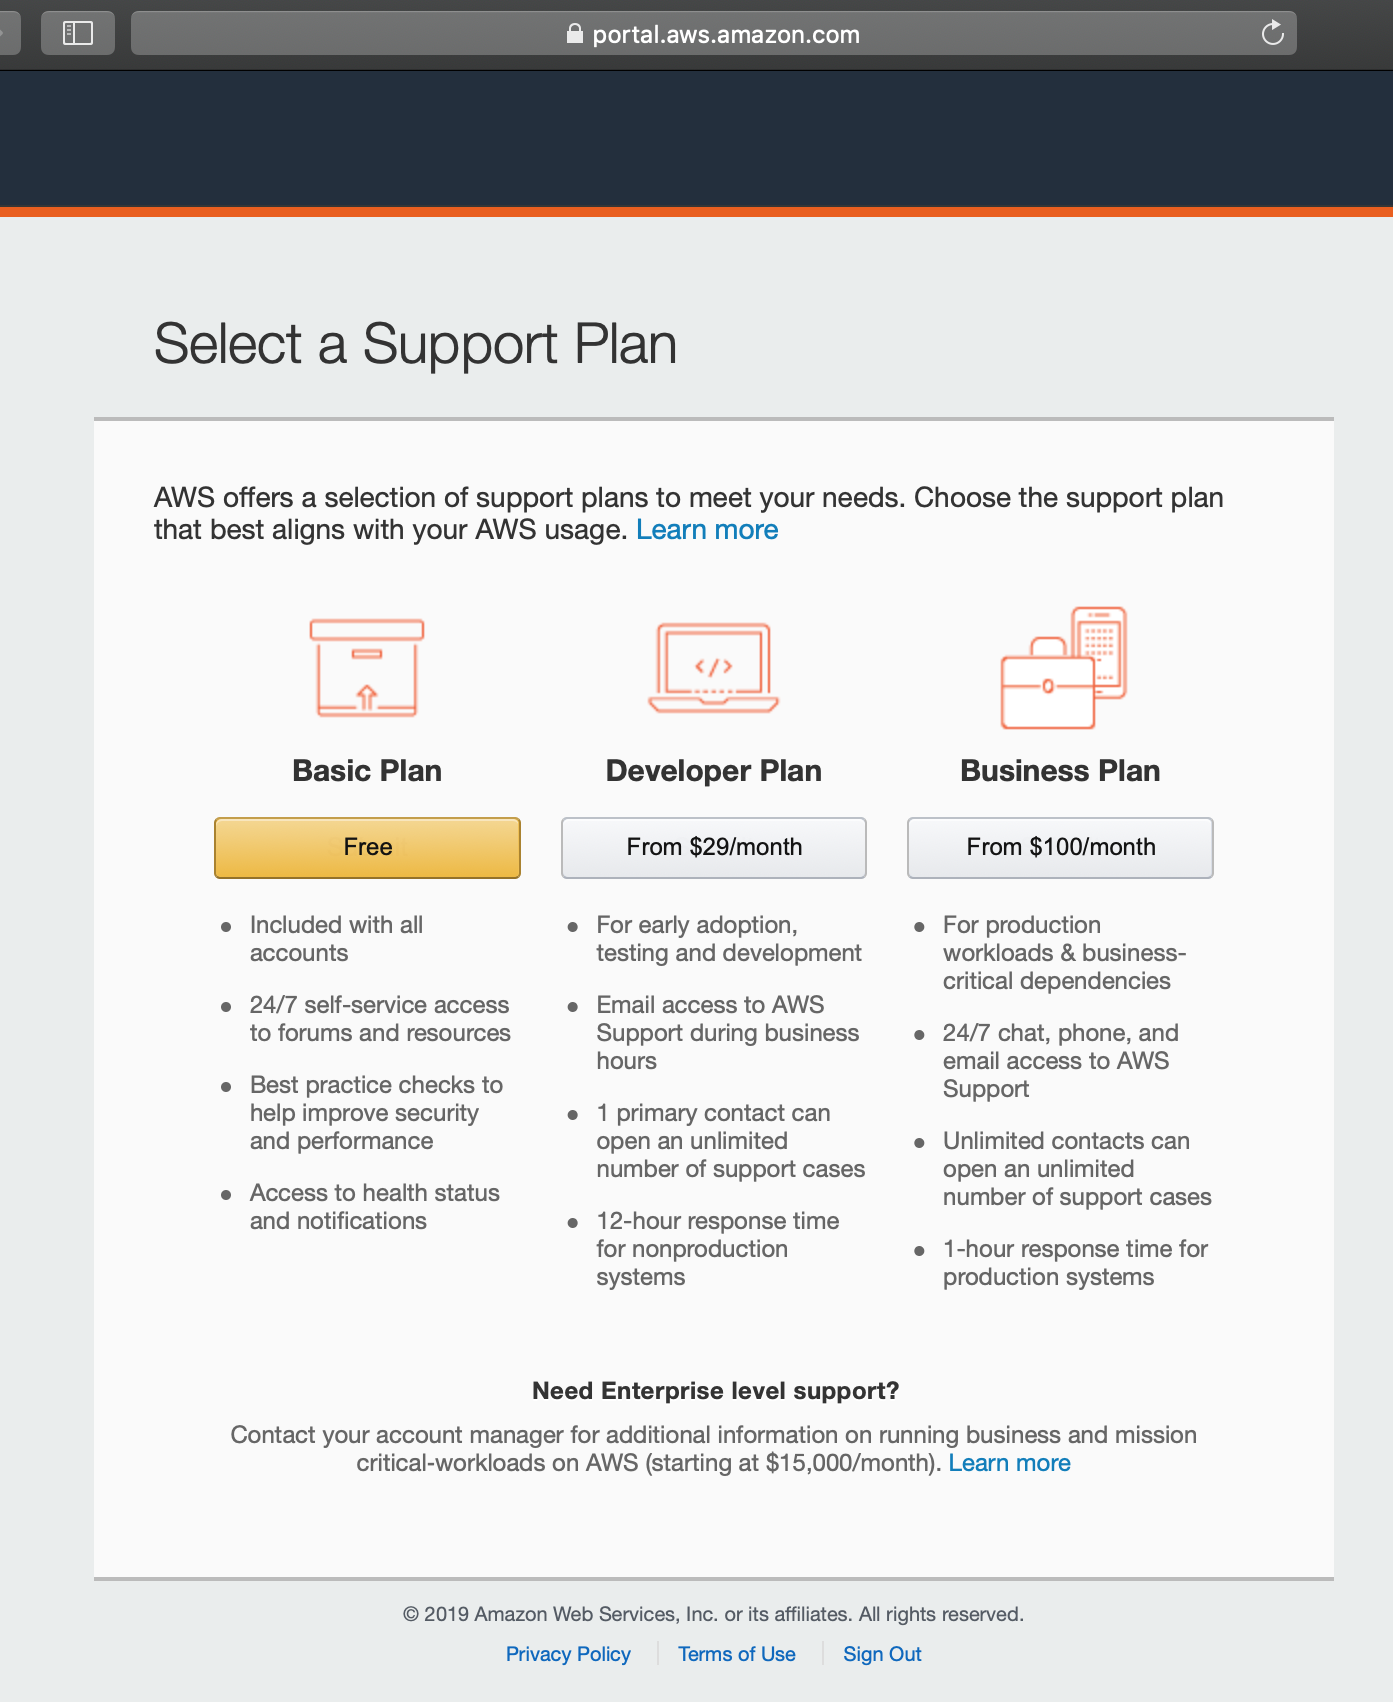
Select a Plan
Congratulations! You have successfully created an AWS account. Now you
can click on Sign In to the Console to sign in.

Personalize
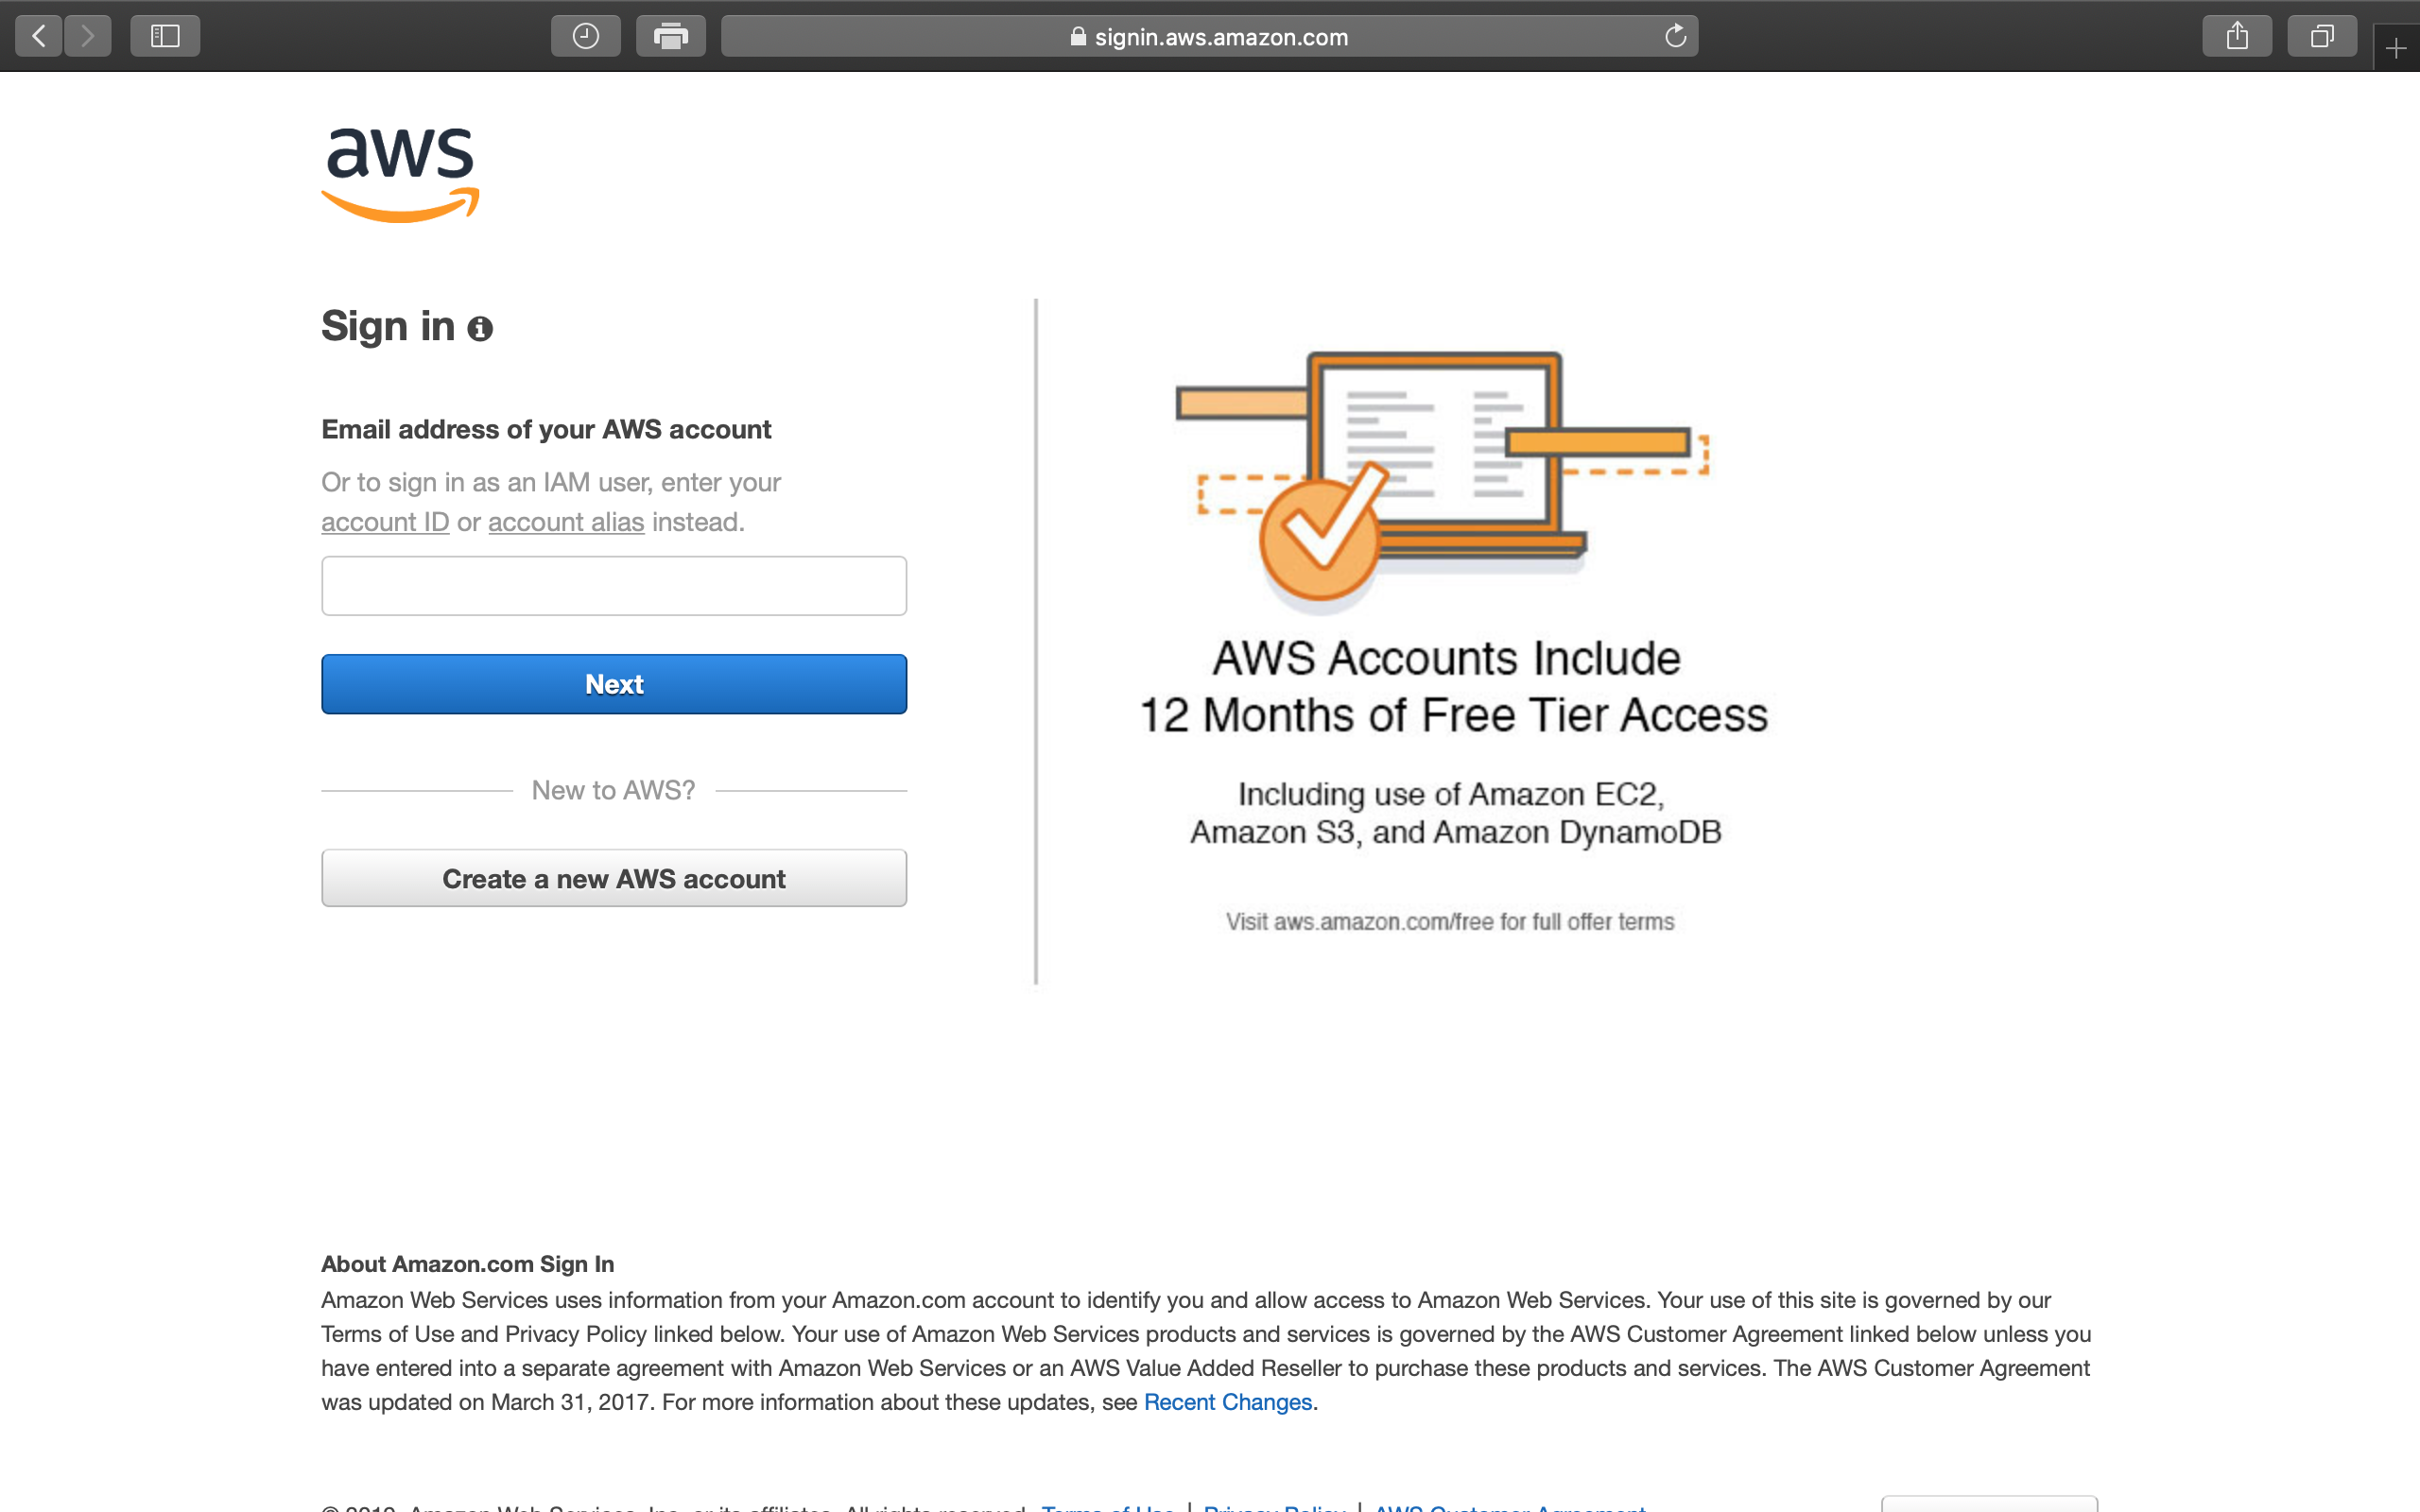
Enter the email address you used for registration, and click on
Next.
email
Enter the password you used for registration, and click on Sign In.
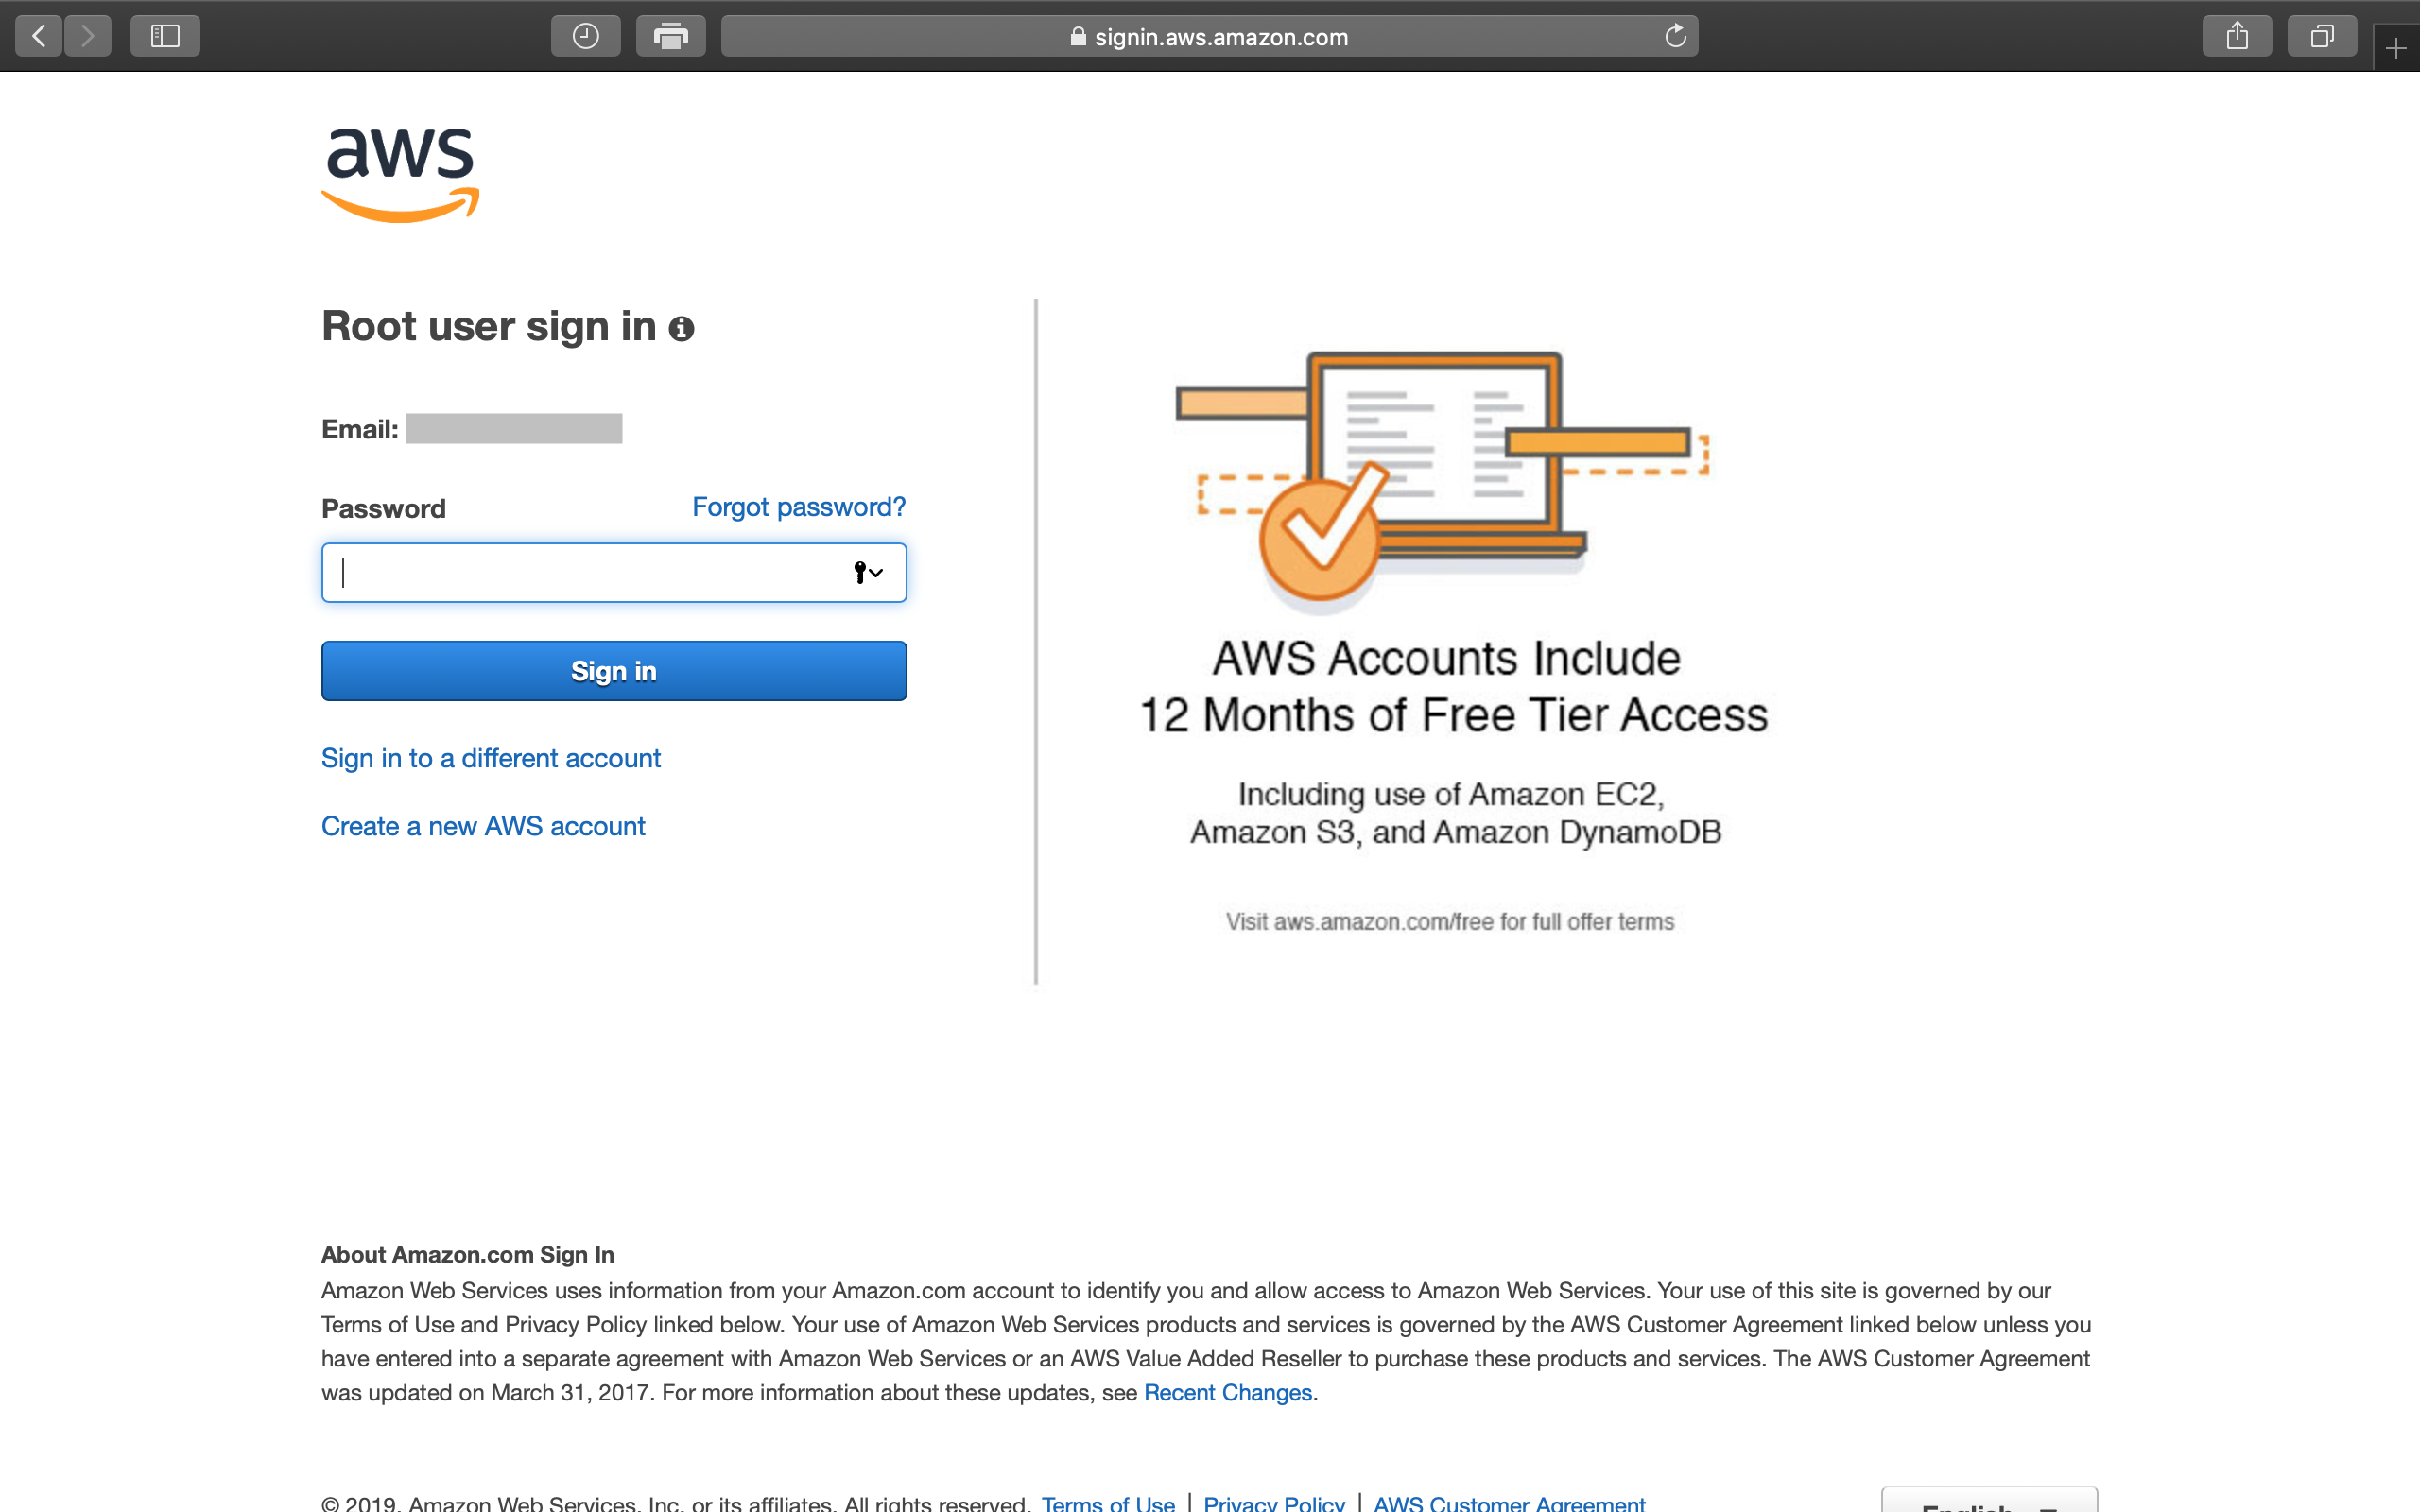
Password
Now you’ve successfully signed in to the AWS Management Console.
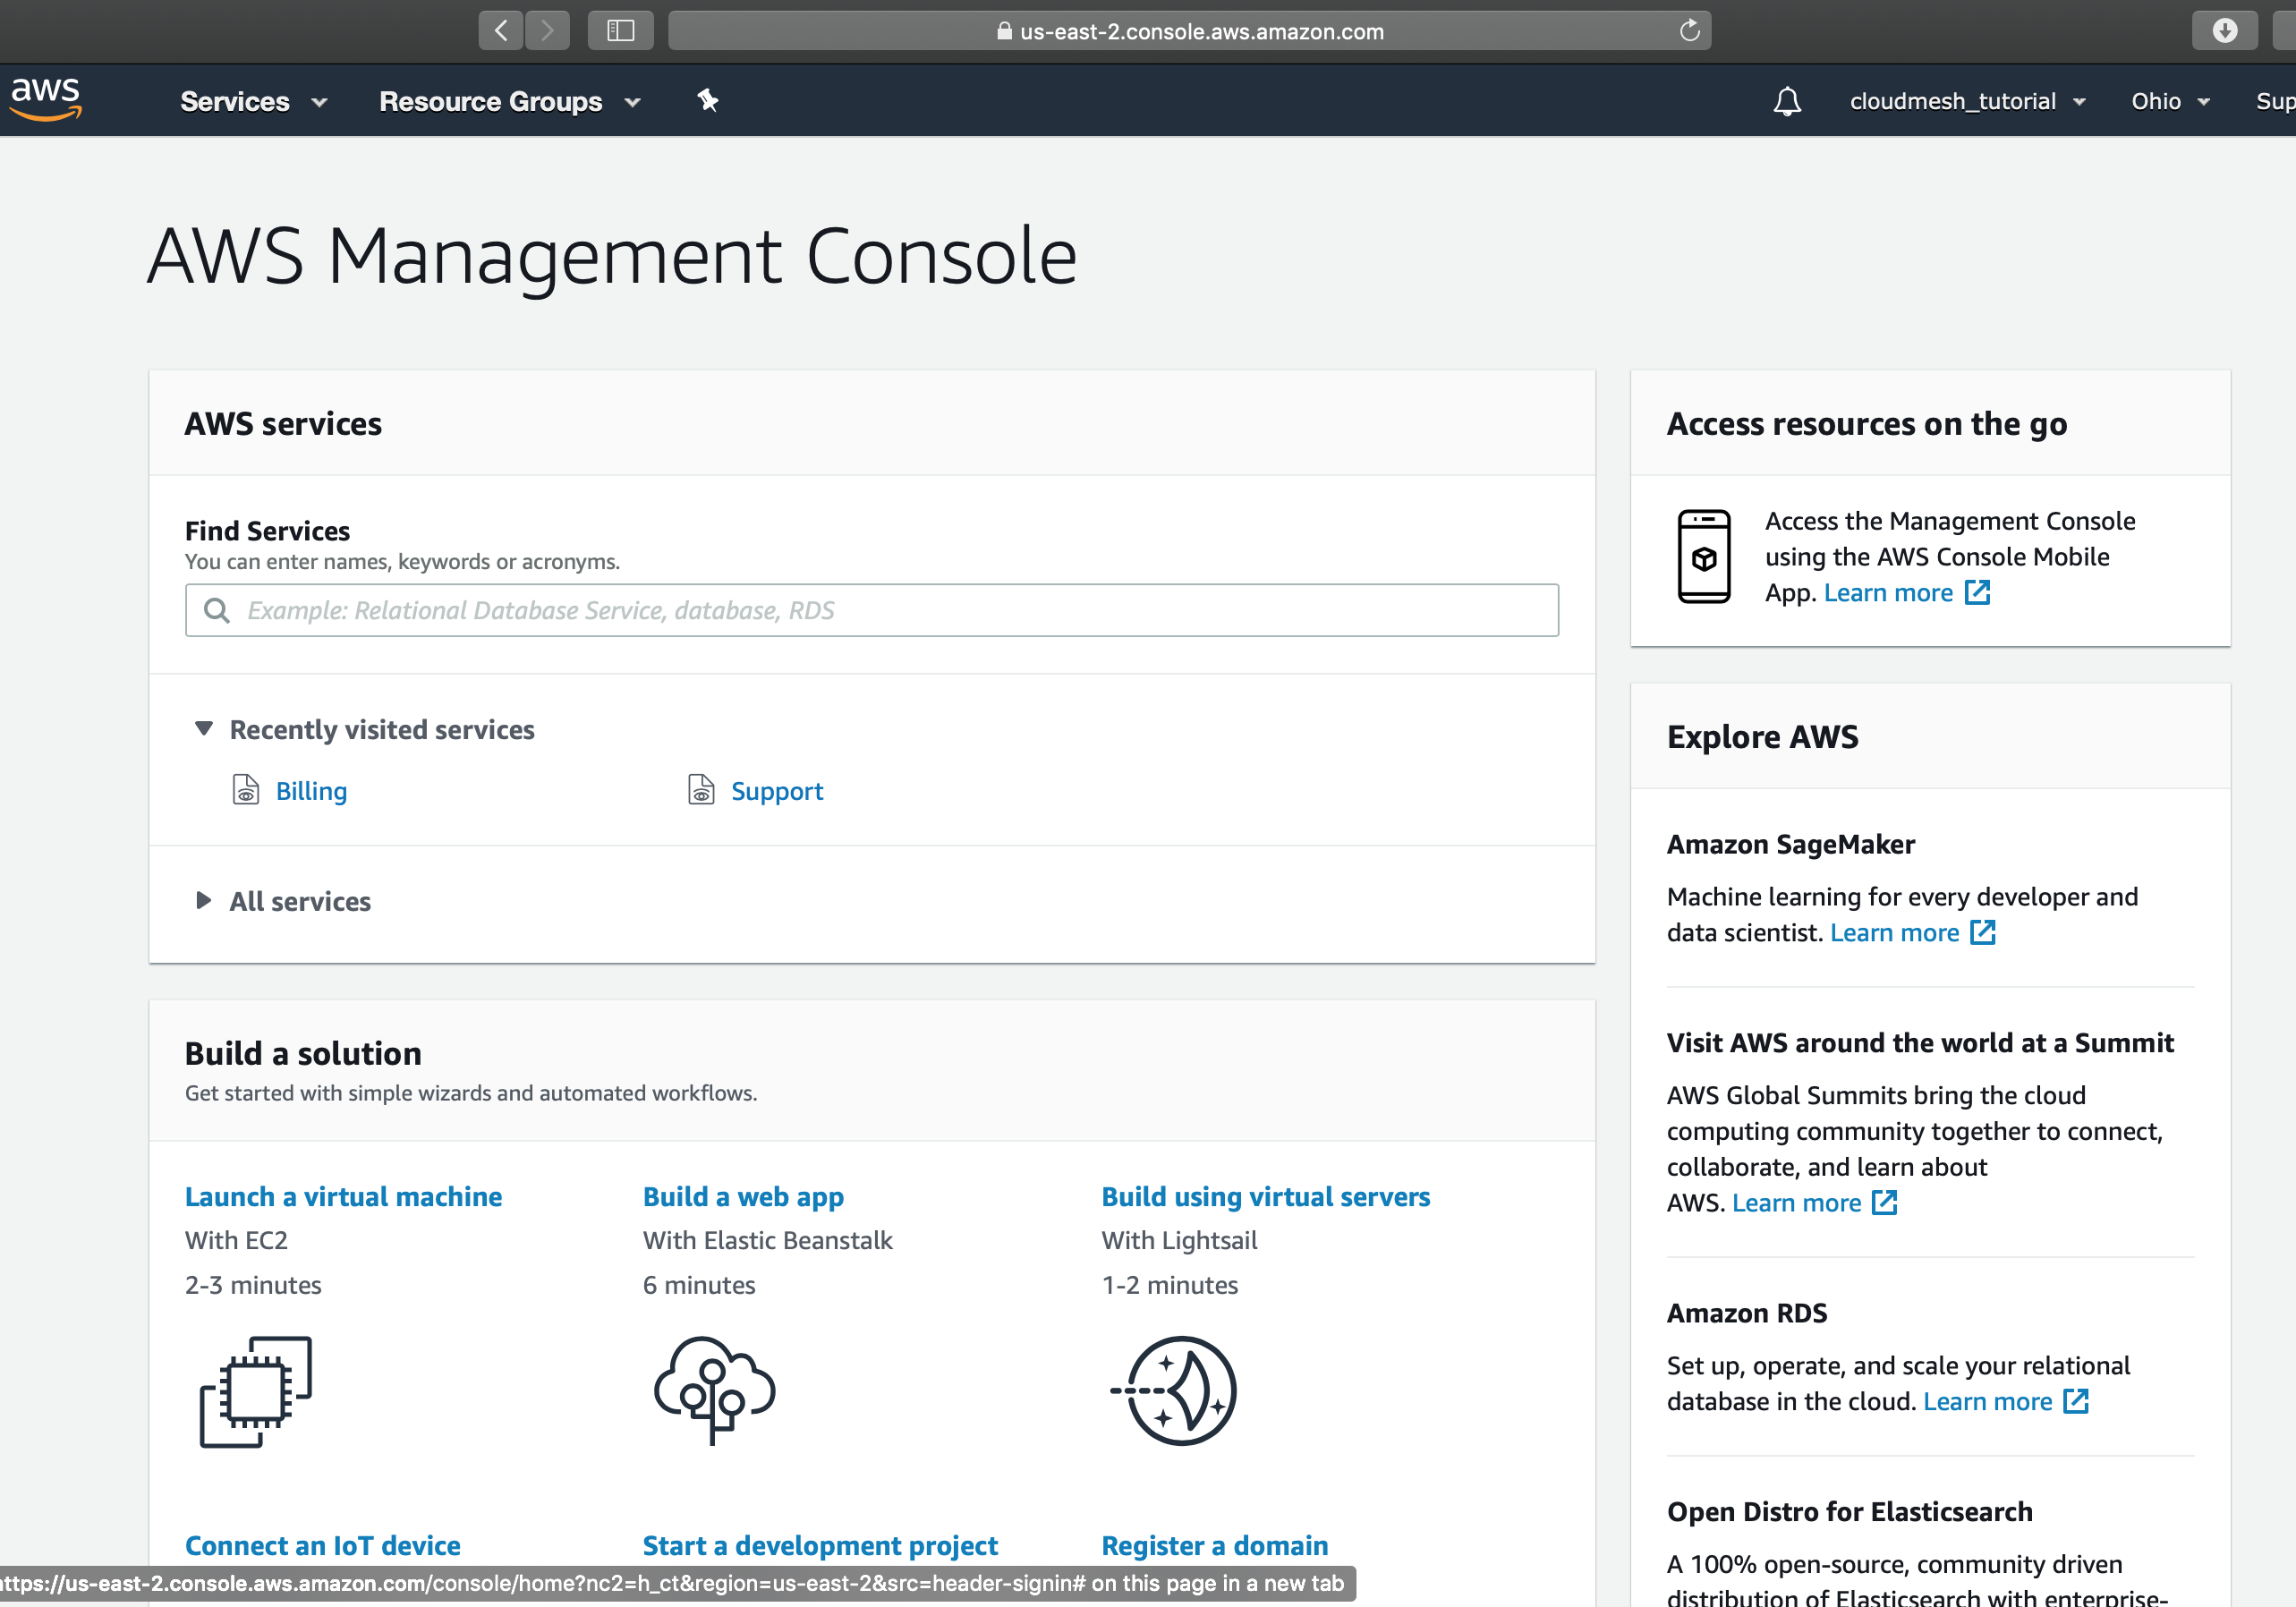
AWS Services
You can click on Services to explore AWS services through their Web
page.
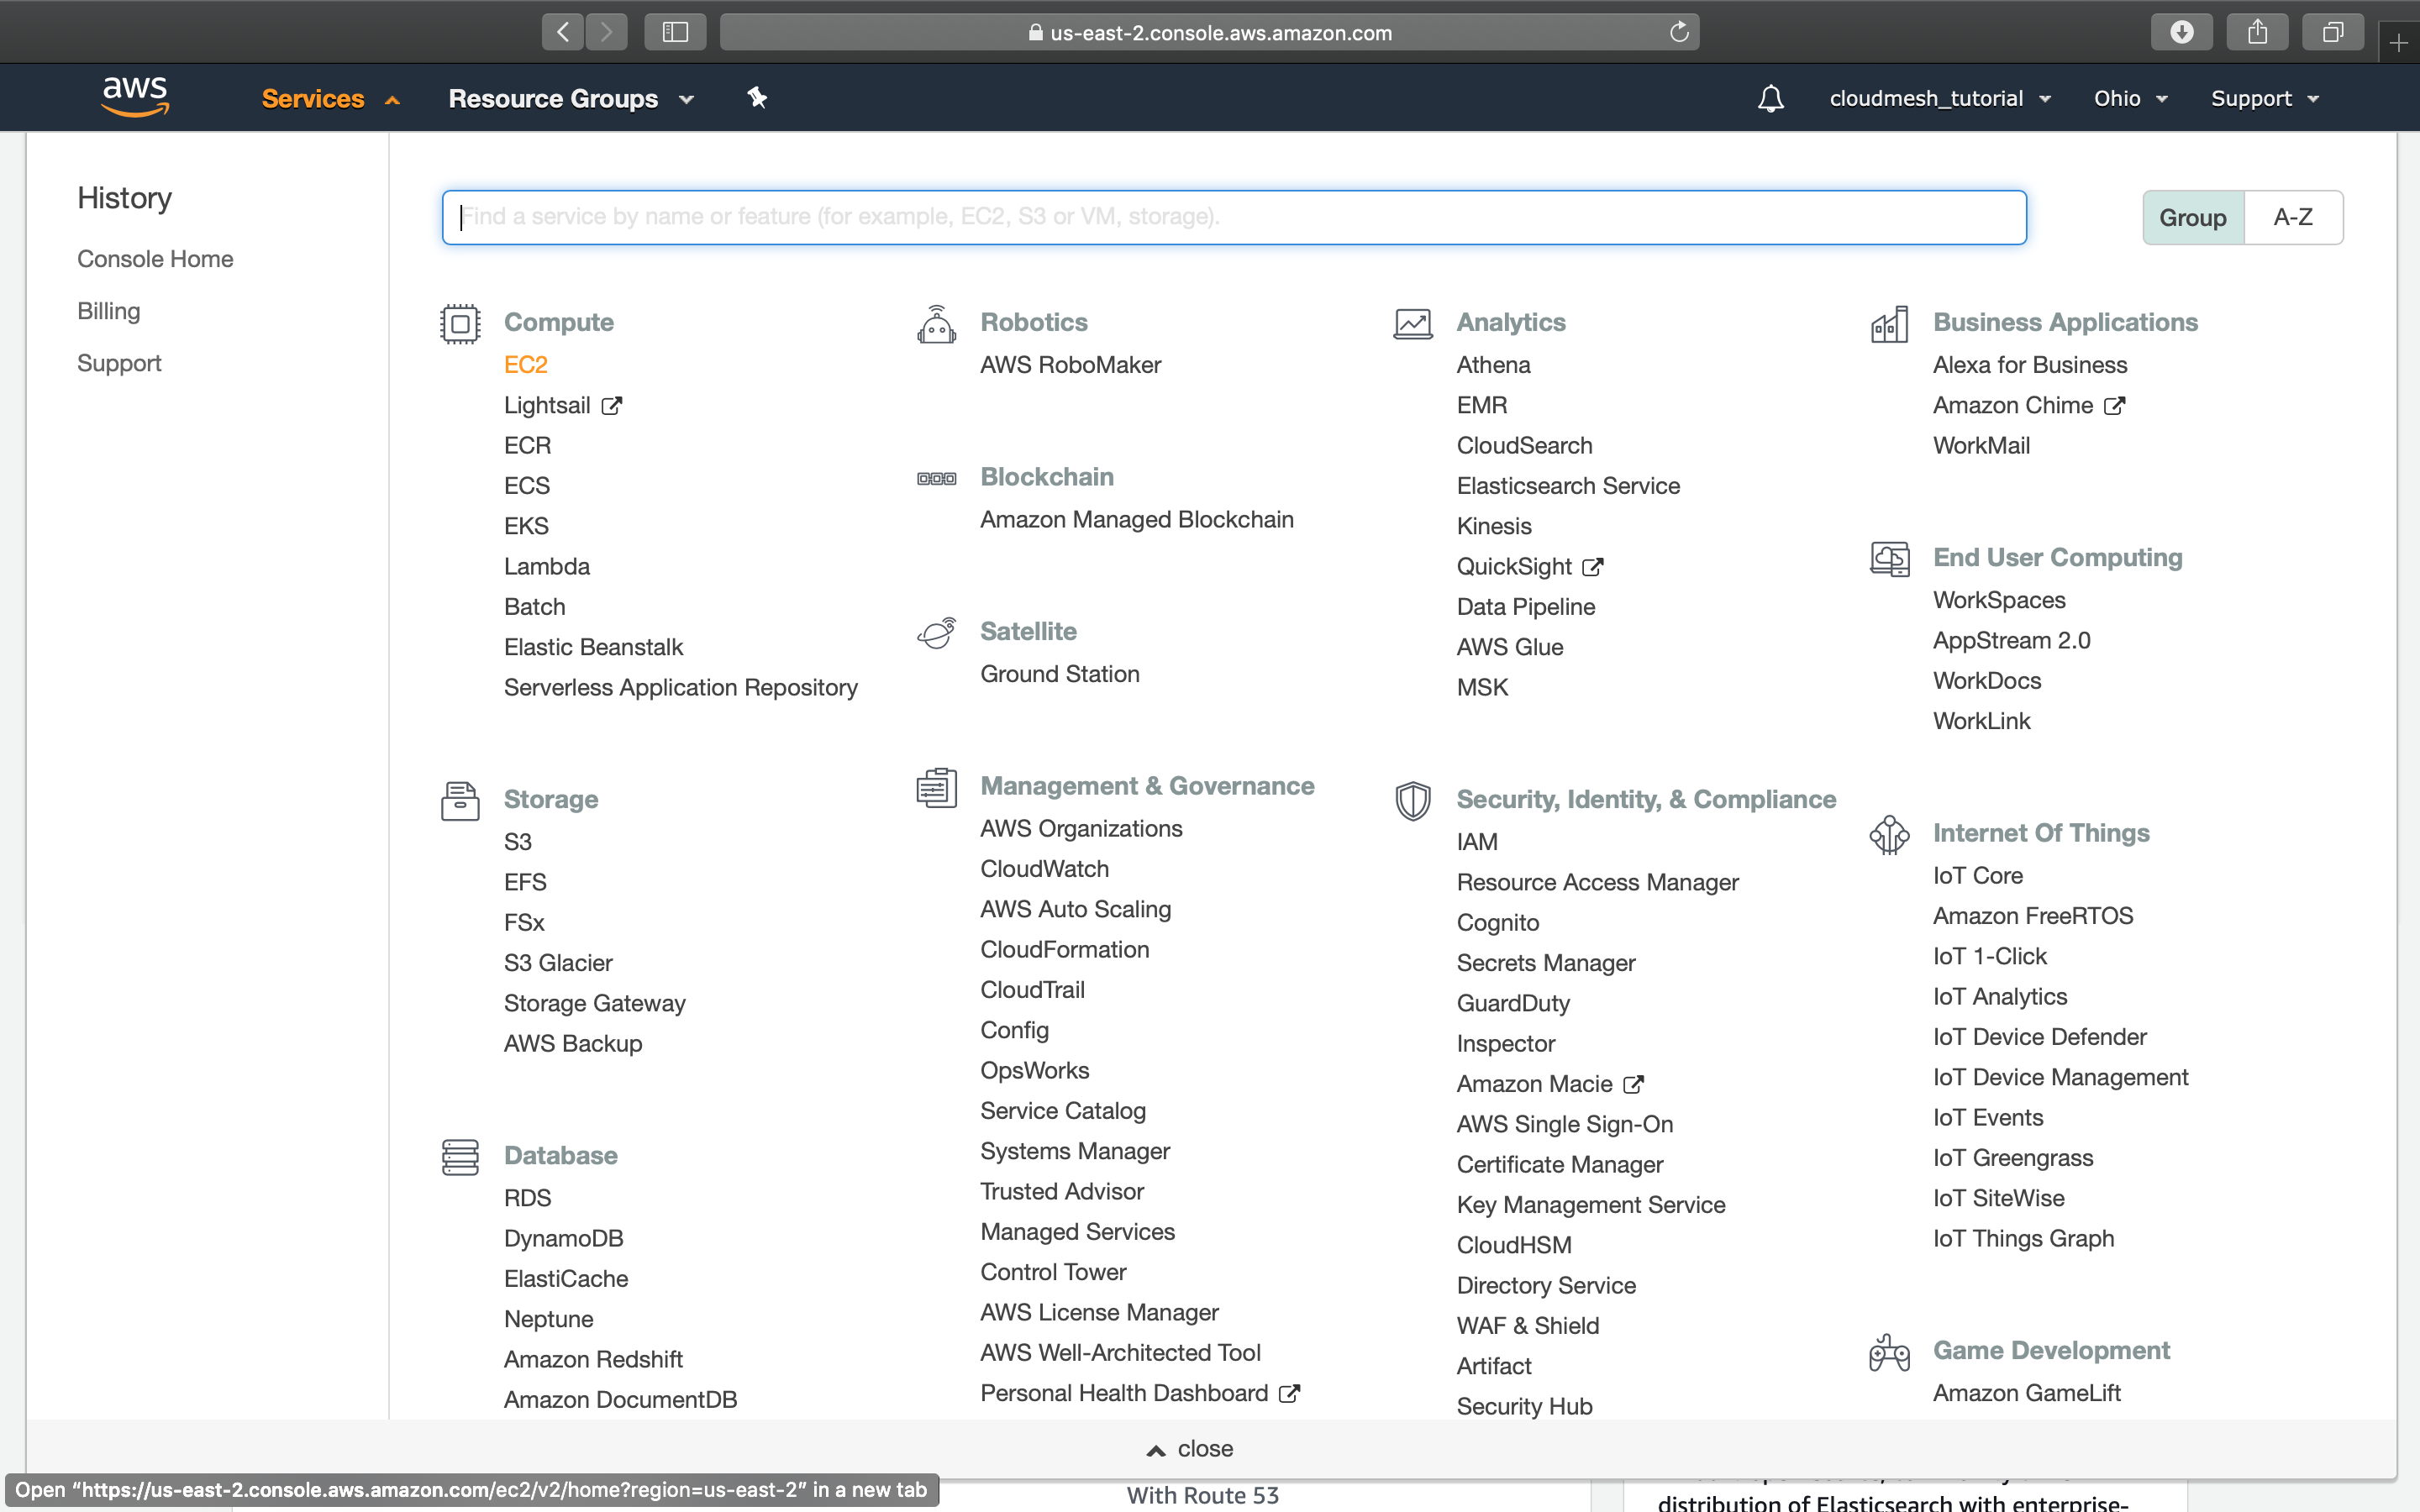
Explore services
You can also start managing your account and instances through our cloudmesh services. This is especially of interest if you use cloudmesh to manage your storage and computational needs while also being able to leverage other clouds.
[ ] To do verify this works and you have created a user.
Access Key
Now that you have an account it is necessary that you can authenticate to your cloud account from a program or a command line. The instructions for this can be found at
-https://docs.aws.amazon.com/cli/latest/userguide/cli-chap-configure.html
However, it is far easier to use the convenient cloudmesh tools by just using the cloudmesh open command.
In case you have not yet added a user, you can visit the user creation page with
cms open account aws
Create and Download Access Key
After logging into your account, you will then see the following console:
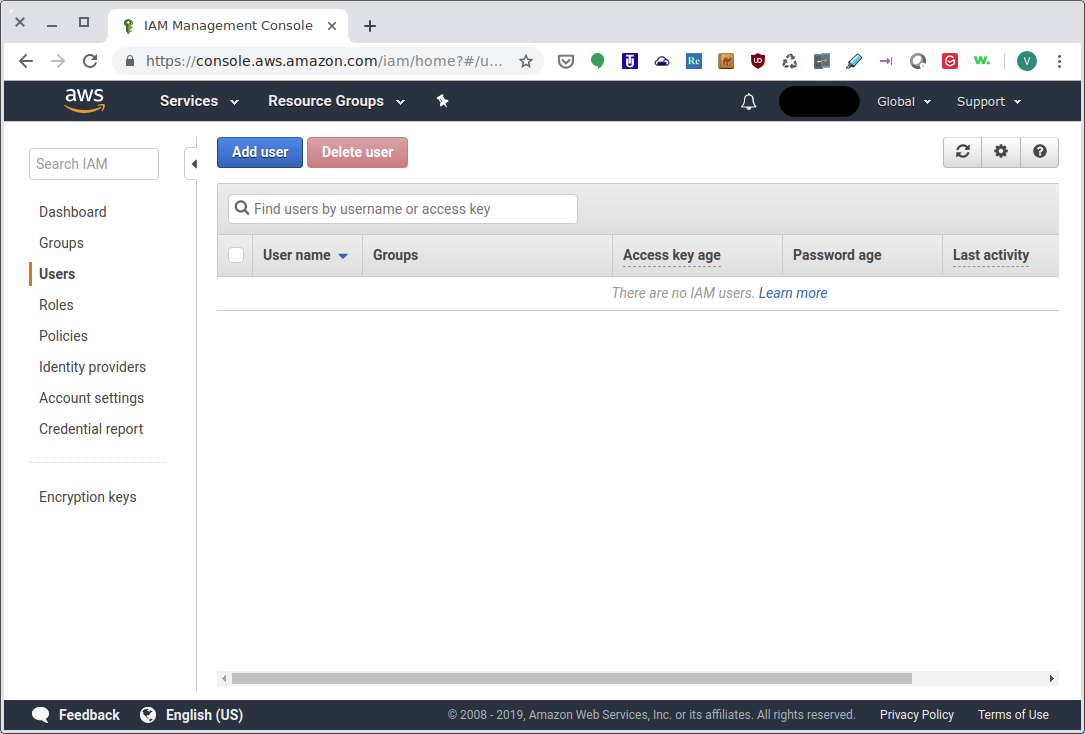
IAM Management Console: Users
Click on Add user and begin the process of creating a new user.
Type the name cloudmesh in the User name and make sure you check
the programmatic access:
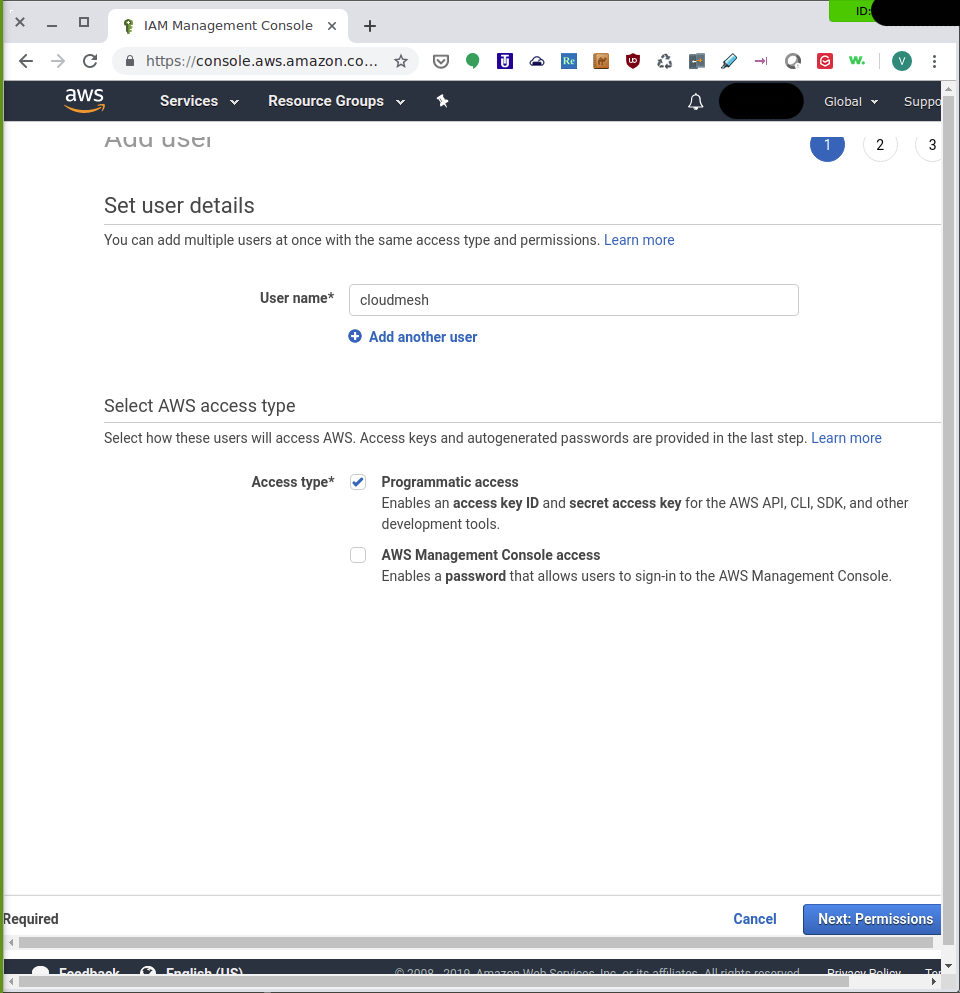
IAM Management Console: Add User
After clicking on the Next: Permissions, you then have to add the
user to a group. If you do not have any group created, click on
Create group button and you will be redirected to the corresponding
page. You can call the group cloudmesh and then check the select the
AmazonEC2FullAccess for the permission:

IAM Management Console: Create Group
After creating the group, select it so that the new user will be assigned to that group:
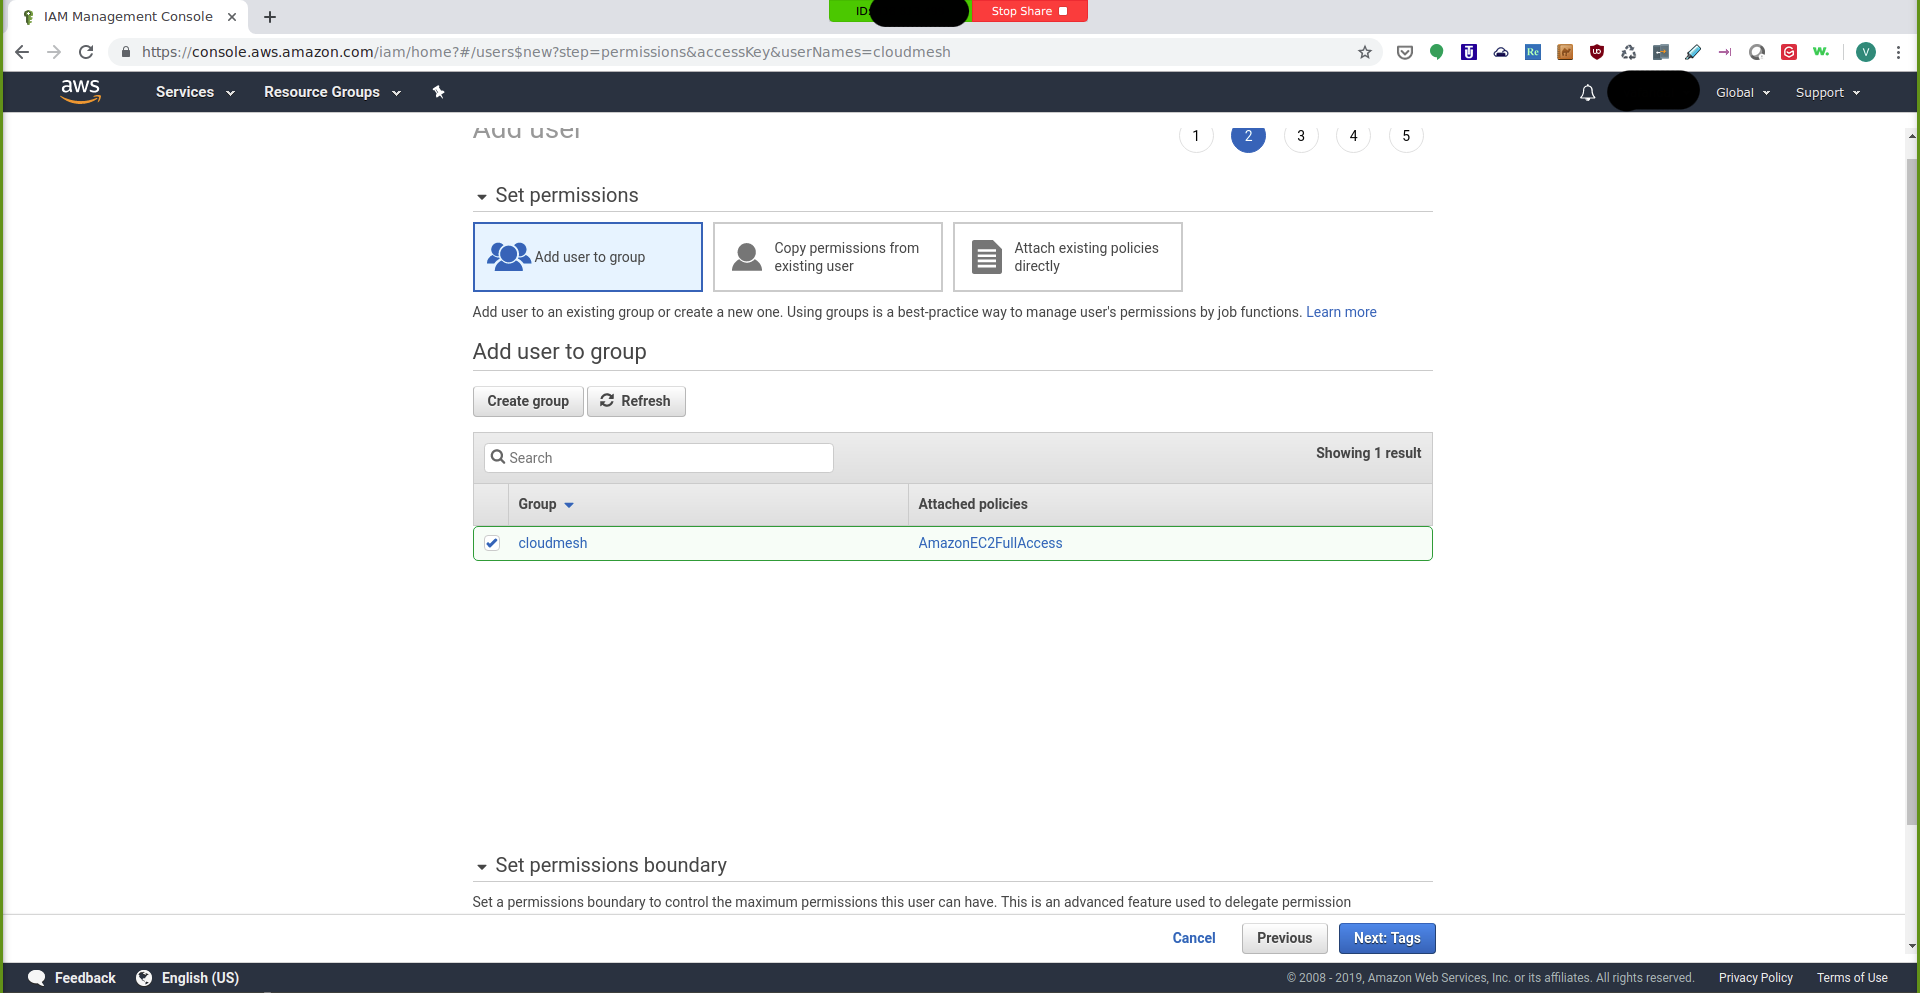
IAM Management Console: Select Group
On the next page, you can create the tags for the new user. You can just
create a cloudmesh key for the user as a tag:
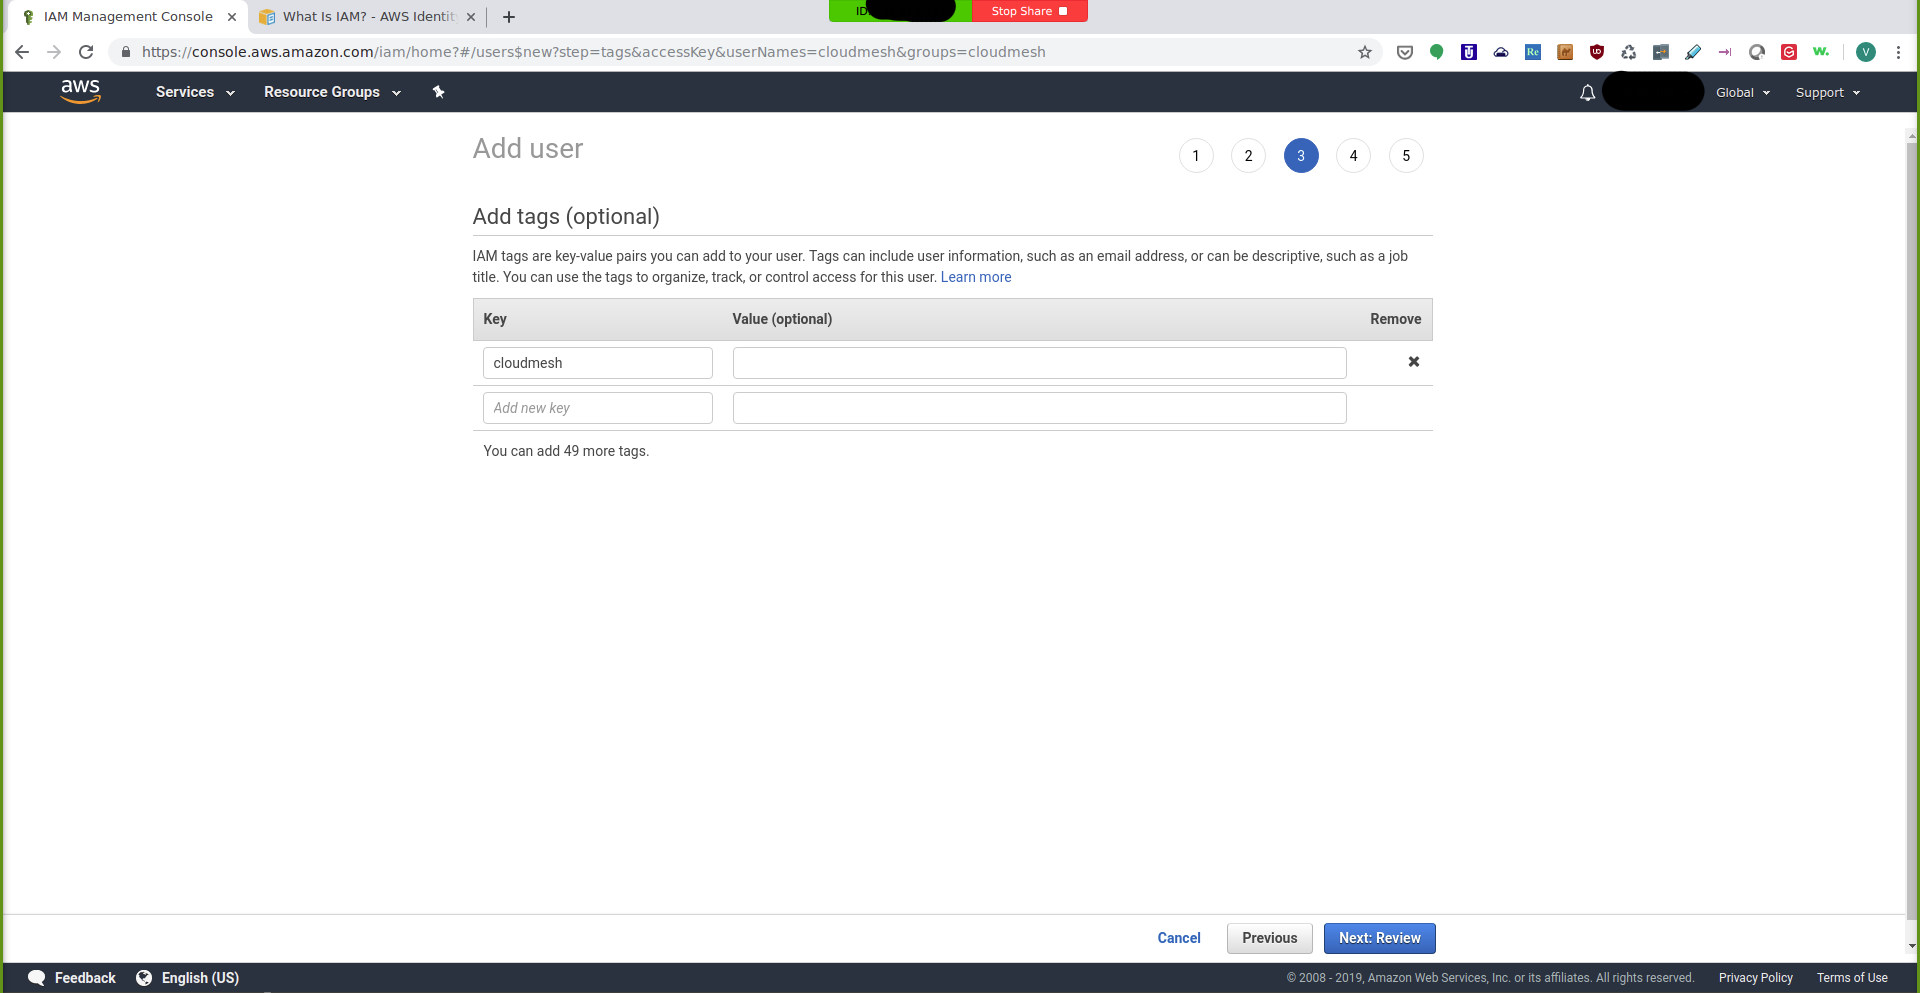
IAM Management Console: Add Tag
The next page is the review page where you can review the information you entered:
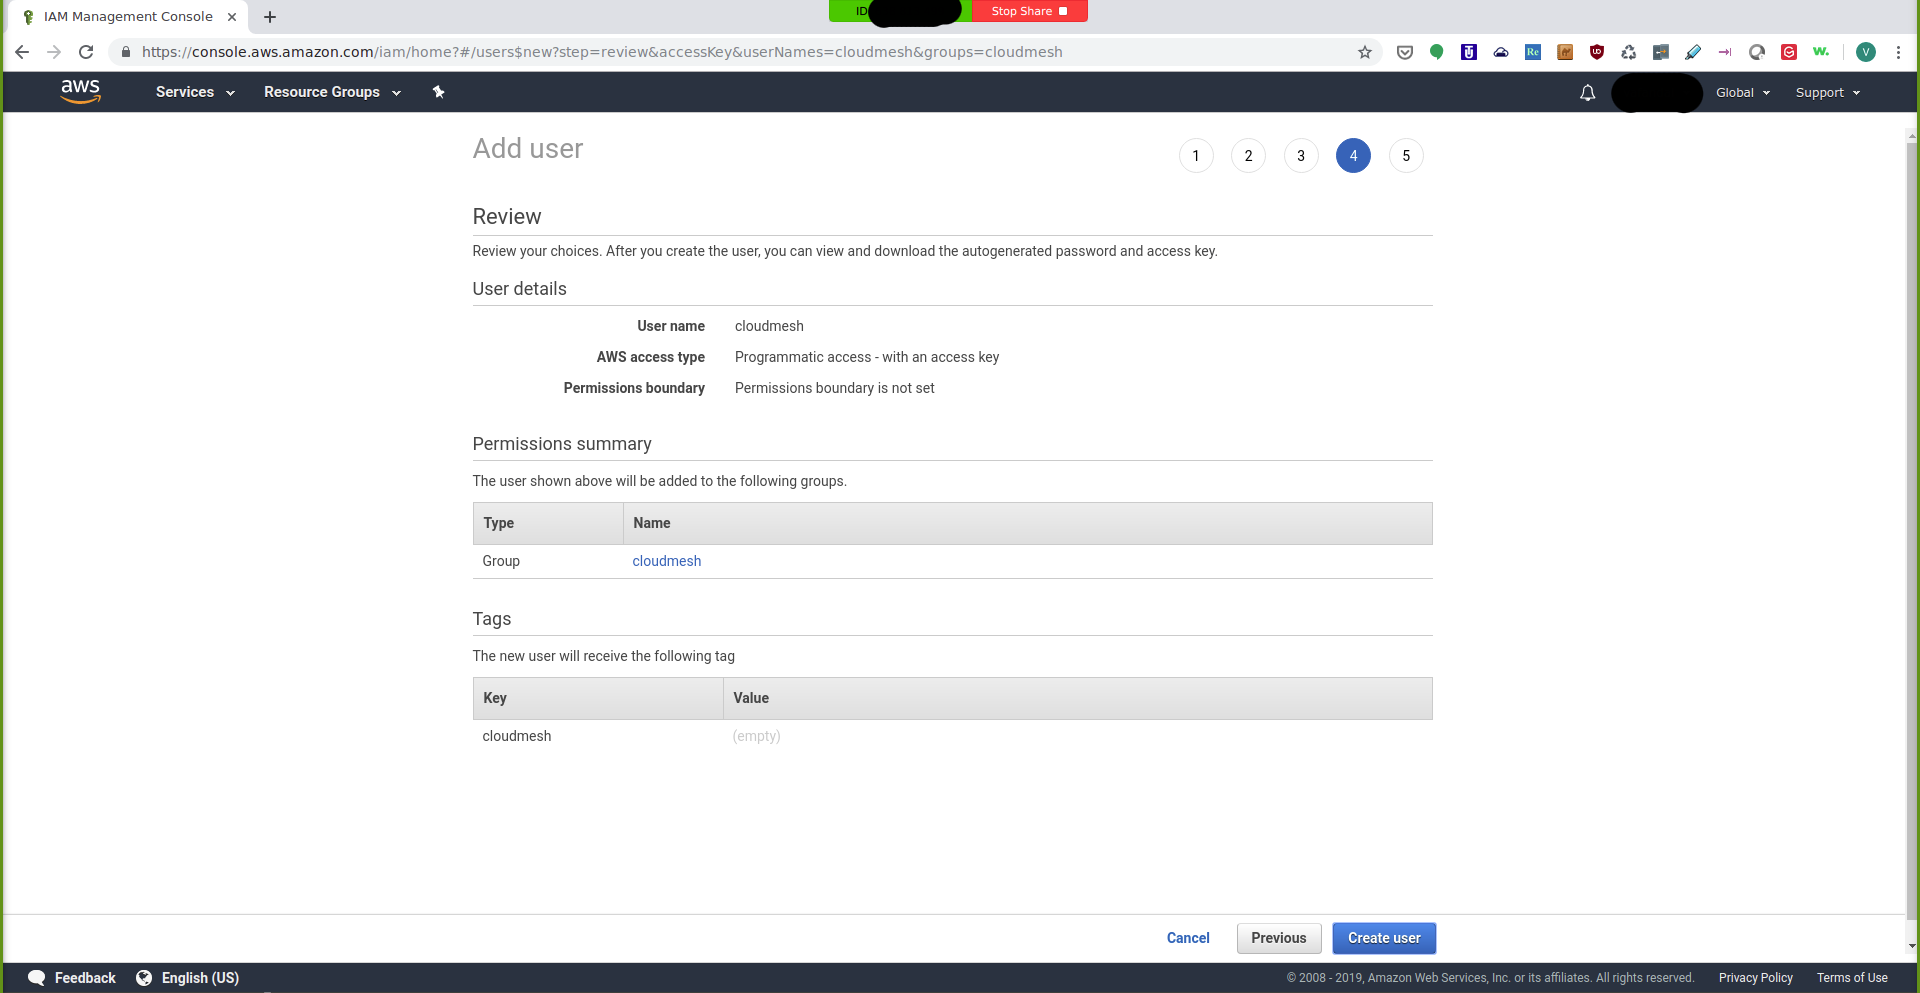
IAM Management Console: Review
After clicking on Create user the user will be finally created and
you will be redirected to the following success page:
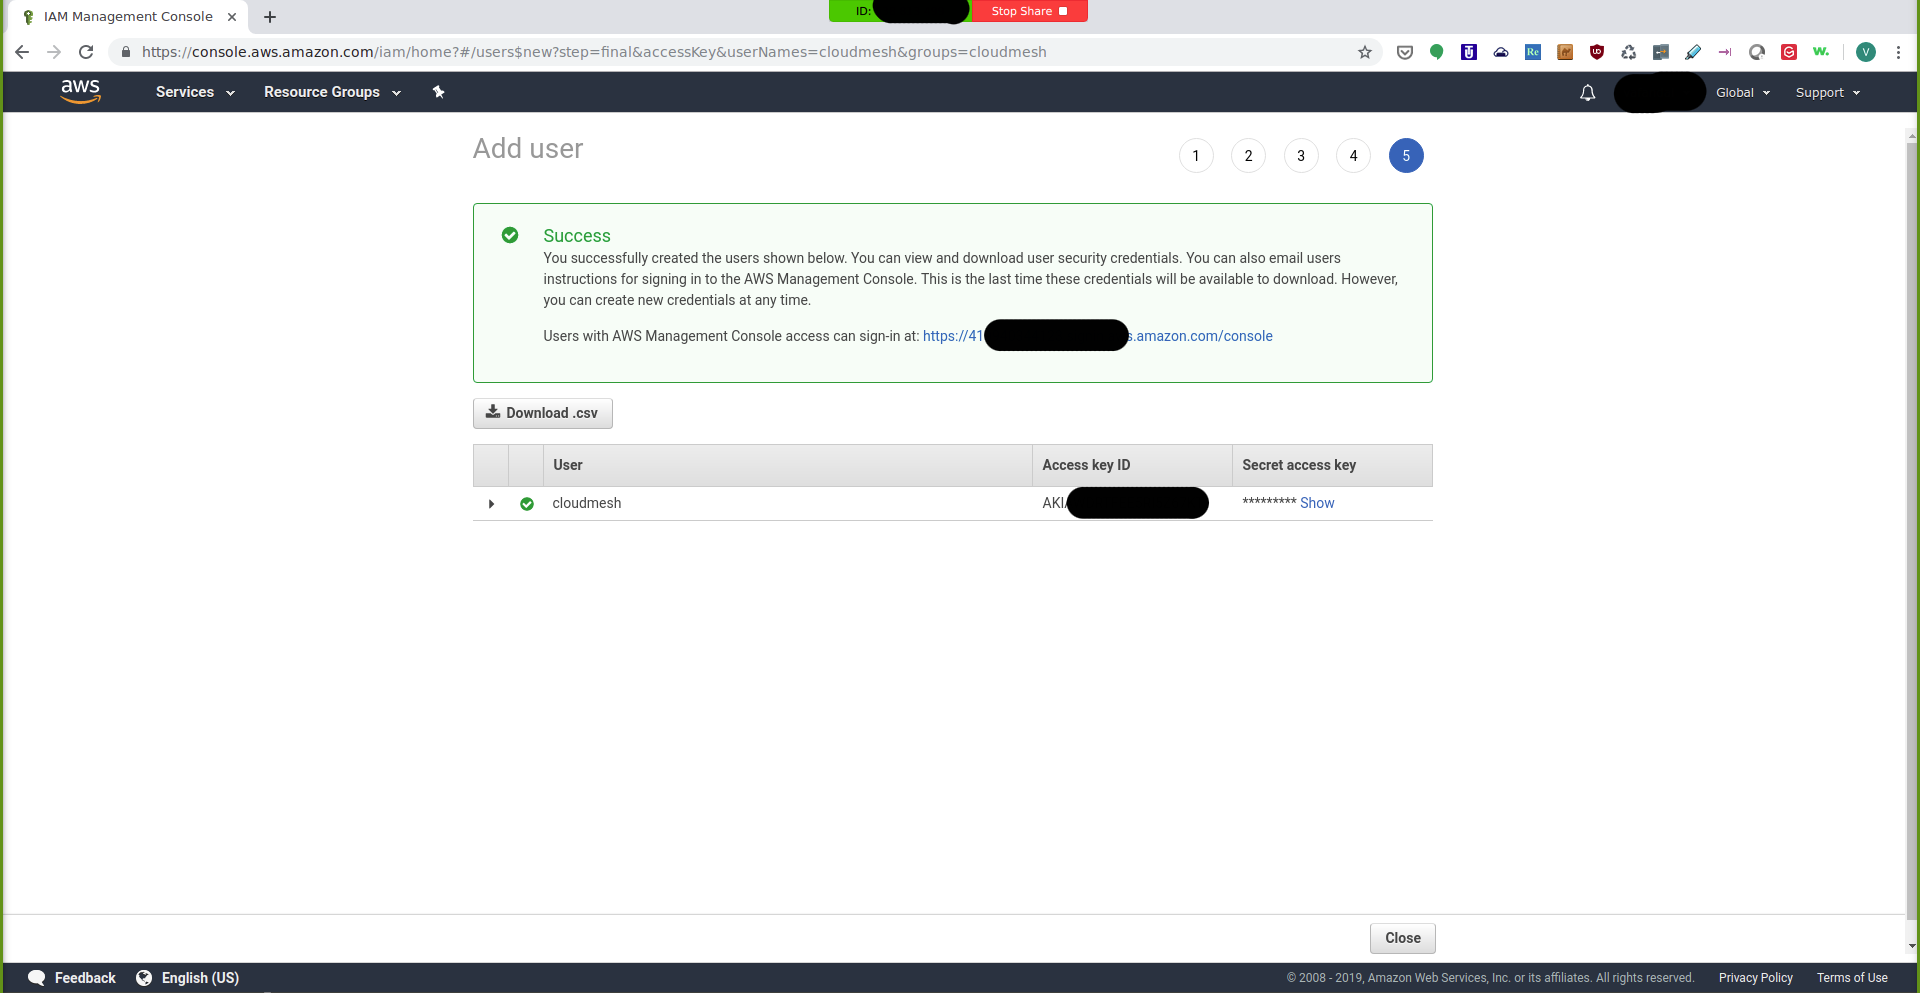
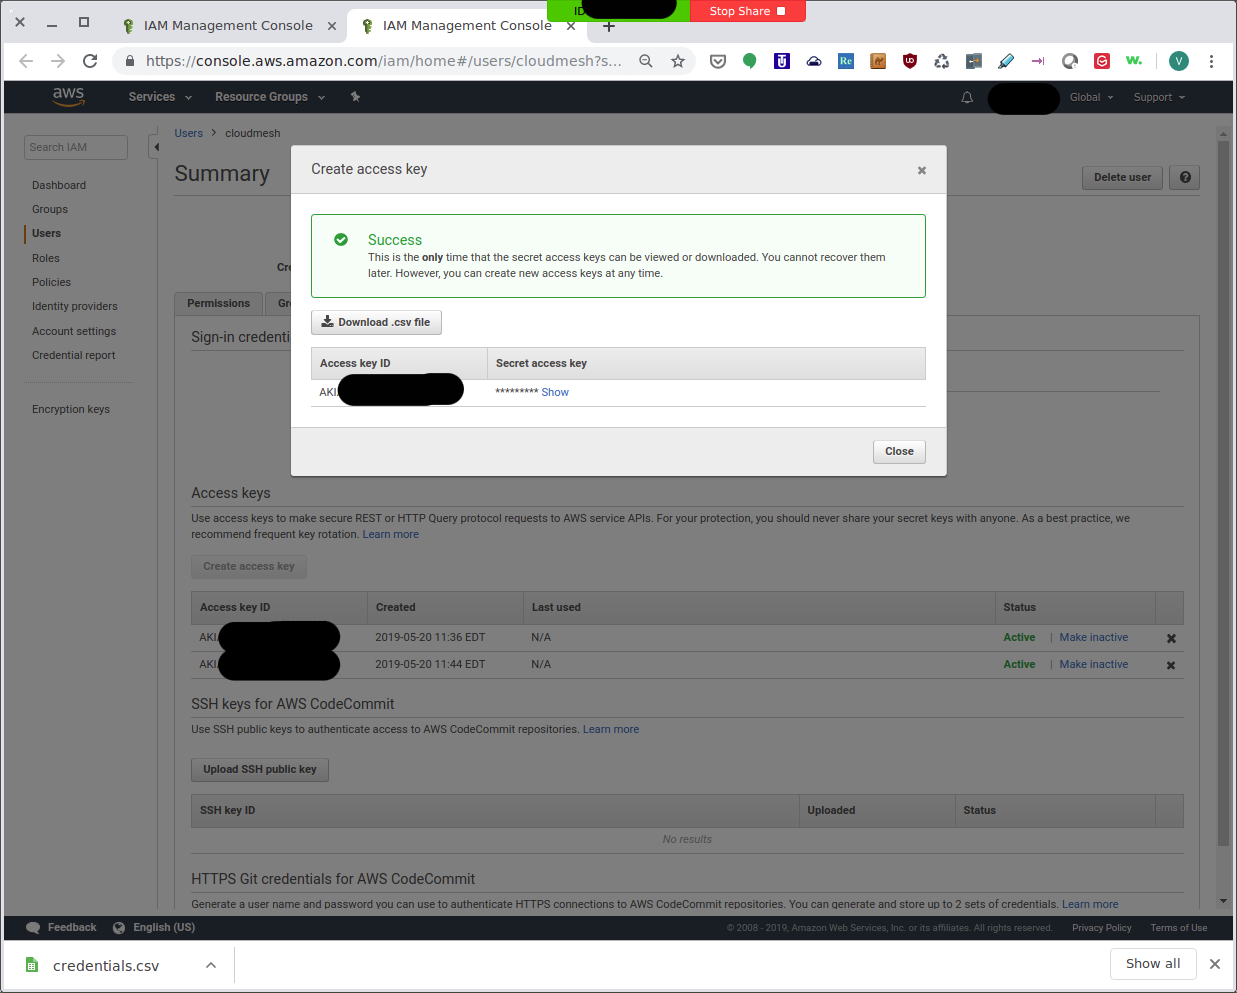
IAM Management Console: Success
You can view the secret access key by clicking on the show button:
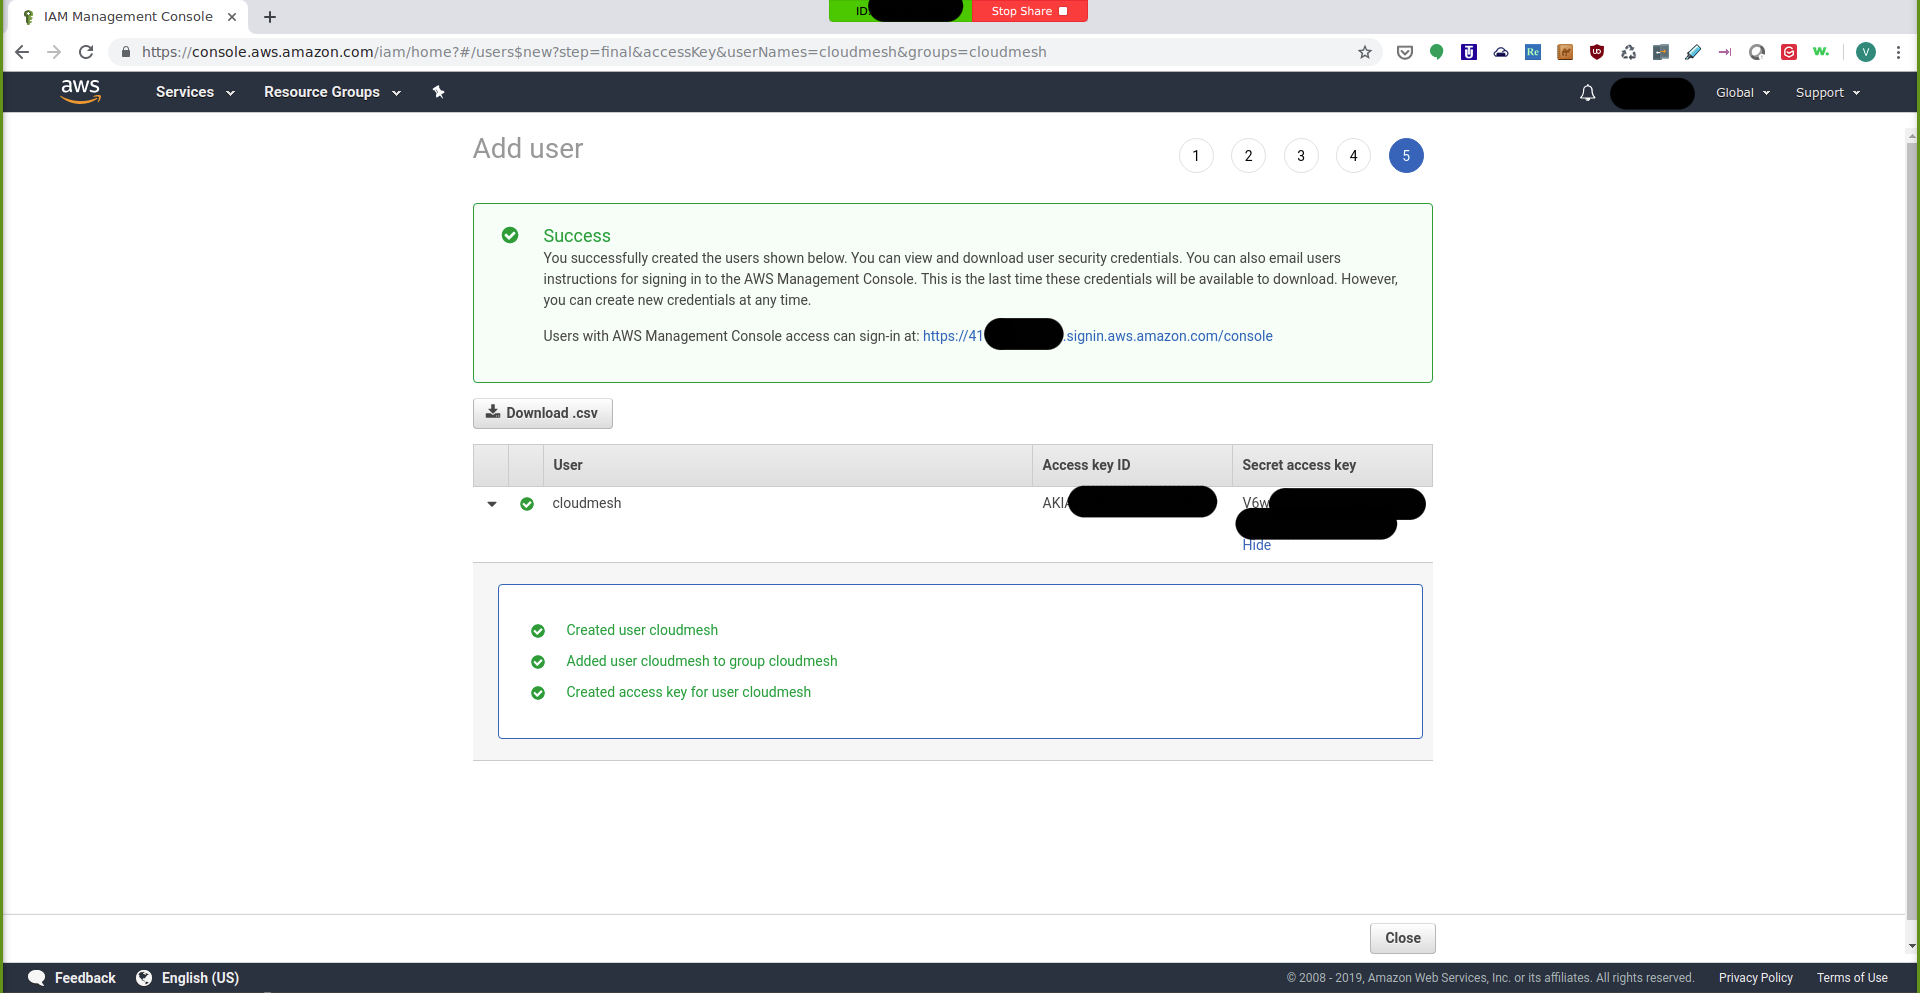
IAM Management Console: Access Key
Next, download the .csv file by clicking on the Download .csv
button and save it as ~/.cloudmesh/credentials.csv:

IAM Management Console: Download CSV
Then you can click on the close button and go back to the IAM
Management Console which now provides you a summary of the newly created
user called cloudmesh and looks like this:
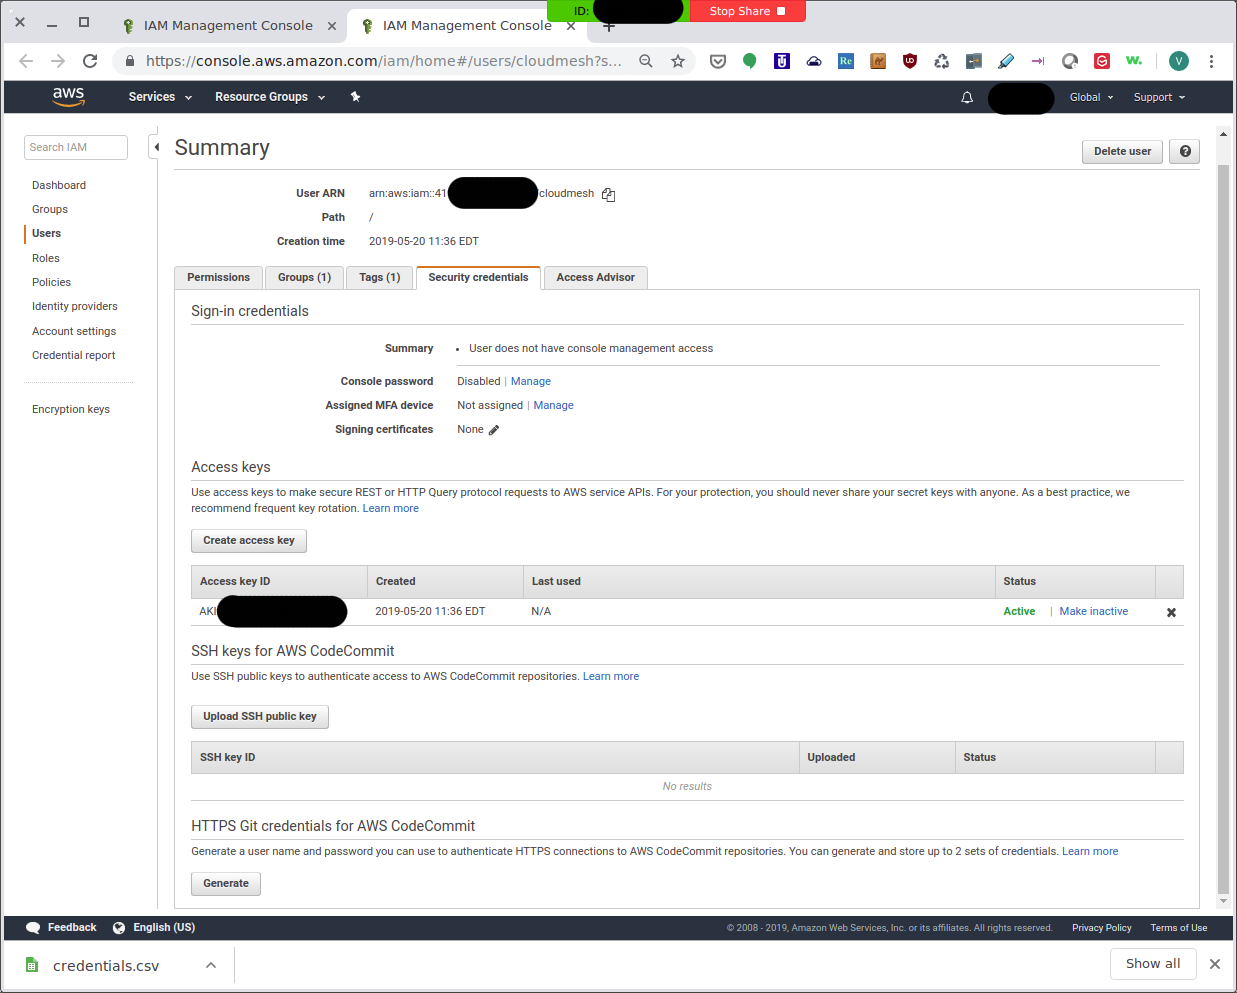
IAM Management Console: Summary
By clicking on the Create access key, you can create another access
key:
IAM Management Console: Create Access Key
As is mentioned in the screenshot, this is the only time you can view
or download the secret access key. So go ahead and click on the
Download .csv file and save it as ~/.cloudmesh/accessKey.csv:
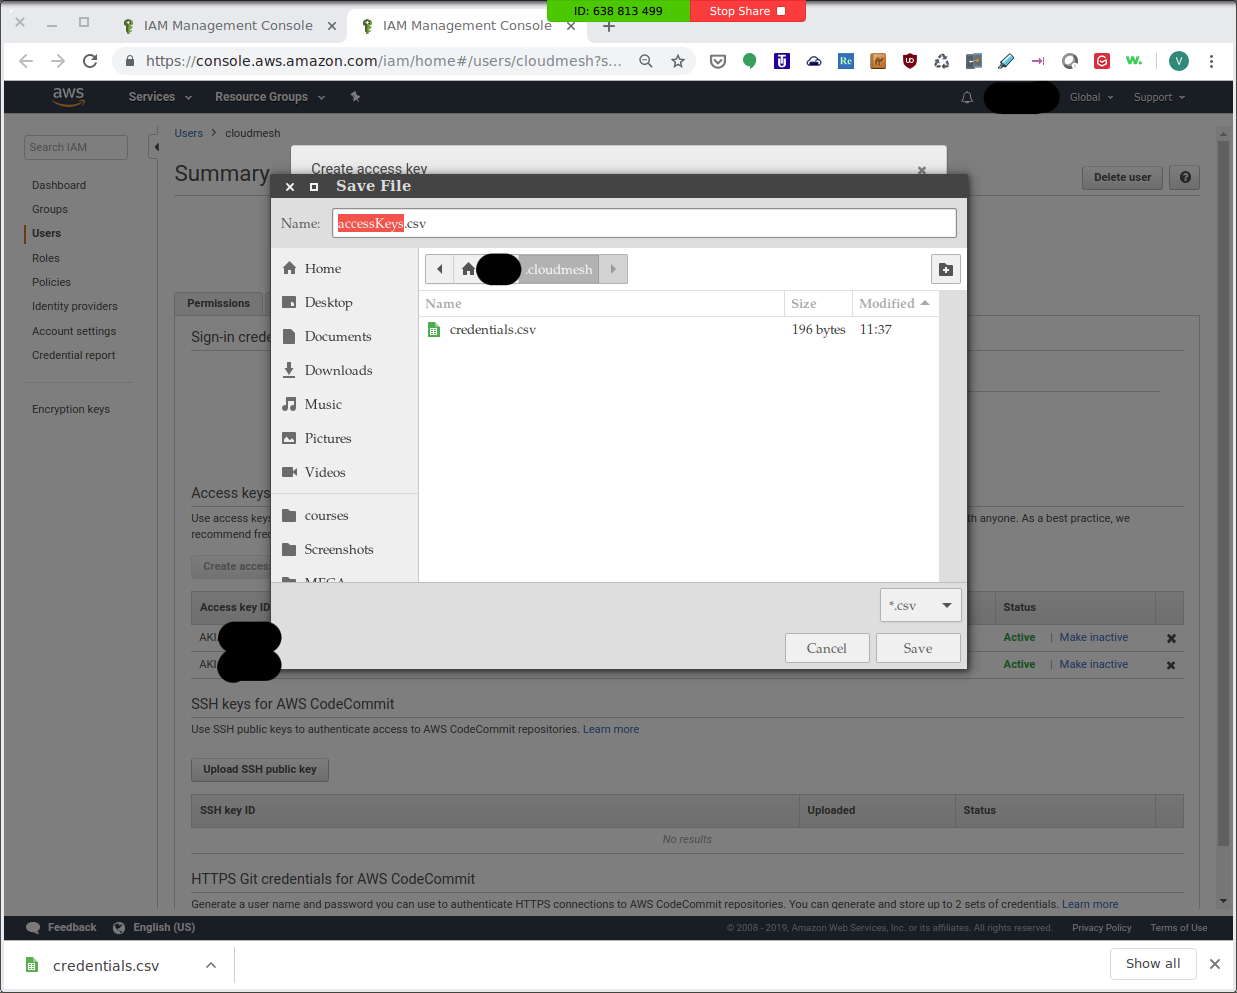
IAM Management Console: Download CSV File
Using the Access Key
To obtain the keys for an already existing account or the one that you just created you can use the command
$ cms open account aws NAME
This command will open a browser window to the credential page of AWS. Please replace the NAME with your username that you created when you added your user to the IAM.
In case you do not yet have credentials choose the Security credentials tab and then choose to Create access key. To see the new access key, choose Show. Your credentials will look something like this:
Access key ID: AAABBCCHHH7EXAMPLE Secret access key: wJalrXUtnFhsjlashlkjh/bPxRfiCYEXAMPLEKEY
To download the key pair, choose Download .csv file. Store the keys in a secure location and do not by default store them in the Downloads folder. We recommend that you store is in ~/.cloudmesh, but before doing so make sure the permissions for ~/.cloudmesh are restricted,
Compute Service
Import Public key
Before we get started with AWS compute services, we need to be sure we
import our public ssh key. We assume ssh has already been set up
under ~\.ssh\id_rsa.pub. If this prerequisite has not yet been
satisfied, please reference the installation section.
While logged into AWS’s console, navigate to the EC2 Management Console
under Services > Compute > EC2:
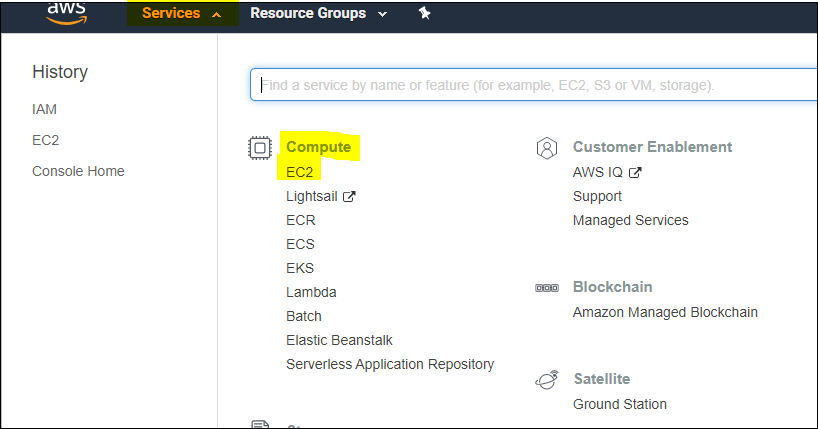
EC2 Management Console: EC2 Console
Next, on the left-hand panel, navigate to
Network & Security > Key Pairs and select Import key pair. Once
you’re at the Import Settings screen, browse to ~\.ssh and select
the id_rsa.pub file. Name the imported file after the same username
configured you have configured in the cloudmesh.yaml file.
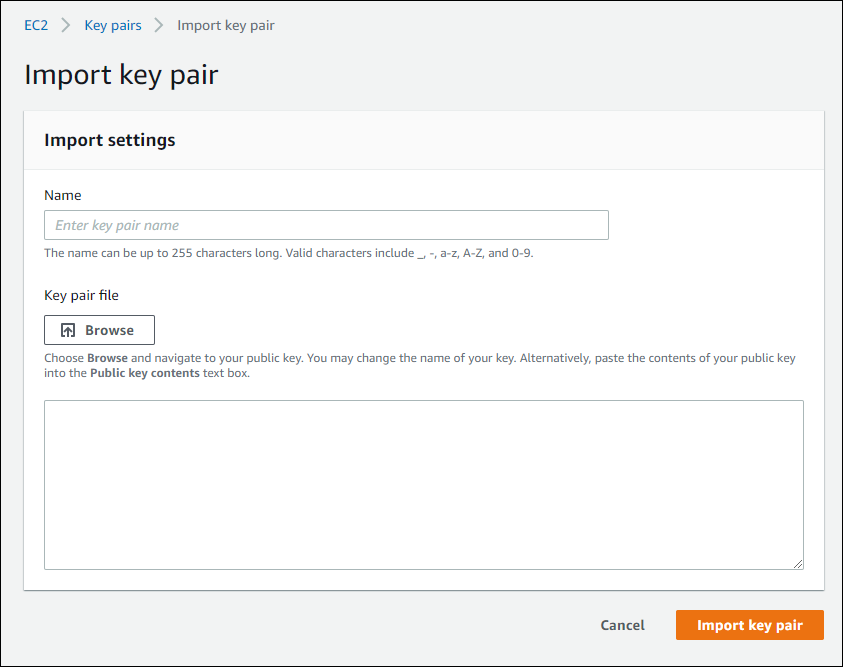
EC2 Management Console: Import Settings
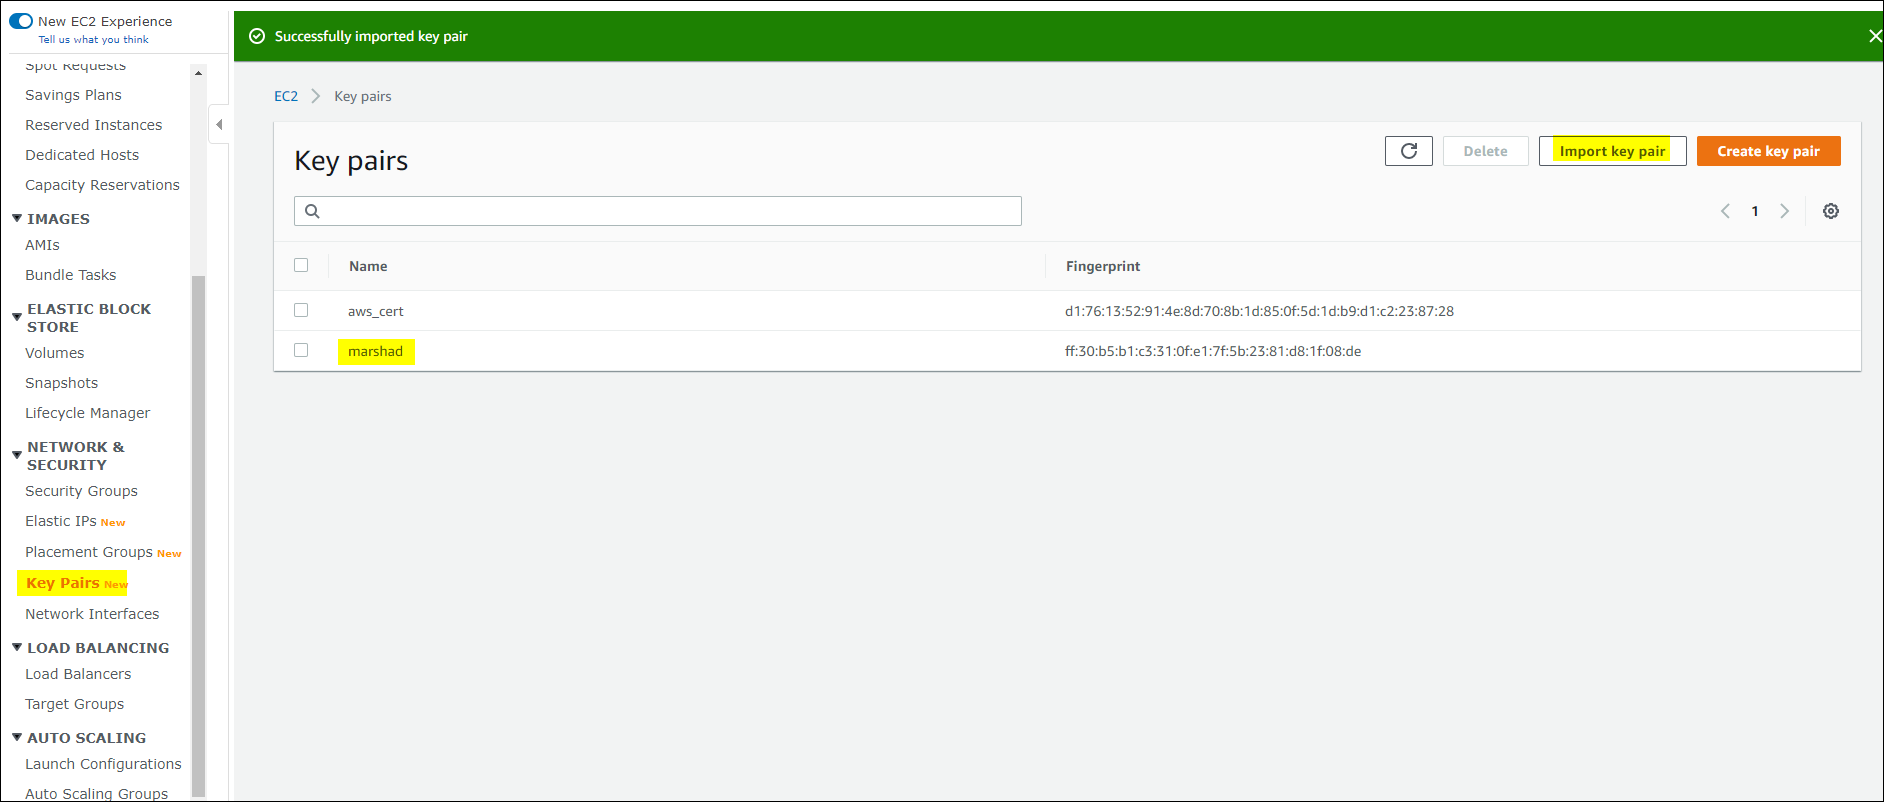
EC2 Management Console: Pub SSH Key
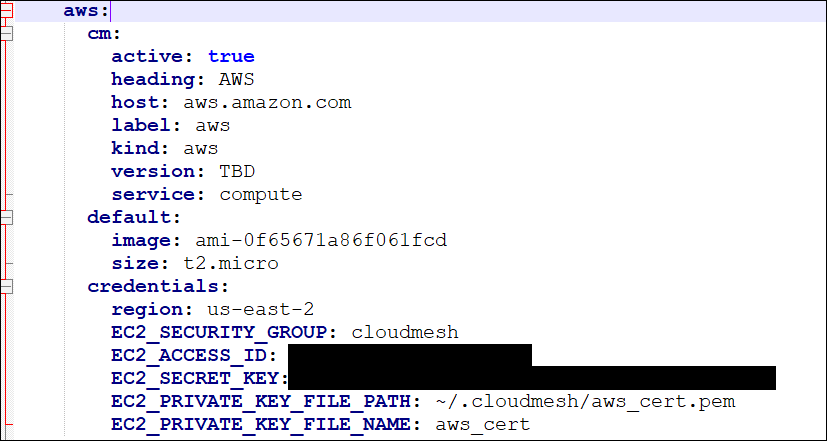
Cloudmesh.yaml Configuration for AWS
Please reference the section on Configuration for more information on getting, setting, and editing values to the cloudmesh.yaml configuration file; along with referencing the compute cloud provider templates and default values.
Run the following code to set the AWS compute provider values specific
to your configuration. Alternatively, you can manually set these values
using a text editor to update the cloudmesh.yaml file under
~\.cloudmesh.
cms config set cloudmesh.cloud.aws.cm.active=true
cms config set cloudmesh.cloud.aws.credentials.region=AWSMGMTCONSOLEREGIONVALUE
cms config set cloudmesh.cloud.aws.credentials.EC2_SECURITY_GROUP=SECGROUPVALUE
cms config set cloudmesh.cloud.aws.credentials.EC2_ACCESS_ID=ACCESSIDVALUE
cms config set cloudmesh.cloud.aws.credentials.EC2_SECRET_KEY=SECRETKEYVALUE
Notes:
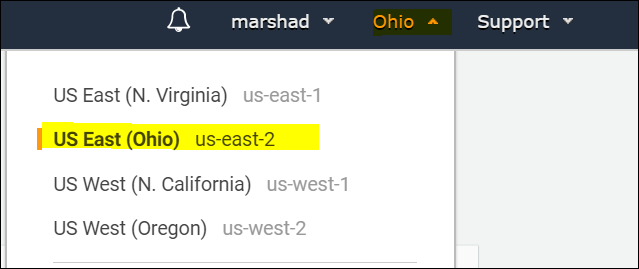
Region can be found while logged into the AWS management console in the upper right-hand side.
EC2_ACCESS_ID and EC2_SECRET_KEY values can be found either during the initial setup in AWS, or by referencing the Access Key downloaded as a csv and moved to the
~\.cloudmeshdirectory.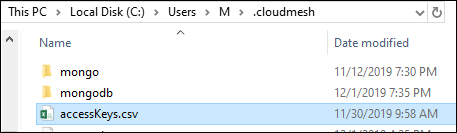
TODO: Confirm if EC2_PRIVATE_KEY_FILE_PATH and EC2_PRIVATE_KEY_FILE_NAME cloudmesh.yaml AWS compute variables are being utilized, as these are not referenced in
Provider.py. If this is not needed, remove it from cloudmesh.yaml. If this is needed, update the AWS account section with the following steps:Create a new key pair and name the key pair
aws_cert. Then download the key and move to the~\.cloudmeshdirectory.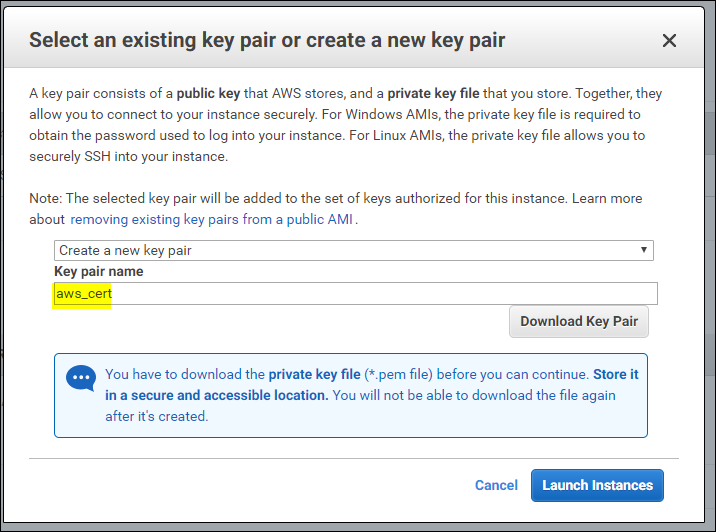
Once the values have been set: 
run the following to get started and test AWS compute services:
cms set cloud=aws
cms init
cms key init
cms vm boot
This should have allowed you to initialize cms with the updated
configurations and boot up a new vm in AWS based. 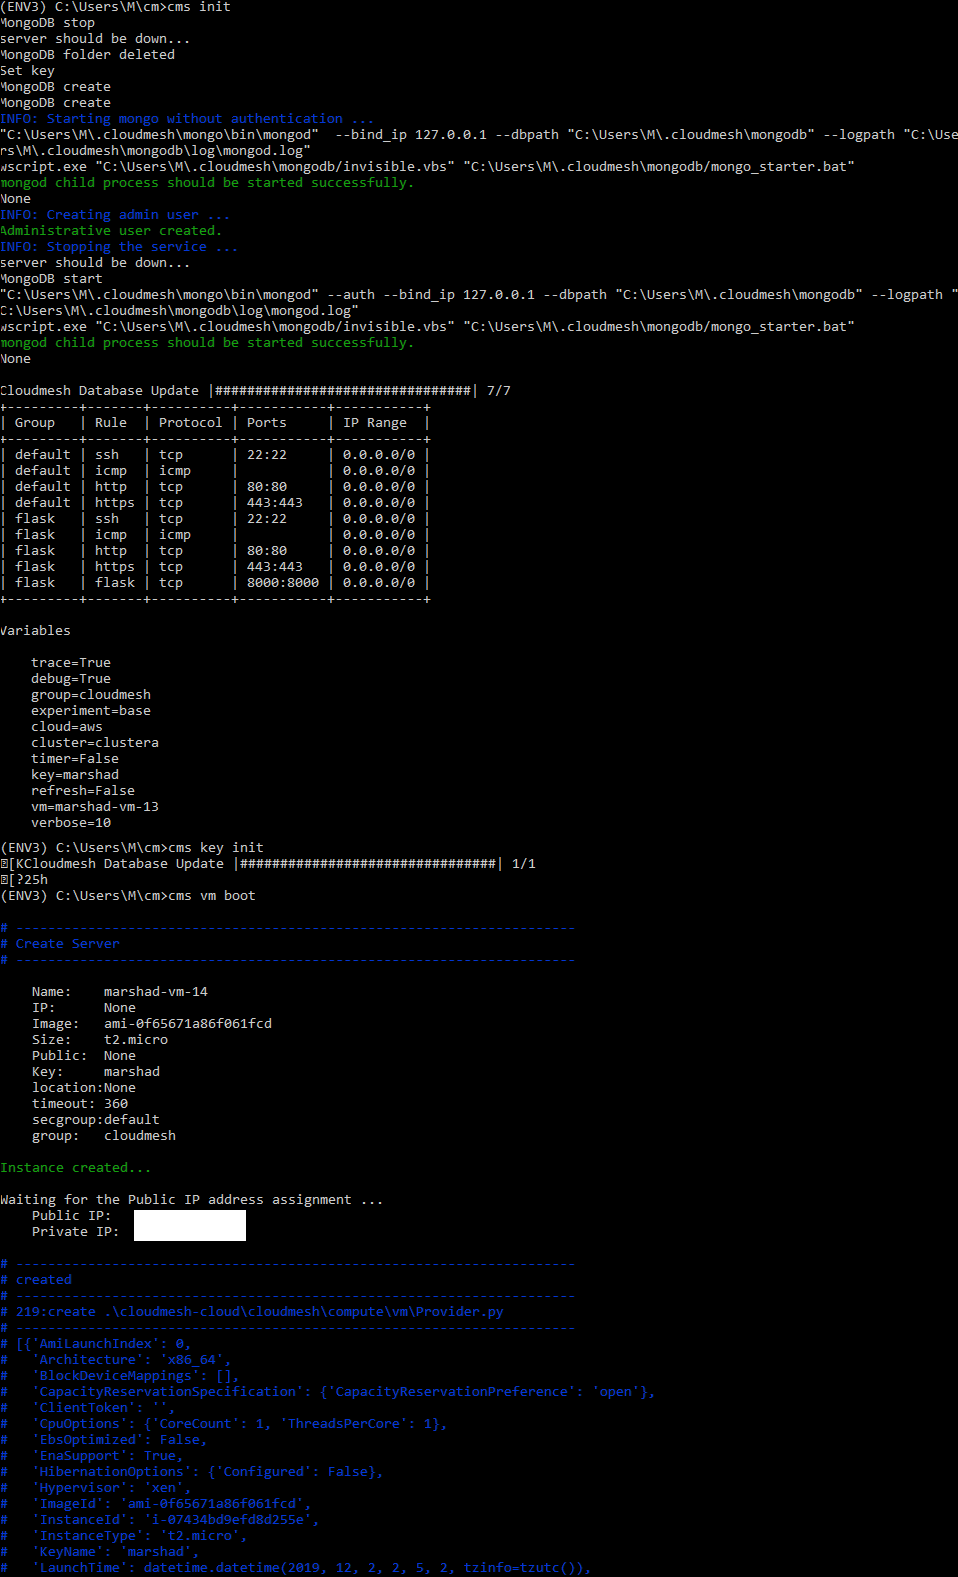
Check the status of the vm by executing the following:
cms vm list --refresh

AWS Configuration: vm list
Now test stopping the vm. Note that you may need to give it a minute or two before you refresh the vm list to validate Status=stopped.
cms vm stop VMINSTANCENAME
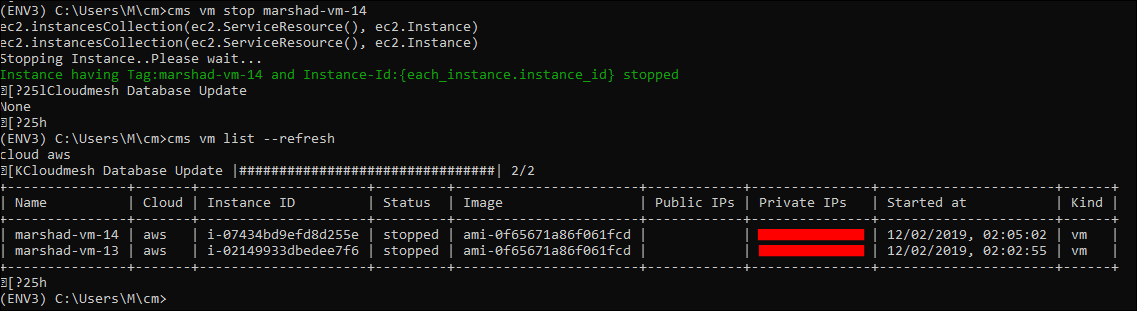
AWS Configuration: vm stop
Now test terminating the vm. (Note the example provided if you are attempting run commands against multiple vm’s.)
cms vm delete VMINSTANCENAME
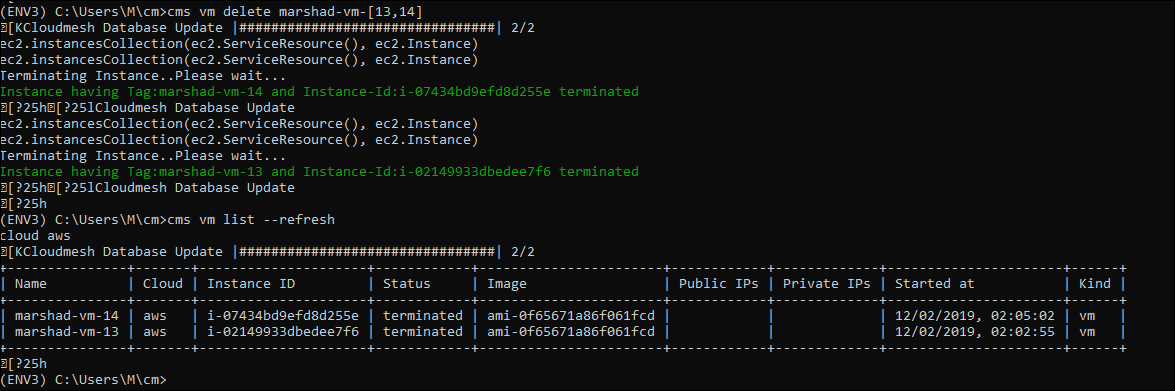
AWS Configuration: vm delete
[x] TODO: Aws EC2 account. Describe here if there is anything to be done for accessing EC2
Storage Service
AWS S3 and Credentials Set up:
Create an AWS account following the instructions above
Select S3 service in AWS Management Console
In the S3 service, create a bucket. (Please remember the bucket name and bucket region)
Select IAM service in AWS Management Console
In the IAM service, Add a new user with “Programmatic access” access type and “S3All” Permission
Remember the user “Access key ID” and “Secret access key”
Fill in the following info into the ~/.cloudmesh/cloudmesh.yaml file under “cloudmesh.storage.aws.credentials” section
bucket
access_key_id
secret_access_key
region
References
Additional information about the services can be found at:
Open Distribution for Elastic Search, https://aws.amazon.com/?nc2=h_lg
Amazon EC2, https://aws.amazon.com/ec2/?nc2=h_m1
Amazon S3, https://aws.amazon.com/s3/?c=23&pt=1