:orphan:
Marvelmind
Introduction to the Marvelmind Positioning System
The Marvelmind Indoor Navigation System is an indoor navigation system designed used for providing location data to autonomous robots, vehicles (AGV) and copters. The precision is rated to be +-2cm.
The following requirements need to be met to run it:
- One Windows PC with Windows 10 to configure the beacon.
- Antivirus software to assure the software you download and install is virus free.
- Marvelmind HW 4.5 or 4.9 package and additional beacons as needed.
In our setup we use the PC to configure the beacons, but conduct all interaction with them thorugh a Mac with Mac OSX with MacOS Sierra version 10.12.5.
Marvelmind Environment Setup
Go to the marvelmind main page, on your Windows PC, at
Scroll down to the Dashboard SW v5.31 + Beacon SW v5.63 + Modem SW 5.63 hyperlink, click it, and a download should start (the version numbers may change based on updates by Marvelmind). Once the zip file is finished downloading, make sure to run a windows defender virus check by rightclicking on the zip file and clicking "Scan with windows defender". After making sure that there is no malware in the zip file, unzip it, and then unzip the dashboard folder, and the firmware folder for your particular beacon, either HW4.5 or HW4.9, included in the package.
Now, go back to
and scroll down to the STM driver column and download the zip file in it. Once the download has finished, unzip the file, and install the STM driver for your particular windows computer. This should only be done once, and it allows you to update your beacons and modems.
- If you would like to go straight to the beacon and modem firmware update instructions, you can Scroll past Figure 13 at the bottom of this manual.
Now, you can start using the dashboard file that you unzipped earlier.
Once you open the dashboard, you should be presented with an error, as shown in Figure 1.
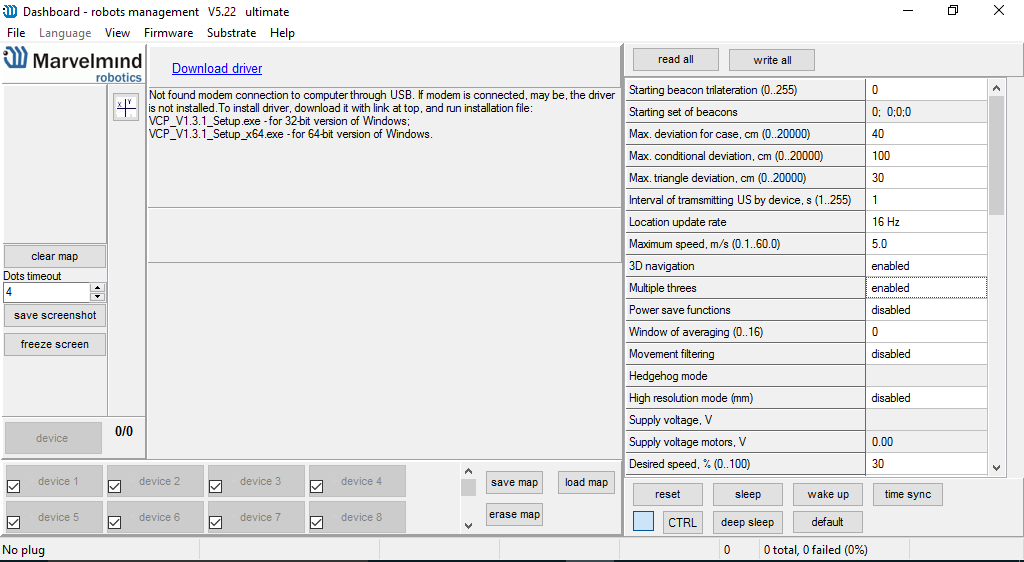
Figure 1: Marvelmind error if modem is not plugged in.
You may get the error shown in Figure 1 if you have not plugged in the Marvelmind modem into your Windows PC yet. The modem is shown in Figure 2. Without this modem plugged into your Windows PC with a microUSB cable, you will not be able to use the Marvelmind dashboard to set up your Marvelmind navigation environment.
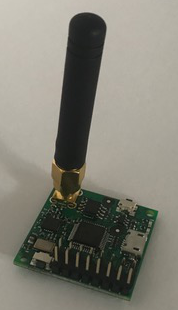
Figure 2: Marvelmind modem.
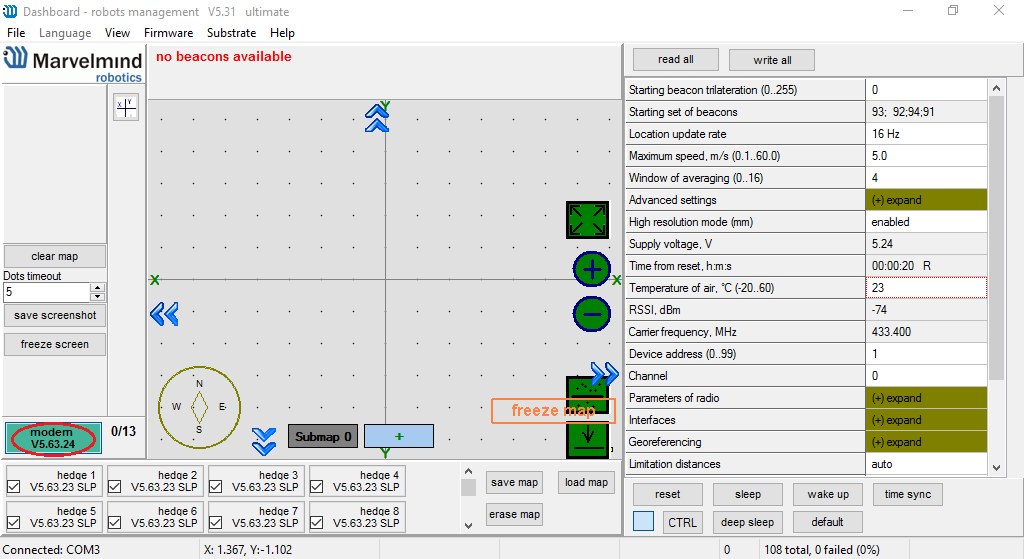
Once the modem is plugged into the Windows PC using a microUSB cable, with the Marvelmind dashboard running, the error should go away. You will be presented with a coordinate plane, as demonstrated in Figure 3. There should be an error at the top left corner of the coordinate plane stating that not enough beacons are available. This error is due to the fact that you have not turned on enough beacons required to track movement with the dashboard environment. You will need at least two beacons. You now need to set up stationary and mobile beacons, as needed, to fit your navigational needs.
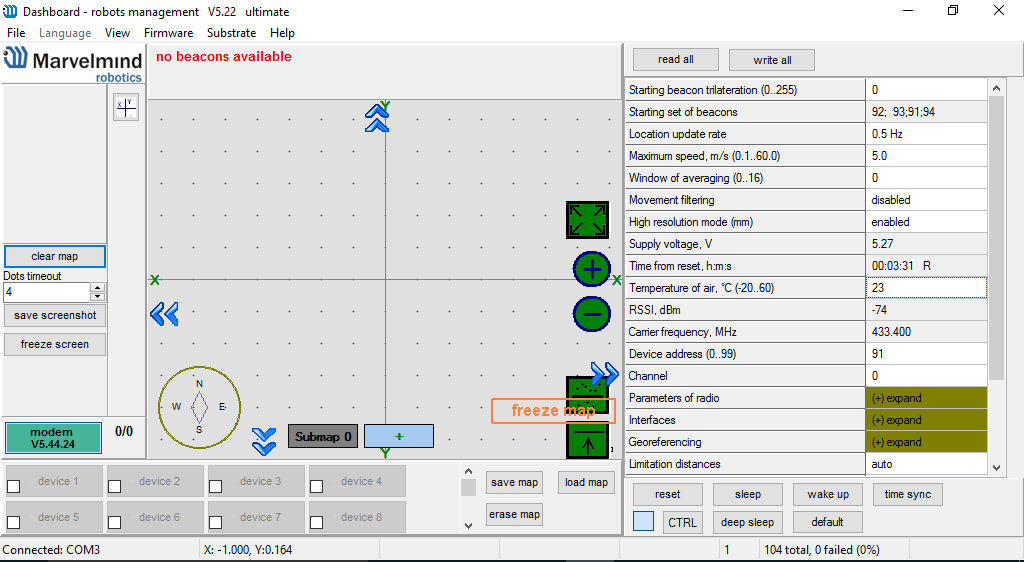
Figure 3: Marvelmind coordinate plane.
Marvelmind Stationary Beacon Setup
Marvelmind uses stationary beacons in order to track its mobile beacons. Any Marvelmind beacon, Figure 4, can be assigned the duty of being stationary or mobile, and it is up to you to decide how many beacons you would like to set up as stationary, or tracker, beacons. The larger the space you operate your environment in, the larger the amount of tracker beacons you should use. Keep in mind, the stationary beacons need to be a good distance apart, 3 meters is a good measure, and their recommended height is at least 1.85 meters. Therefore it is a good idea to mount the stationary beacons on stands of heights equal to or greater than 1.85 meters using velcro tape, as shown in Figure 5. In contrast to the original marvelmind documentation, we found that, in our room, the beacon mounted on the ceiling does not result in better positioning. Hence, we removed it and only run four stationary beacons in a square-shaped setup. This may vary based on your environment.
![]()
Figure 4: Marvelmind beacon.
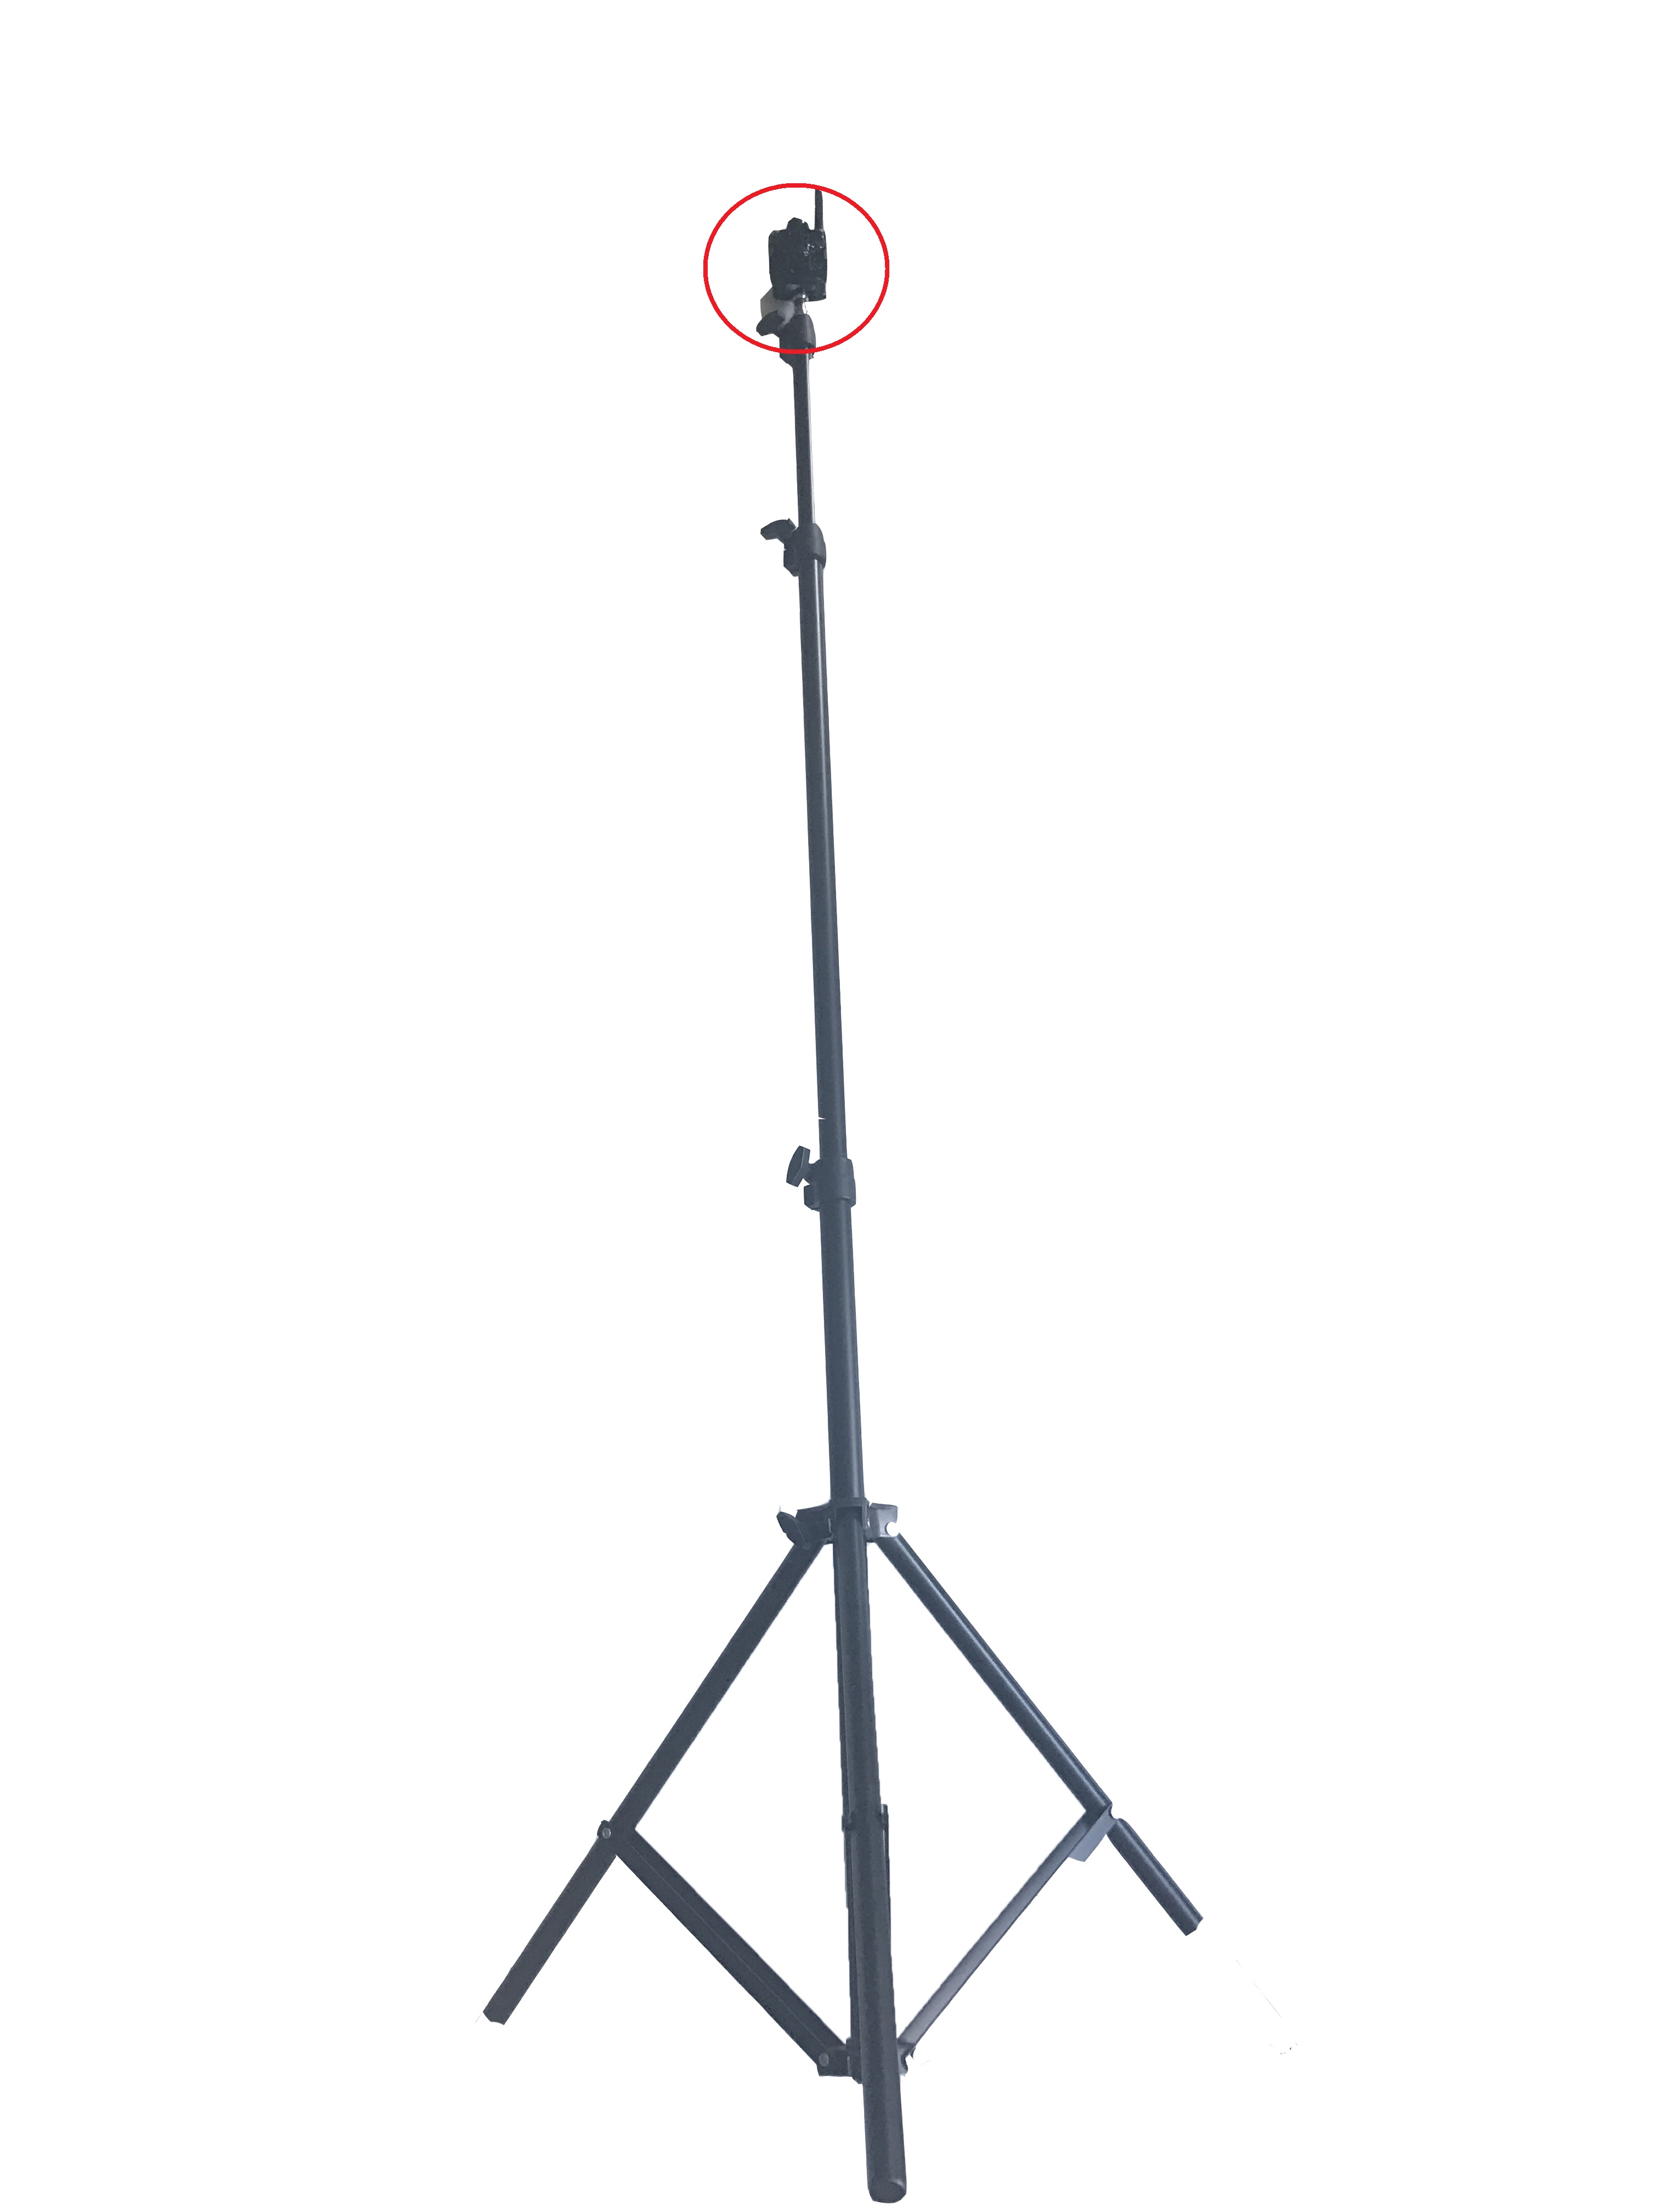
Figure 5: Stand used to hold Marvelmind stationary beacon in place above recommended height. Circled: Marvelmind stationary beacon.
Now that you have set up your beacons on top of the stands, turn them on. The beacons will start showing up on the Marvelmind dashboard, they take approximately 8 seconds to wake up, as green circles with random device addresses assigned to them, consisting of numbers between 1 and 99, as shown in Figure 6. Keep track of the numbers Marvelmind assigns to each beacon. We recommend that you rename them to your liking. You can assign one of the beacons the coordinates (0,0,Z), Z being the height of the beacon, by making it the starting beacon. The menu to the right of the dashboard interface, Figure 7, has an option labeled starting beacon tritalateration. You can type the device address number of whichever beacon you would like to use as your point (0,0, Z) in terms of the x and y value, respectibly. The other beacons will now remap themselves around this beacon on the dashboard interface.
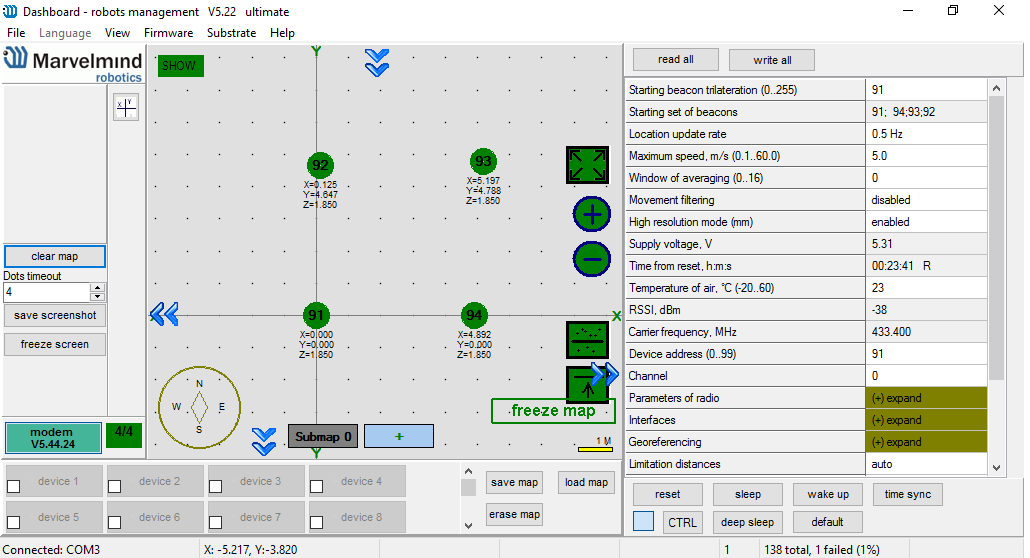
Figure 6: Marvelmind beacons as green circles.
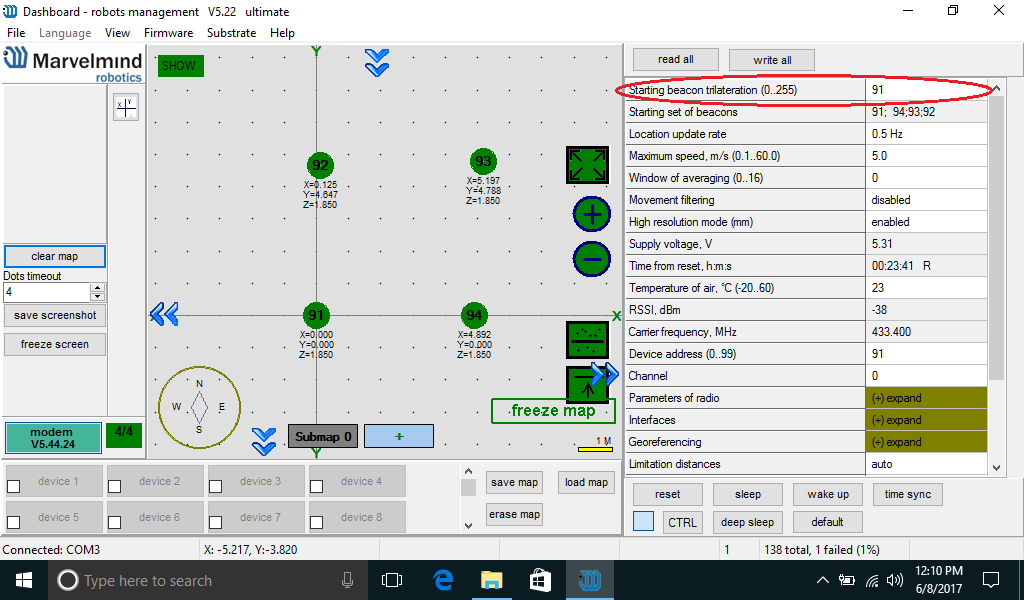
Figure 7: First cell shows starting beacon trilateration.
At the bottom of your dashboard there is a list of all 99 beacon addresses, as shown in Figure 8. Find each beacon the device address number of which you would like to change, and click on it and the menu presented to you on the right side of the dashboard interface should change to look like Figure 9. In this new menu, click the Device address option and type in whatever number, between 1 and 99, that you would like to assign to this specific beacon, as long as another active beacon does not have it. The beacon should now change device addresses. Do this for as many beacons as you like.
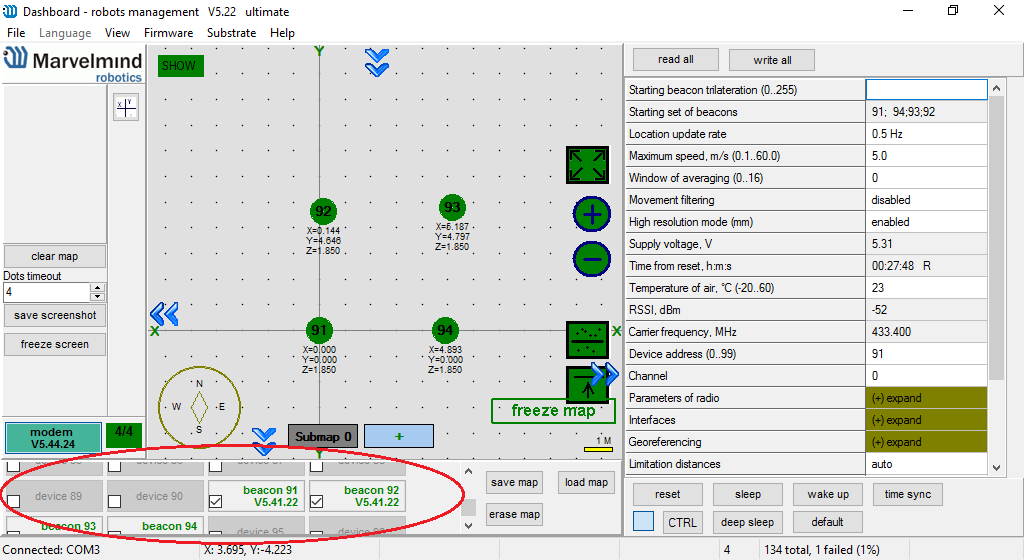
Figure 8: List of beacons circled red.
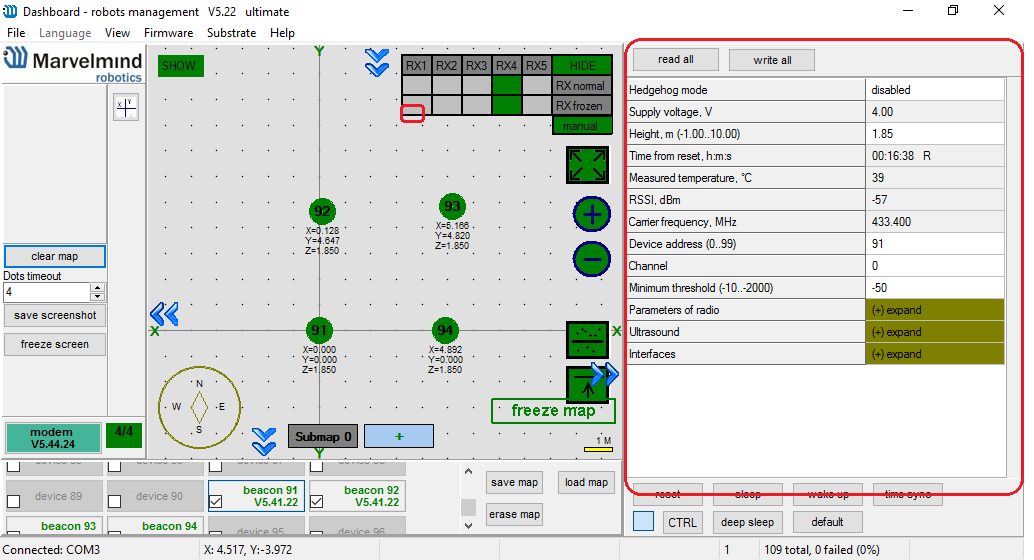
Figure 9: Menu you are presented with once you click a specific beacon to edit its settings.
Note: You may return to the modem view at any time by clicking the green rectangle button on the left side of the dashboard which reads modem VX.XX.XX, the "X" taking place of the firmware version number of your beacon, ours being V5.44.24 at the time this manual was written.
Now that you have assigned your beacons device addresses to your liking and have picked a starting beacon, you can click the option freeze map at the bottom right corner of the coordinate plane, Figure 10, and lock your beacons as stationary on the Marvelmind screen. Now you can move on to introducing mobile beacons that will be picked up by these stationary beacons to your environment.
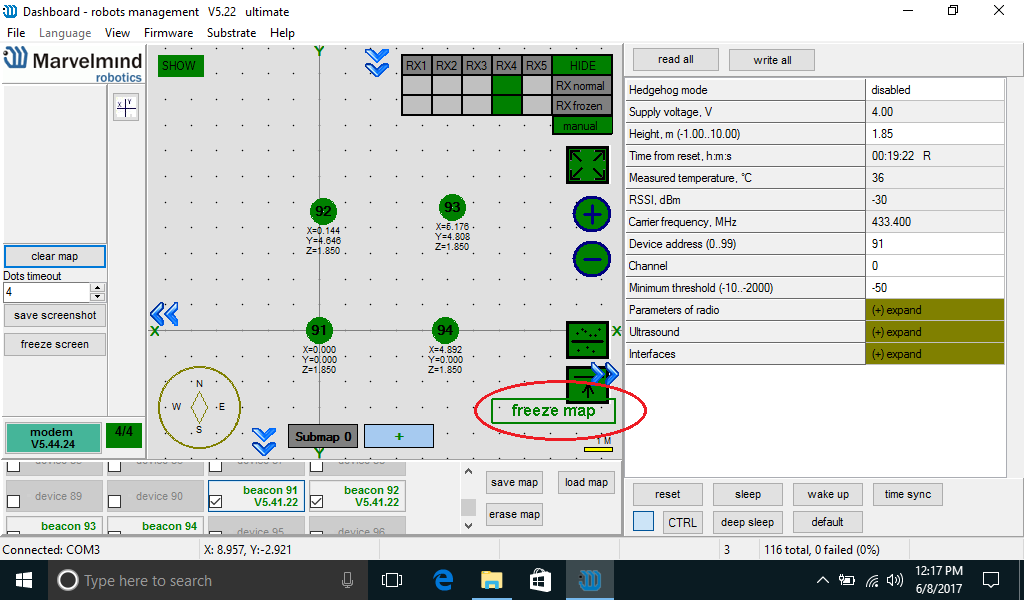
Figure 10: "Freeze map" option circled red.
###Marvelmind Mobile Beacon Setup
Once you have frozen the stationary beacons, you can now start introducing mobile beacons to Marvelmind. These mobile beacons can be mounted on whatever object you are trying to measure the movement of using Marvelmind, such as a robot. However you should make sure they are not obstructed much. In order to introduce a beacon as a mobile beacon, turn a beacon, or as many as you would like, on (make sure the stationary beacons are on also). Now the mobile beacon will show up green just like the other beacons on the dashboard. Find the beacon number in the list shown in Figure 9 of this newly started beacon, renumber it like demonstrated earlier, or keep the randomly assigned address, if that's your preference. Click on the beacon number in the list and the menu on the right should change again, as demonstrated in Figure 8. Now, there should be an option at the top of this menu labeled Hedgehog mode and it should be disabled. Click on it so it says enabled. The beacon should now turn blue on the coordinate plane, as shown in Figure 11.
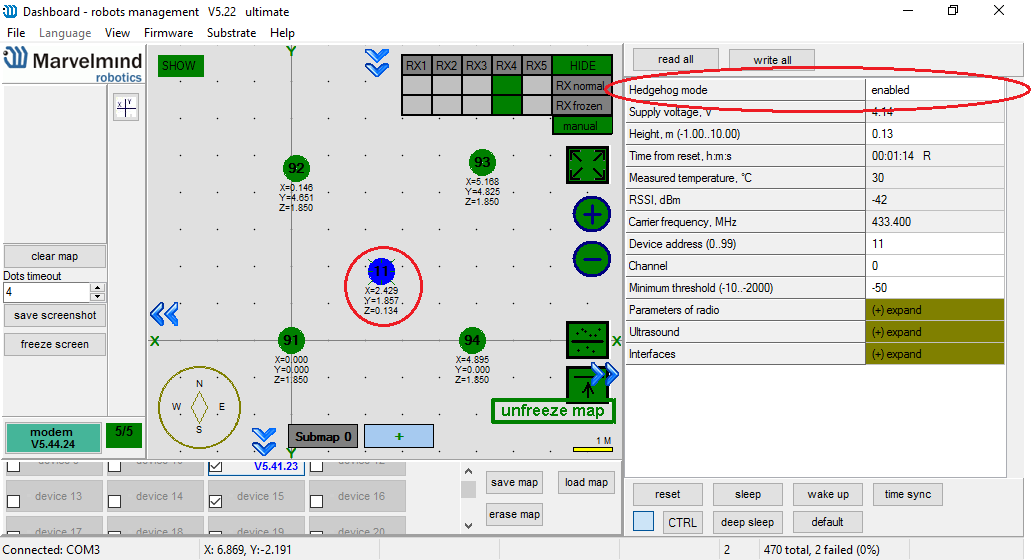
Figure 11: Hedgehog beacon and its setting.
You can now move the beacon around as it is mobile, while the frozen beacons remain stationary. Now, the Marvelmind python program, which you will find in the dashboard package that you downloaded from google docs, can be used to track the coordinates of this beacon, essentially tracking whatever object it is mounted on. If you are mounting other objects on top of the device you are tracking in addition to the beacon, you will need holders for mobile beacons that allow the beacons to be mounted higher up than everything else mounted on the device, so that they do not block the sound recepters on the beacons, since that's the stationary beacons' way of receiving feedback from the mobile ones. Figure 12 shows a selfie stick that can be purchased from any local store that seems to function very well as a holder for the beacons. Just make sure the beacon is not too far into the holder, because the sound recepters may become blocked off.
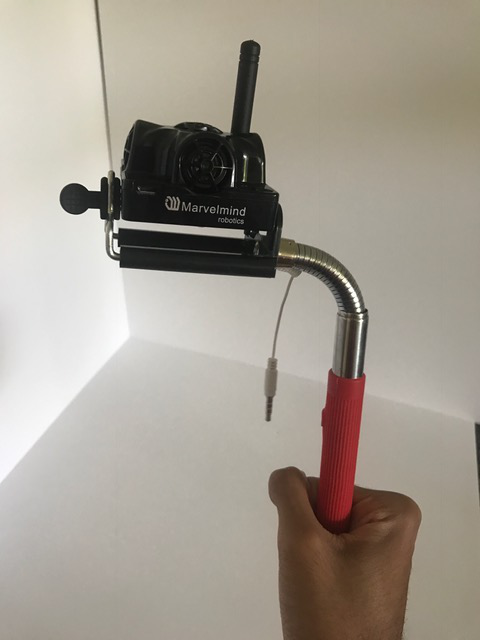
Figure 12: Selfie stick used as a hedgehog beacon holder (note how the sound receptors are elevated above the grip of the beacons).
Programming in Python
In order to get coordinates of the beacons from the python program.
Unplug the modem from the Windows PC after you have frozen your
stationary beacons and introduced the mobile beacon(s). Plug it into
your mac computer. Run the marvelmind.py program included in the
program package that you can download, along with example.py for
reference on using it,
here,
by typing python marvelmind.py into Terminal. If there is an error,
open the marvelmind.py program in your python editor and scroll to
line 175, which should look like this
m = MarvelmindHedge(tty='/dev/tty.usbmodemFD121') # for macOS
Replace tty.usbmodemFD121 with the usb tty for your computer
assigned to that modem.
TODO: cms robot has a probe command that automatically discovers the USB/tty. I SUGGEST DOCUMENTING HOW TO USE THAT INSTEAD OF MAKING IT SO COMPLICATED WHILE NOT USING IT. see Probe in cloudmesh.robot
Once this issue is resolved, the program should start outputting coordinates of the remote beacons, as shown in Figure 13. You can now move the remote beacon(s) around and the marvelmind.py program will pick up on the movement, even if the dashboard on the Windows PC says there is no connection. You can now access these coordinates into your python programs.
(ENV3) Ss-MacBook-Pro:tests username$ python marvelmind.py
Hedge 0: X: 0, Y: 0, Z: 0 at    time T: 0.00
...
Hedge 0: X: 0, Y: 0, Z: 0 at time T: 0.00
Hedge 18: X: 200.20, Y: 229.30, Z: 12.80 at time T: 9.71
...
Hedge 18: X: 199.30, Y: 235.40, Z: 12.90 at time T: 13.71
...
Hedge 18: X: 199.30, Y: 235.50, Z: 12.90 at time T: 15.71
Hedge 18: X: 199.30, Y: 235.50, Z: 12.90 at time T: 15.71
Hedge 18: X: 199.30, Y: 235.50, Z: 12.90 at time T: 15.71
Hedge 18: X: 199.30, Y: 235.50, Z: 12.90 at time T: 15.71
Figure 13: Marvelmind coordinates presented as units of (X,Y,Z, and time elapsed since the program has been running) in MacOS Terminal. Note how marvelmind.py takes a little over the aforementioned 8 seconds to start picking up on coordinates, since that's how long it takes the mobile beacon to wake up.
Marvelmind Updates
Updating Marvelmind modem.
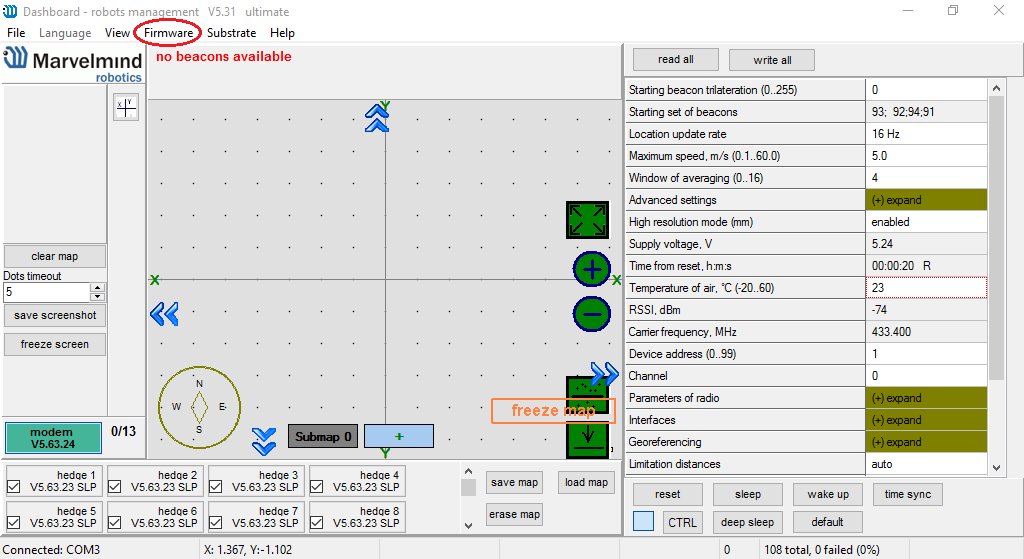
First, open the marvelmind dashboard with the marvelmind modem plugged in to a Windows PC. You should be presented with a screen that looks likes this:
As you notice, circled at the bottom left of the dashboard, in red, is the version number of the modem. If the modem is not on the latest update, according to Marvelmind.com, and you wish to be on the latest update, click on the firmware tab at the top left of the dashboard, as circled in this figure:
Navigate to the SW folder that you unzipped upon installation, and click on the folder labeled after your modem version, either 4.5 or 4.9. Then find the modem firmware zip file, unzip it, and double click the hex file inside and you should be returned to the dashboard, as shown:
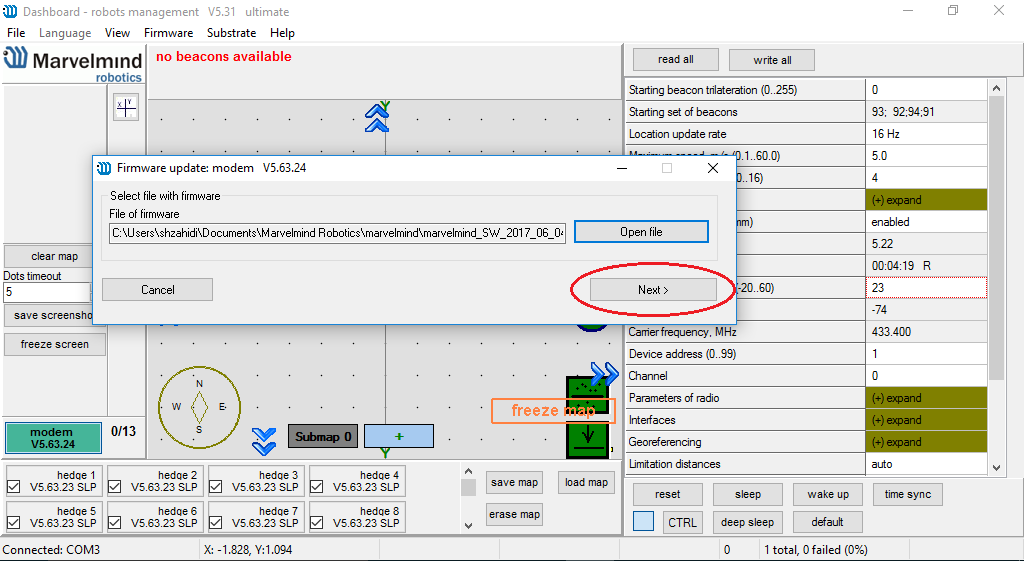
Click next, and the update should start. Once the update has concluded, close the dashboard.
Updating Marvelmind beacons
First, open the marvelmind dashboard with the marvelmind beacon plugged in to a Windows PC. You should be presented with a screen that looks likes this:
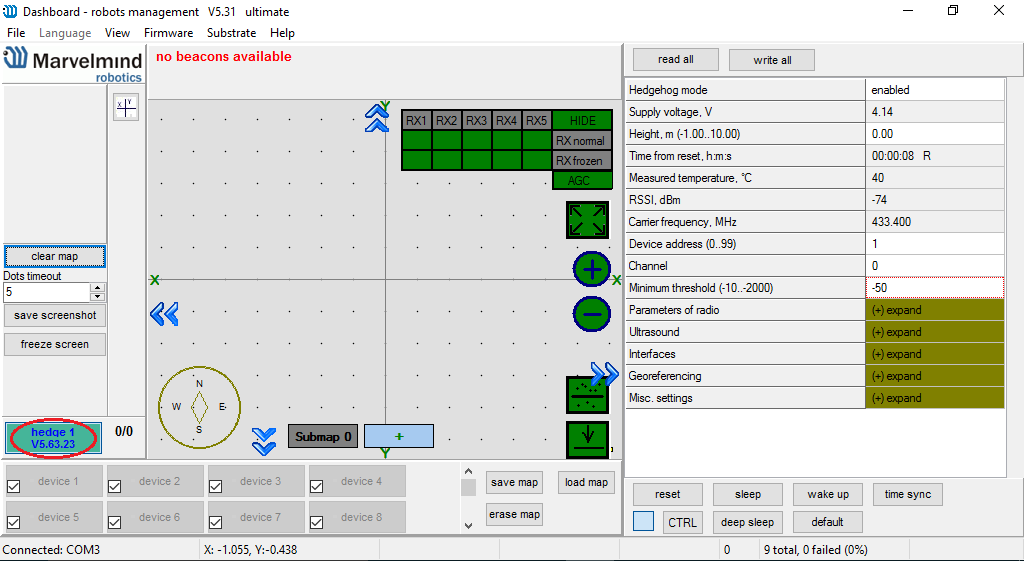
As you notice, circled at the bottom left of the dashboard, in red, is the version number of the beacon. If the beacon is not on the latest update, according to Marvelmind.com, and you wish to be on the latest update, click on the firmware tab at the top left of the dashboard, as circled in this figure:
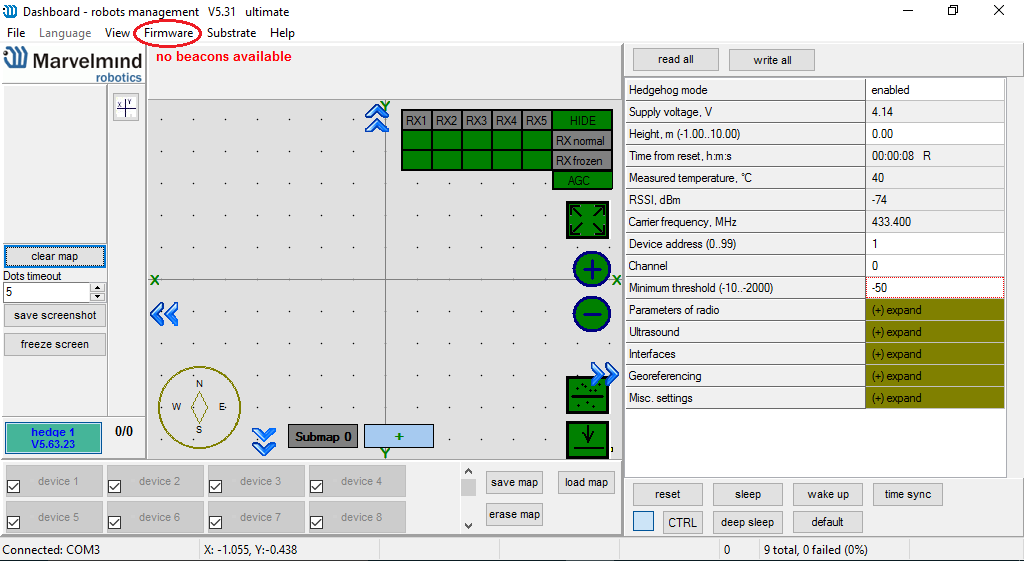
Navigate to the SW folder that you unzipped upon installation, and click on the folder labeled after your modem version, either 4.5 or 4.9. Then find the beacon firmware zip file, unzip it, and double click the hex file inside and you should be returned to the dashboard, as shown:
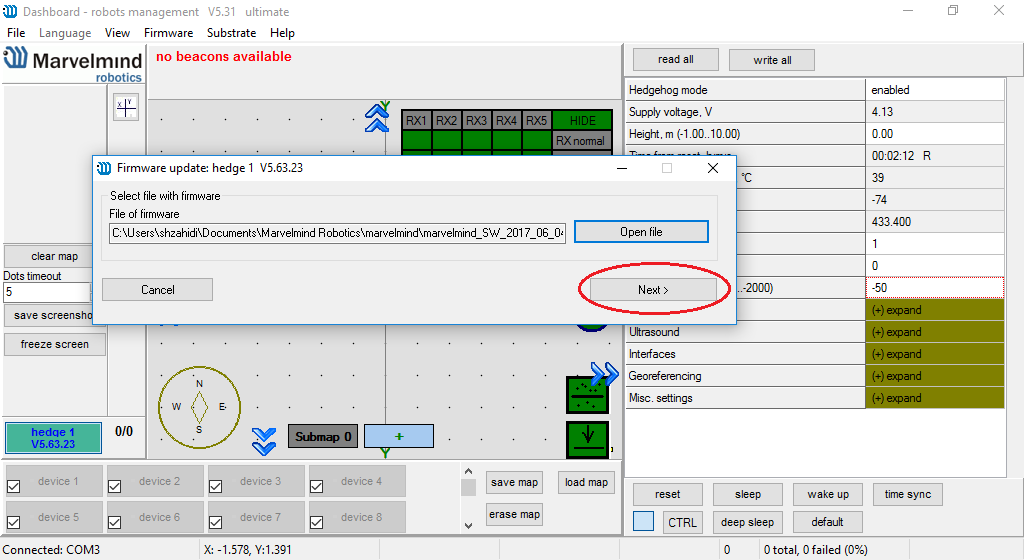
Click next, and the update should start. Once the update has concluded, close the dashboard.