Chef
Overview
This lesson will introduce you to Chef, a configuration management tool written in Ruby and Erlang.
Tip
Duration: 1 hour
Description
Chef is an open source infrastructure automation software that manages
installation and configuration of your software with its Ruby code Recipe
and Cookbook. Recipe is a description of how your servers should be set
up with your software and Cookbook is a set of recipes. If you install an
Apache web server or a MySQL database using Chef, you may download and use
existing recipes from the Chef server (SuperMarket). You can also write your
own recipes with your preference about configuration and installation. In most
cases, a single recipe is not enough to configure and install software. Chef
provides a collection of related recipes named Cookbook, and you use
Cookbooks to install software with relevant tools.
This lesson gives you an introduction of Chef including the following topics:
- Installation of Chef
- Example I: Apache2 Installation
- Write the first recipe
Installation Chef
This lesson is based on FutureSystems which means you create a VM instance on India OpenStack and install Chef on top of it. If you prefer to use other virtual environments, we recommend to use Vagrant and VirtualBox.
We assume you use an OpenStack instance on FutureSystems.
Note
If don’t know how to launch a new instance? See here
root Access
We will install Chef and other software using root account. Using root
account means that you have a permission to use entire system resources without
any restriction. Since this lesson includes a couple of examples using Chef, we
strongly recommend to use OpenStack VM instance on FutureSystems. DON’T try to
install Chef on your local machine or on the india.futuresystems.org host.
Use a benefit of VM instance which you can easily delete and re-create a new
one.
On a VM instance, simply run a switch user command:
ubuntu@chef:~$ sudo su -
If you see root label, you are in root account on your machine:
root@chef:~#
One Line Installation
Opscode provides one-line installation script. We use it to simplify downloading and setting Chef.:
curl -L https://www.opscode.com/chef/install.sh | bash
Version Check
Now we expect to use chef-client command.:
chef-client -v
The tested version of Chef is 12.0.3.
You may have a higher version of Chef. We use chef-client --local-mode or chef-solo which is a light version of a
chef-client command that uses Cookbooks without communicating with Chef
server. Chef has a few main components including chef-client and
chef-server. For more detail, see here: Chef Components
Chef Development Kit (ChefDK)
To write a Cookbook and use other tools, we need Chef Development Kit.
On Ubuntu 14.04 with root account, run:
wget https://opscode-omnibus-packages.s3.amazonaws.com/ubuntu/12.04/x86_64/chefdk_0.4.0-1_amd64.deb
dpkg -i chef*.deb
If you can’t download the package file, you probably have a newer version of ChefDK. Go and checkout the new release here: https://downloads.chef.io/chef-dk/ubuntu/
The expected output is:
Selecting previously unselected package chefdk.
(Reading database ... 67885 files and directories currently installed.)
Preparing to unpack chefdk_0.4.0-1_amd64.deb ...
Unpacking chefdk (0.4.0-1) ...
Setting up chefdk (0.4.0-1) ...
Thank you for installing Chef Development Kit!
Default chef-repo Repository
You start with a Chef Repository to manage cookbooks, roles, config files and other artifacts. We create a base Chef repository with the following command:
chef generate repo ~/chef-repo
If this doesn’t work, you can try other commands to setup a base repository:
wget http://github.com/opscode/chef-repo/tarball/master
tar -zxf master
mv *chef-repo* ~/chef-repo
rm master
Configuration for Knife
knife is a command-line tool that provides an interface between a local chef-repo and the Chef server. knife helps users to manage Cookbooks and recipes We need to setup the .chef directory which is used to store validation key files and the knife.rb file.:
mkdir ~/chef-repo/.chef
echo "cookbook_path [ '$HOME/chef-repo/cookbooks' ]" > ~/chef-repo/.chef/knife.rb
Now, your cookbook directory is at $HOME/chef-repo/cookbooks. The default
directory was /var/chef/cookbooks/.
First Cookbook
If you create a new cookbook, you need following instructions. We will
start an Apache web server with a new cookbook named
first-cookbook:
knife cookbook create first-cookbook
You see:
** Creating cookbook first-cookbook in /root/chef-repo/cookbooks
** Creating README for cookbook: first-cookbook
** Creating CHANGELOG for cookbook: first-cookbook
** Creating metadata for cookbook: first-cookbook
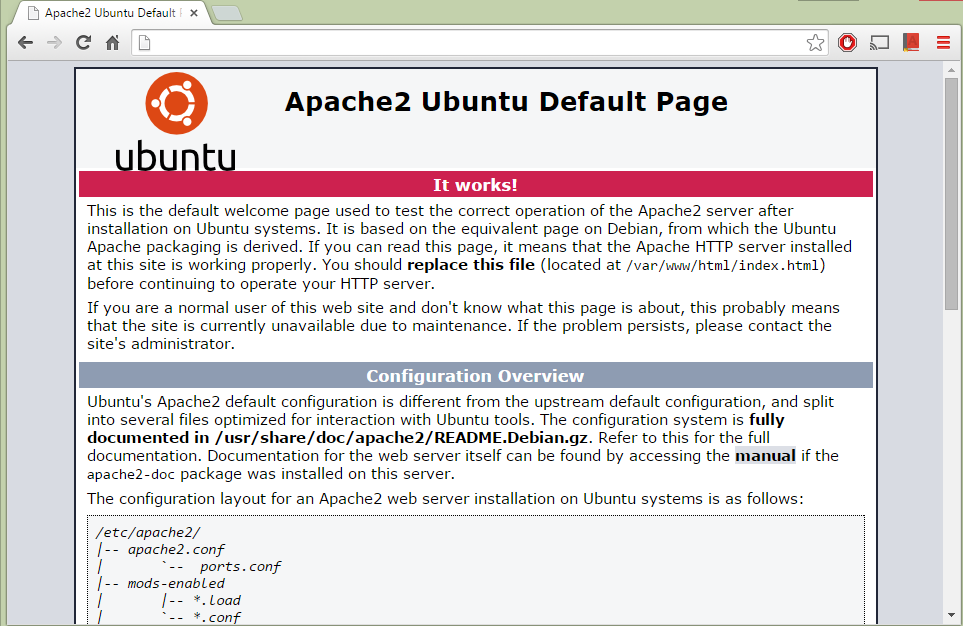
Installation of Apache Web Server
We configure our first-cookbook with an Apache web server in this lesson. It
includes:
- Download Apache2 Cookbook
- Update metadata.rb
- Update default.rb
- Use client.rb for
chef-client --local-mode - Use web.json for run_list
Download Apache Cookbook
First, We need to download Apache2 and apt.:
knife cookbook site download apache2
knife cookbook site download apt
You may see:
Downloading apache2 from the cookbooks site at version 3.0.1 to /root/chef-repo/apache2-3.0.1.tar.gz
Cookbook saved: /root/chef-repo/apache2-3.0.1.tar.gz
Uncompress the download file to your cookbooks:
tar xvzf apache2-3.0.1.tar.gz -C ~/chef-repo/cookbooks
tar xvzf apt-2.7.0.tar.gz -C ~/chef-repo/cookbooks
You may have different versions of Apache2 and apt Cookbooks. Please use your filename, if you have different one
Update metadata.rb
The metadata.rb file contains information about cookbooks, we update this
file to tell Chef about required items. We use a depends setting to tell
required items in the cookbook.:
echo 'depends "apache2"' >> ~/chef-repo/cookbooks/first-cookbook/metadata.rb
For more information about metadata.rb:
https://docs.chef.io/cookbook_repo.html#metadata-rb
Update default.rb
We include apache2 as a default recipe.
Open a
~/chef-repo/cookbooks/first-cookbook/recipes/default.rbvia nano or viAdd the following lines:
include_recipe "apache2"

apache_site "default" do
  enable true
end
Use of client.rb
A client.rb file is used to specify the configuration details for chef-client.
Let’s create a new client.rb file.:
echo -e "file_cache_path \"$HOME/chef-client\"\ncookbook_path \"$HOME/chef-repo/cookbooks\"" > client.rb
The client.rb must look like this:
file_cache_path "/root/chef-client"
cookbook_path "/root/chef-repo/cookbooks"
For more information about client.rb, see here:
https://docs.chef.io/config_rb_client.html
Use of web.json
The web.json will be used to load attributes from a JSON file. We will use
-j option in chef-client command to load this file.:
echo -e '{\n "run_list": [ "recipe[apt]", "recipe[phpapp]" ]\n}' > web.json
The web.json must look like this:
{
  "run_list": [ "recipe[apt]", "recipe[phpapp]" ]
}
Start chef-client
Let’s start a Chef client in a local mode. We will use configurations that
we’ve made in client.rb and web.json.:
chef-client --local-mode -c client.rb -j web.json
Update on Security Group
If you are running on a VM instance, you need to have your HTTP port (80) open.
Go back to india.futuresystems.org. You can’t update your security group of
your VM instance on the VM instance.
Be on india.futuresystems.org:
[albert@i136 ~]$
Create a new Security Group for HTTP port:
nova secgroup-create web HTTP-80
(expected output)
+-----+------+-------------+
| Id  | Name | Description |
+-----+------+-------------+
| 1   | web  | HTTP-80     |
+-----+------+-------------+
Add a rule:
nova secgroup-add-rule web tcp 80 80 0.0.0.0/0
(expected output)
+-------------+-----------+---------+-----------+--------------+
| IP Protocol | From Port | To Port | IP Range  | Source Group |
+-------------+-----------+---------+-----------+--------------+
| tcp         | 80        | 80      | 0.0.0.0/0 |              |
+-------------+-----------+---------+-----------+--------------+
Apply a
webgroup to your VM:nova add-secgroup [VM NAME] web
I have
chef-albertVM instance, so I rannova add-secgroup chef-albert web
Floating IP Address Allocation
Since your VM may not have a public IP address, we assign one. This is also be
done on india.futuresystems.org
Be on India.futuresystems.org:
[albert@i136 ~]$
Create a new IP:
nova floating-ip-create ext-net
(expected output)
+--------------------------------------+-----------------+-----------+----------+---------+
| Id                                   | IP              | Server Id | Fixed IP | Pool    |
+--------------------------------------+-----------------+-----------+----------+---------+
| 2342222f-bd0b-47b1-959f-bfce60488b90 | 149.333.222.111 | -         | -        | ext-net |
+--------------------------------------+-----------------+-----------+----------+---------+
Assign the IP to your VM:
nova add-floating-ip [VM NAME] [IP ADDRESS]
I have
chef-albertVM instance, so I assign the IP:nova add-floating-ip chef-albert 149.333.222.111
Acknowledgement
This lesson is adapted from Getting started with Chef