4.5.5. Raspberry PI 3
4.5.5.1. Raspbery PI for IOT (Gregor)
4.5.5.2. Hardware
see hardware page we have
4.5.5.3. Installation
4.5.5.3.1. Erasing the SD Card
Before you can install an OS on your sd card, you must erase it and put it in the proper format.
- Insert your sd card into your micro-sd adapter and open Disk Utility with a spotlight search.
- In the Disk Utility, right click the name of the sd card and select erase.
- Name the sd card and format it as MS-DOS (FAT). Then click erase.
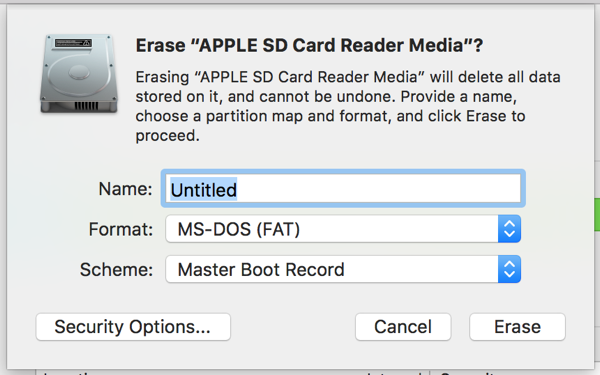
- If it does not erase the first time, try again. It sometimes takes multiple tries to work.
4.5.5.3.2. Installation of NOOBS
NOOBS is an OS that includes Raspian. The official descrition of Raspbian can be found here. It comes pre-packaged with many useful programming tools, and is easy to use.
- Download Noobs here. This will take around 30 minutes.
- Go to your Finder and in Downloads, search for NOOBS.
- Open the NOOBS folder and drag its contents into the sd card in the devices section. There should be 20 files and folders in the NOOBS folder. The download should take about 3 minutes.
- Once installed, eject the sd card and put it in your raspberry pi.
- Power up your raspberry and you will see a menu like this
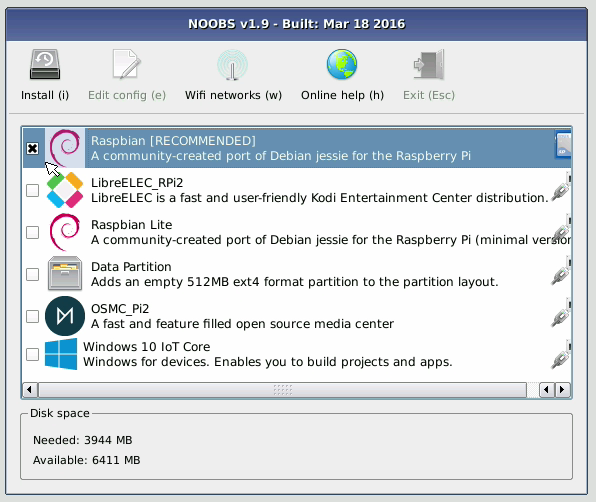
- Select Raspbian and click
Install (i)
4.5.5.3.3. Installation of Dexter
The version of Dexter that you want to flash onto your sd card is called Raspbian for Robots. This is a Raspbian based os that is compatible with the GrovePi board. It also comes with pre-installed Dexter Industries software.
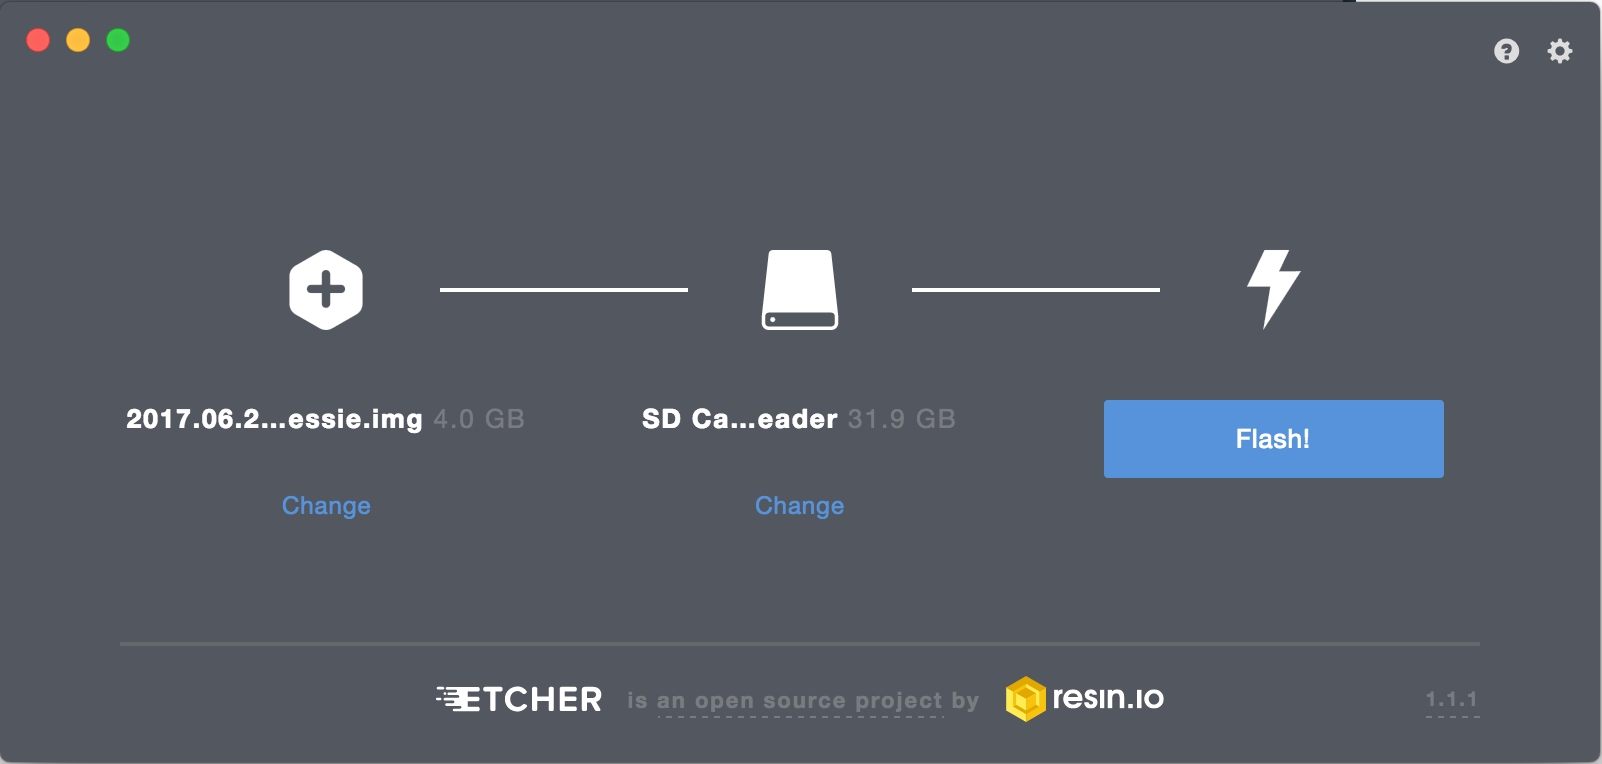
- First, download the most recent Dexter_Industries_jessie.zip file from here.
- Once the file has downloaded, uncompress it and insert your sd card into the micro-sd adapter.
- Open etcher and flash the uncompressed jessie image onto the sd card.
- Eject your sd card and insert it into your raspberry pi.
4.5.5.5. Update
The following are essential updates:
sudo apt-get update
sudo apt-get upgrade
sudo apt-get install emacs
dpkg -l > ~/Desktop/packages.list
pip freeze > ~/Desktop/pip-freeze-initial.list
The following are necessary for the scientific libraries, but they require lots of space. Our sd cards do not have enough space for them.
sudo apt-get install build-essential python-dev python-distlib python-setuptools python-pip python-wheel libzmq-dev libgdal-dev
sudo apt-get install xsel xclip libxml2-dev libxslt-dev python-lxml python-h5py python-numexpr python-dateutil python-six python-tz python-bs4 python-html5lib python-openpyxl python-tables python-xlrd python-xlwt cython python-sqlalchemy python-xlsxwriter python-jinja2 python-boto python-gflags python-googleapi python-httplib2 python-zmq libspatialindex-dev
sudo pip install bottleneck rtree
add to .bashrc
cd
git clone git://github.com/yyuu/pyenv.git .pyenv
echo 'export PYENV_ROOT="$HOME/.pyenv"' >> ~/.bashrc
echo 'export PATH="$PYENV_ROOT/bin:$PATH"' >> ~/.bashrc
echo 'eval "$(pyenv init -)"' >> ~/.bashrc
source ~/.bashrc

export PATH="/home/pi/.pyenv/bin:$PATH"
eval "$(pyenv init -)"
eval "$(pyenv virtualenv-init -)"

curl -L https://raw.githubusercontent.com/pyenv/pyenv-installer/master/bin/pyenv-installer | bash
source
4.5.5.5.1. Update to Python 3.6.1
4.5.5.6. change python version
- [https://linuxconfig.org/how-to-change-from-default-to-alternative-python-version-on-debian-linux] (https://linuxconfig.org/how-to-change-from-default-to-alternative-python-version-on-debian-linux)
Upgrade setuptools for pip install with
$ pip3 install --upgrade setuptools
Test your python version with
$ python --version
Check your python version alternatives
$ update-alternatives --list python
If python2.7 is not in your alternatives, add it with
$ sudo update-alternatives --install /usr/bin/python python /usr/bin/python2.7 1
If python3.4 is not in your alternatives, add it with
$ sudo update-alternatives --install /usr/bin/python python /usr/bin/python3.4 2
Now make python3.4 to your default with
update-alternatives --config python
Select python3.4
4.5.5.7. install 3.6.1
To install python 3.6.1, follow steps 1 and 2. This is unnecessary for our purposes.
4.5.5.8. install cloudmesh.pi
pip install cloudmesh.pi
pip install cloudmesh.pi with
$ git clone https://github.com/cloudmesh/cloudmesh.pi.git
$ cd cloudmesh.pi
$ sudo pip3 install .
see how we do this in osx/linux can this be done on raspbery? if not document update from source with altinstall
4.5.5.8.1. Install scientific Libraries
check if they are already installed we don’t have enough space to install all of these.
sudo apt-get install python-numpy python-matplotlib python-scipy python-sklearn python-pandas
4.5.5.8.2. cloudmesh.pi (Jon)
cloudmesh.pi is a repository for our GrovePi module classes. These classes require Dexter software, so you need to either have Raspian for Robots or download the software separately.
If you have Raspian for Robots, run the following in your terminal:
cd
mkdir github
cd github
git clone https://github.com/cloudmesh/cloudmesh.pi.git
cd cloudmesh.pi
sudo pip install .
4.5.5.8.3. Install VNC
describe how to install and configure VNC
4.5.5.9. Sensors (Jon)
4.5.5.9.1. Grove Sensors (Jon)
we already have draft
4.5.5.9.2. Non Grove Sensors (Jon)
Elegoo as example
4.5.5.10. Notes To integrates
4.5.5.10.1. Connecting
Hostnames:
- raspberrypi.local
- raspberrypi.
change
recovery.cmdline
forgot what these were:
runinstaller quiet ramdisk_size=32768 root=/dev/ram0 init=/init vt.cur_default=1 elevator=deadline
silentinstall runinstaller quiet ramdisk_size=32768 root=/dev/ram0 init=/init vt.cur_default=1 elevator=deadline
Connect the cable
You will see the activity LEDs flash while the OS installs. Depending on your SD-Card this can take up to 40-60 minutes.
4.5.5.11. VLC on OSX
Camera on Pi
sudo apt-get install vlc
https://www.raspberrypi.org/learning/getting-started-with-picamera/worksheet/
4.5.5.12. Streaming video
4.5.5.13. Linux Commandline
4.5.5.14. Enable SPI
go to the configuration interfaces and enable
4.5.5.15. RTIMUlib2
git clone https://github.com/RTIMULib/RTIMULib2.git cd RTIMULib
Add the following two lines to /etc/modules
i2c-bcm2708
i2c-dev
reboot
ls /dev/i2c-*
sudo apt-get install i2c-tools

sudo i2cdetect -y 1
         0  1  2  3  4  5  6  7  8  9  a  b  c  d  e  f
00:          -- -- -- -- -- -- -- -- -- -- -- -- --
10: -- -- -- -- -- -- -- -- -- -- -- -- -- -- -- --
20: -- -- -- -- -- -- -- -- -- -- -- -- -- -- -- --
30: -- -- -- -- -- -- -- -- -- -- -- -- -- -- -- --
40: -- -- -- -- -- -- -- -- -- -- -- -- -- -- -- --
50: -- -- -- -- -- -- -- -- -- -- -- -- -- -- -- --
60: -- -- -- -- -- -- -- -- 68 -- -- -- -- -- -- --
70: -- -- -- -- -- -- -- --

Pinout
create a file /etc/udev/rules.d/90-i2c.rules and add the line:
KERNEL=="i2c-[0-7]",MODE="0666"
note: does not work
instead we do
sudo chmod 666 /dev/i2c-1
Set the I2C bus speed to 400KHz by adding to /boot/config.txt:
dtparam=i2c1_baudrate=400000
reboot. In terminal change directories to
cd /home/pi/github/RTIMULib2/RTIMULib/IMUDrivers
and open
emacs RTIMUDefs.h
In RTIMUDefs.h change
#define MPU9250_ID 0x71
To
#define MPU9250_ID 0x73


cd /home/pi/github/RTIMULib2/RTIMULib
In terminal
mkdir build
cd build
cmake ..
make -j4
sudo make install
sudo ldconfig
4.5.5.16. Compile RTIMULib Apps
cd /home/pi/github/RTIMULib2/Linux/RTIMULibCal
make clean; make -j4
sudo make install
cd /home/pi/github/RTIMULib2/Linux/RTIMULibDrive
make clean; make -j4
sudo make install
cd /home/pi/github/RTIMULib2/Linux/RTIMULibDrive10
make clean; make -j4
sudo make install
cd /home/pi/github/RTIMULib2/Linux/RTIMULibDrive11
make clean; make -j4
sudo make install


cd /home/pi/github/RTIMULib2/Linux/RTIMULibDemo
qmake clean
make clean
qmake
make -j4
sudo make install
cd /home/pi/github/RTIMULib2/Linux/RTIMULibDemoGL
qmake clean
make clean
qmake
make -j4
sudo make install
4.5.5.17. Camera
.
sudo apt-get install libjpeg-dev libtiff5-dev libjasper-dev libpng12-dev
sudo apt-get install libavcodec-dev libavformat-dev libswscale-dev libv4l-dev

sudo apt-get install libxvidcore-dev libx264-dev

sudo pip install virtualenv virtualenvwrapper
sudo rm -rf ~/.cache/pip
copy into ~/.profile:
echo -e "\n# virtualenv and virtualenvwrapper" >> ~/.profile
echo "export WORKON_HOME=$HOME/.virtualenvs" >> ~/.profile
echo "source /usr/local/bin/virtualenvwrapper.sh" >> ~/.profile
source ~/.profile
mkvirtualenv cv -p python3
workon cv
comandline has (cv) in front
pip install numpy

wget -O opencv.zip https://github.com/Itseez/opencv/archive/3.1.0.zip
wget -O opencv_contrib.zip https://github.com/Itseez/opencv_contrib/archive/3.1.0.zip
unzip opencv.zip
unzip opencv_contrib.zip
4.5.5.18. Lessons and Projects
4.5.5.19. OTHER TO BE INTEGRATED
4.5.5.19.1. PI emulator on Windows
We have not yet tried it, but we like to hear back from you on experiences with