Comet Cloudmesh Tutorial
Goal: Install a Comet Virtual Cluster (VC) with Ubuntu 16.04, and run examples.
Time: ~1 to 2 hours.
Status of this Tutorial
Released for PEARC17 Tutorial - Using Comet’s Virtual Clusters
Overview
In this tutorial you will learn how to install a Comet virtual cluster. This includes manually install the front-end node from an attached OS ISO; running some configuration scripts to configure the front-end behaving as a NAT router, DHCP/TFTP and PXE-booting server; booting the compute nodes, which will be automatically installed and configured; and running some testing examples.
Requirements
- Experience with Linux system installation and management and, ideally, with HPC cluster management.
- Knowledge of Git, shell scripting, and Python.
- A Comet Virtual Cluster (vctNN) assigned to you.
Note
Scripts used in this tutorial are maintained at:
Install Cloudmesh Client tool to access Comet VC
First we will need to install the Cloudmesh Client to access and manage the VC
on Comet. The tool could be easily installed via pip install
cloudmesh_client, however installation of the dependent system libraries varies
from OS to OS. We provided a preconfigured VirtualBox appliance to ensure a
proper environment has been setup. Alternately, you can choose to install the
client tool directly on your machine.
Cloudmesh Client tool in PEARC17 VirtualBox Appliance
Step 1: Install Virtual Box
For convenience we will be using Ubuntu Xenial in this demo to install the Cloudmesh client on it.
Please make sure you have VirtualBox installed (downloads page). Make sure to download and install both the platform packages and Extension Pack.
Step 2: Download Comet PEARC17 VirtualBox Appliance
For PEARC17 we provide a pre-installed VirtualBox Appliance for download on the internal PEARC17 web server. You should be able to download the appliance file from…
…and remember the location where you downloaded it. You will need that location later.
After downloading the Comet PEARC17 VirtualBox Appliance locate it on your machine.
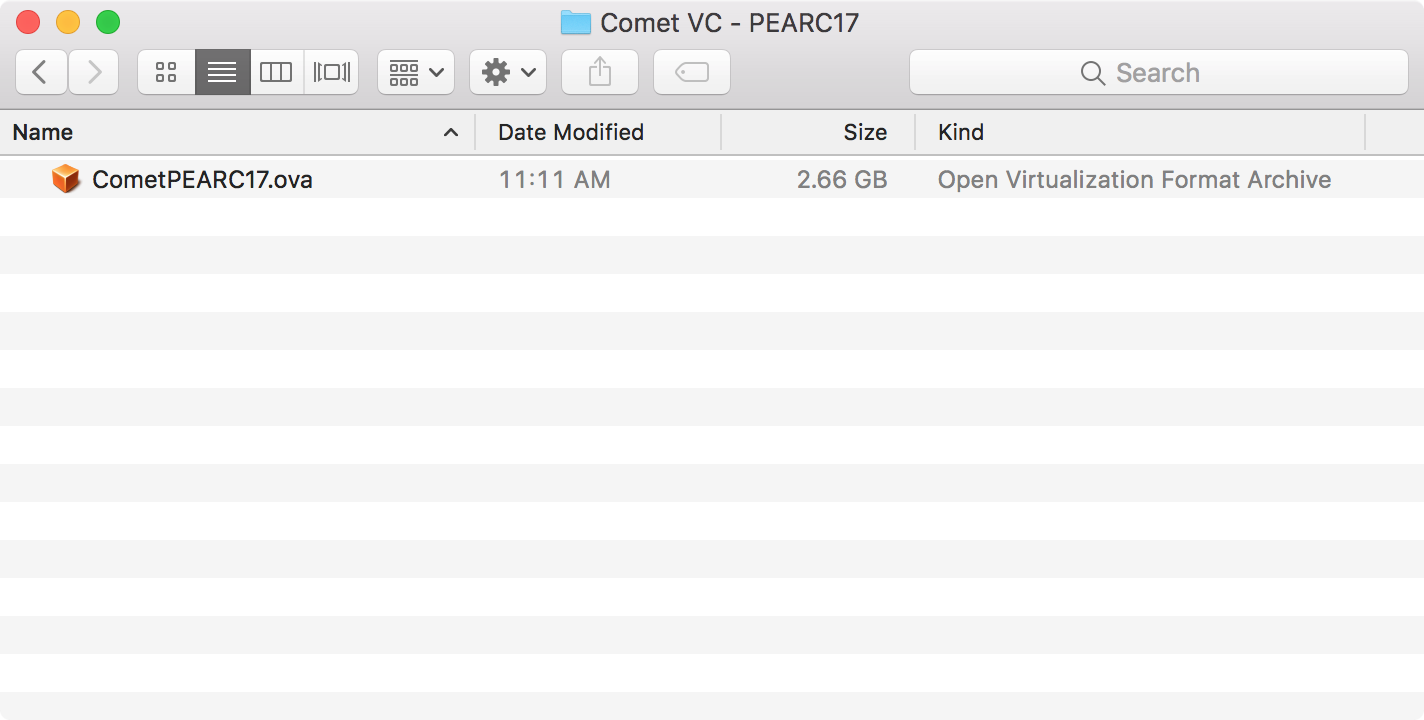
Figure: Locate downloaded VirtualBox Appliance file (CometPEARC17.ova)
Step 3: Import Comet PEARC17 VirtualBox Appliance
During import of the Comet PEARC17 VirtualBox Appliance you will have the option to configure the number of CPUs and amount of RAM. We recommend 2 CPUs and 2048 MB of RAM.
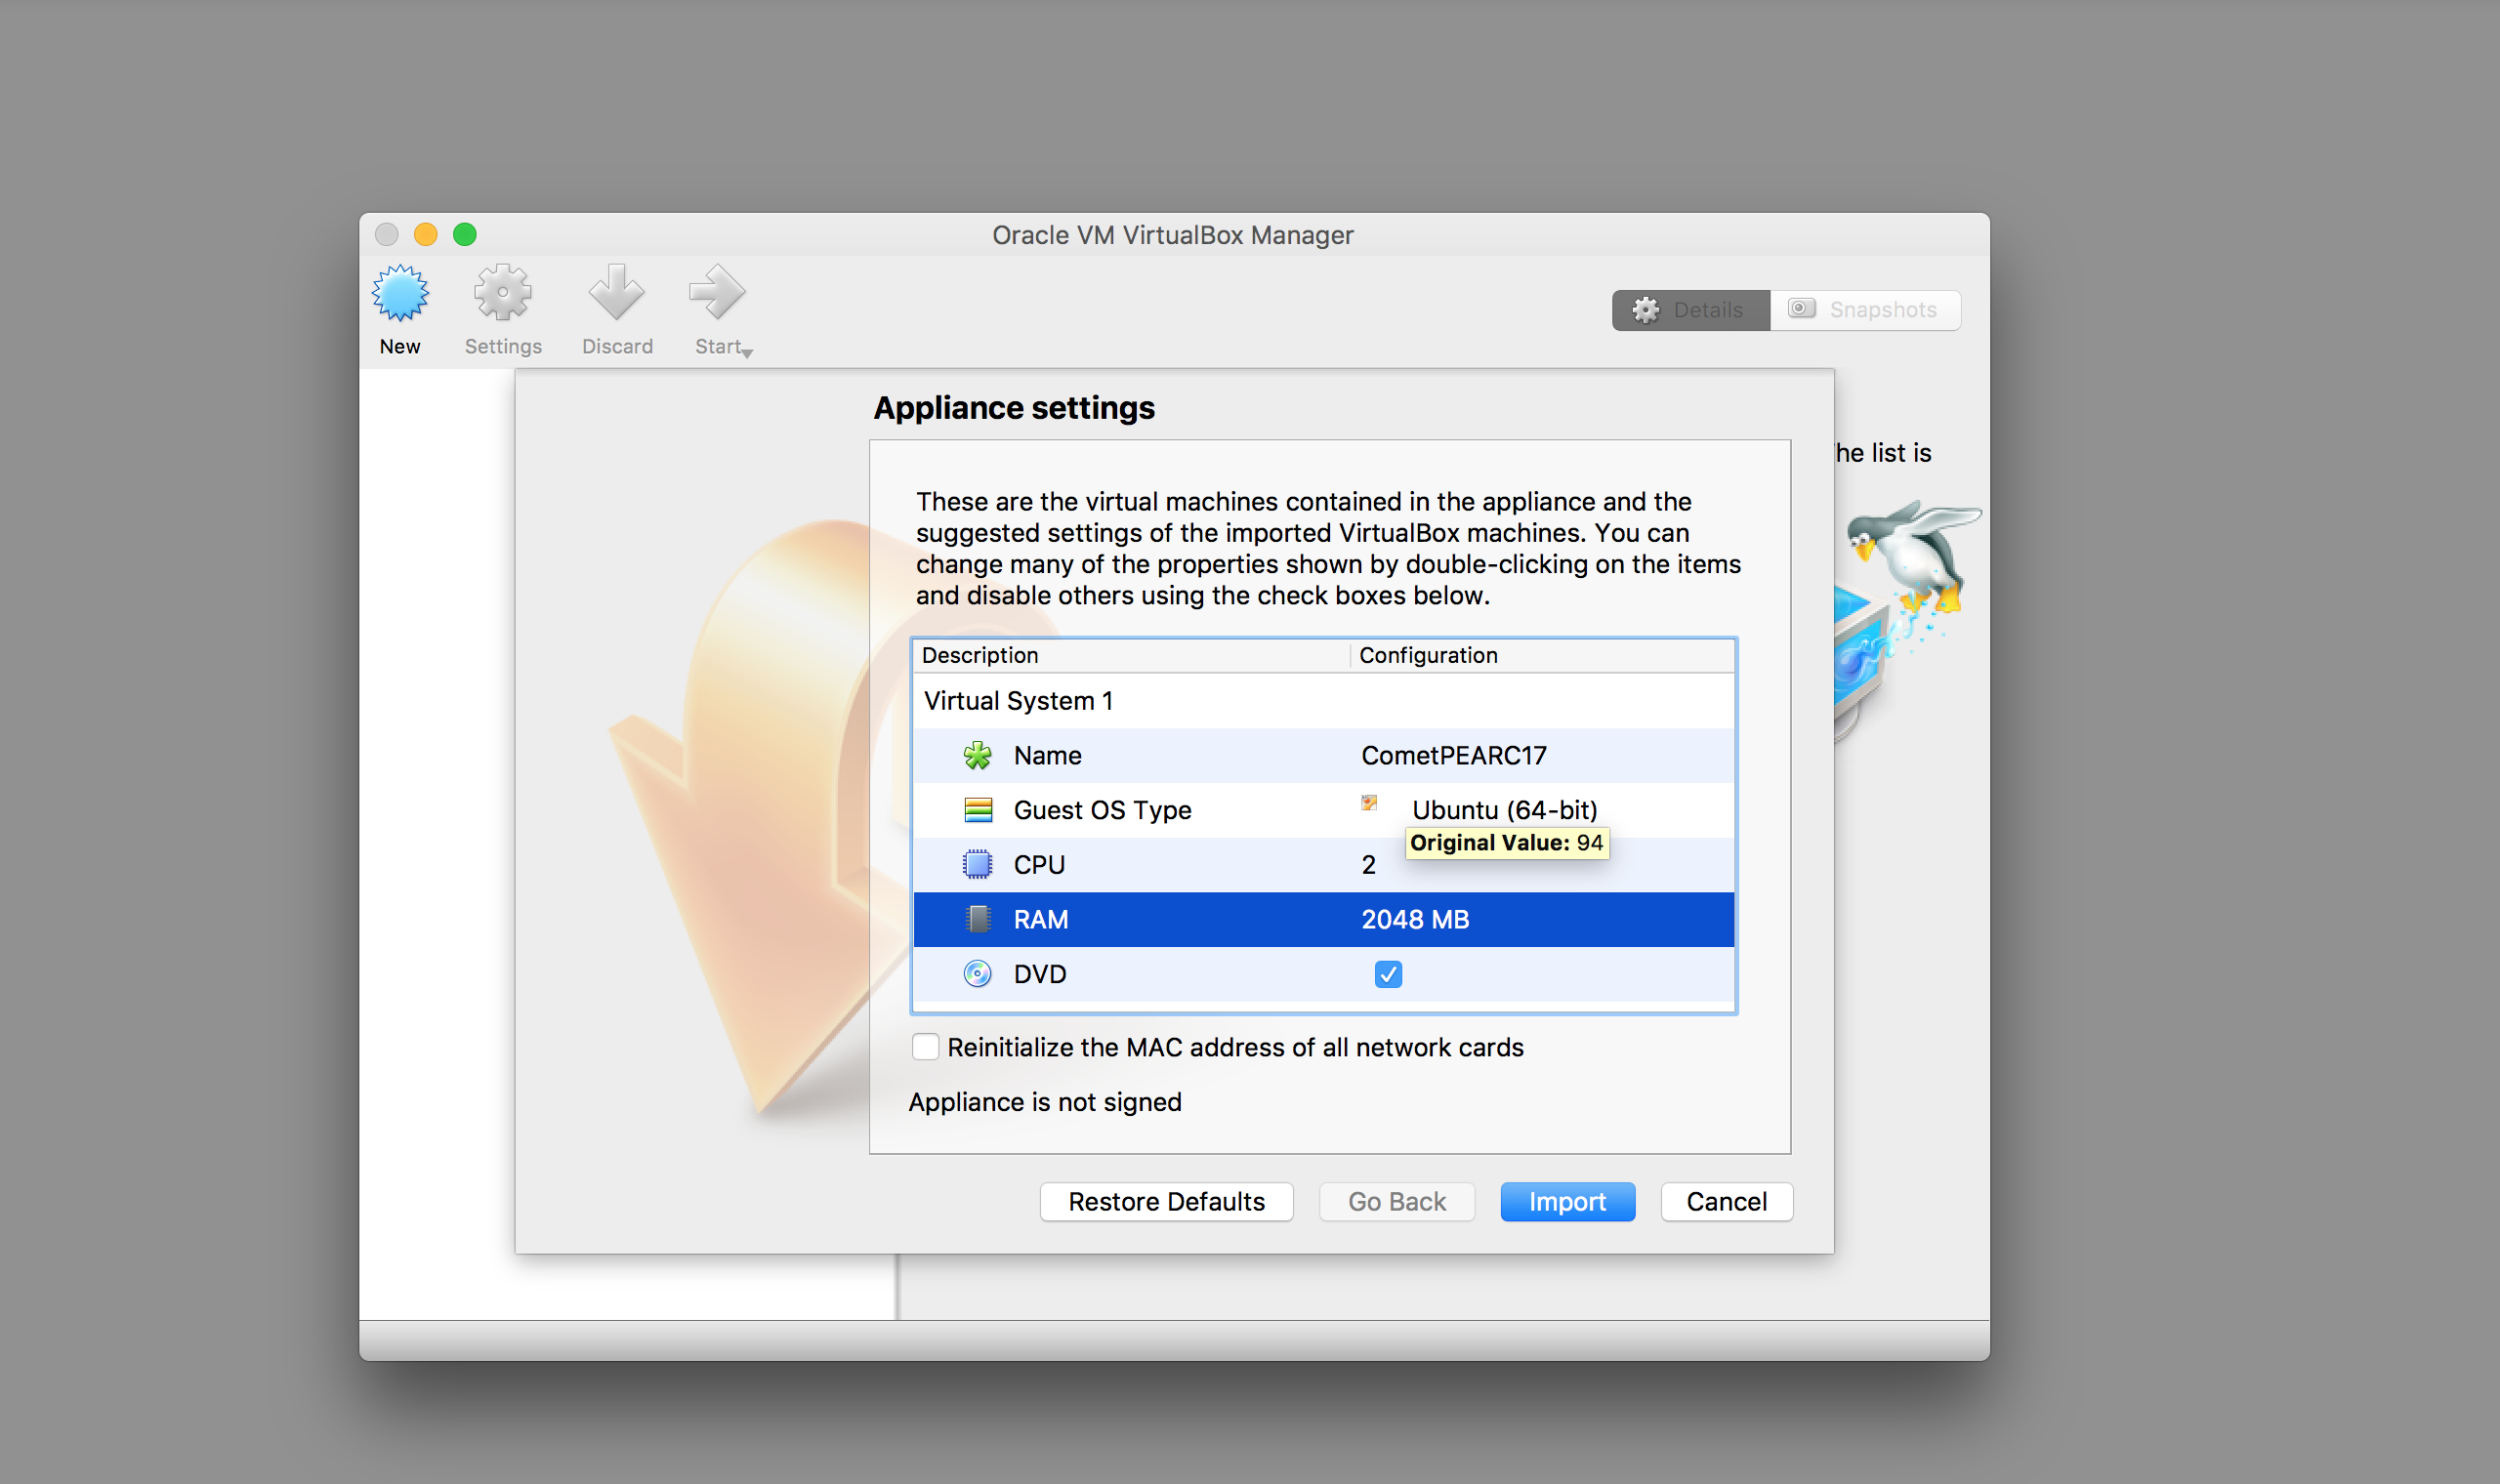
Figure: Configure processors and memory for VirutalBox Appliance
After you’ve configured the Comet PEARC17 VirtualBox Appliance click on the Import button to initiate the import process…
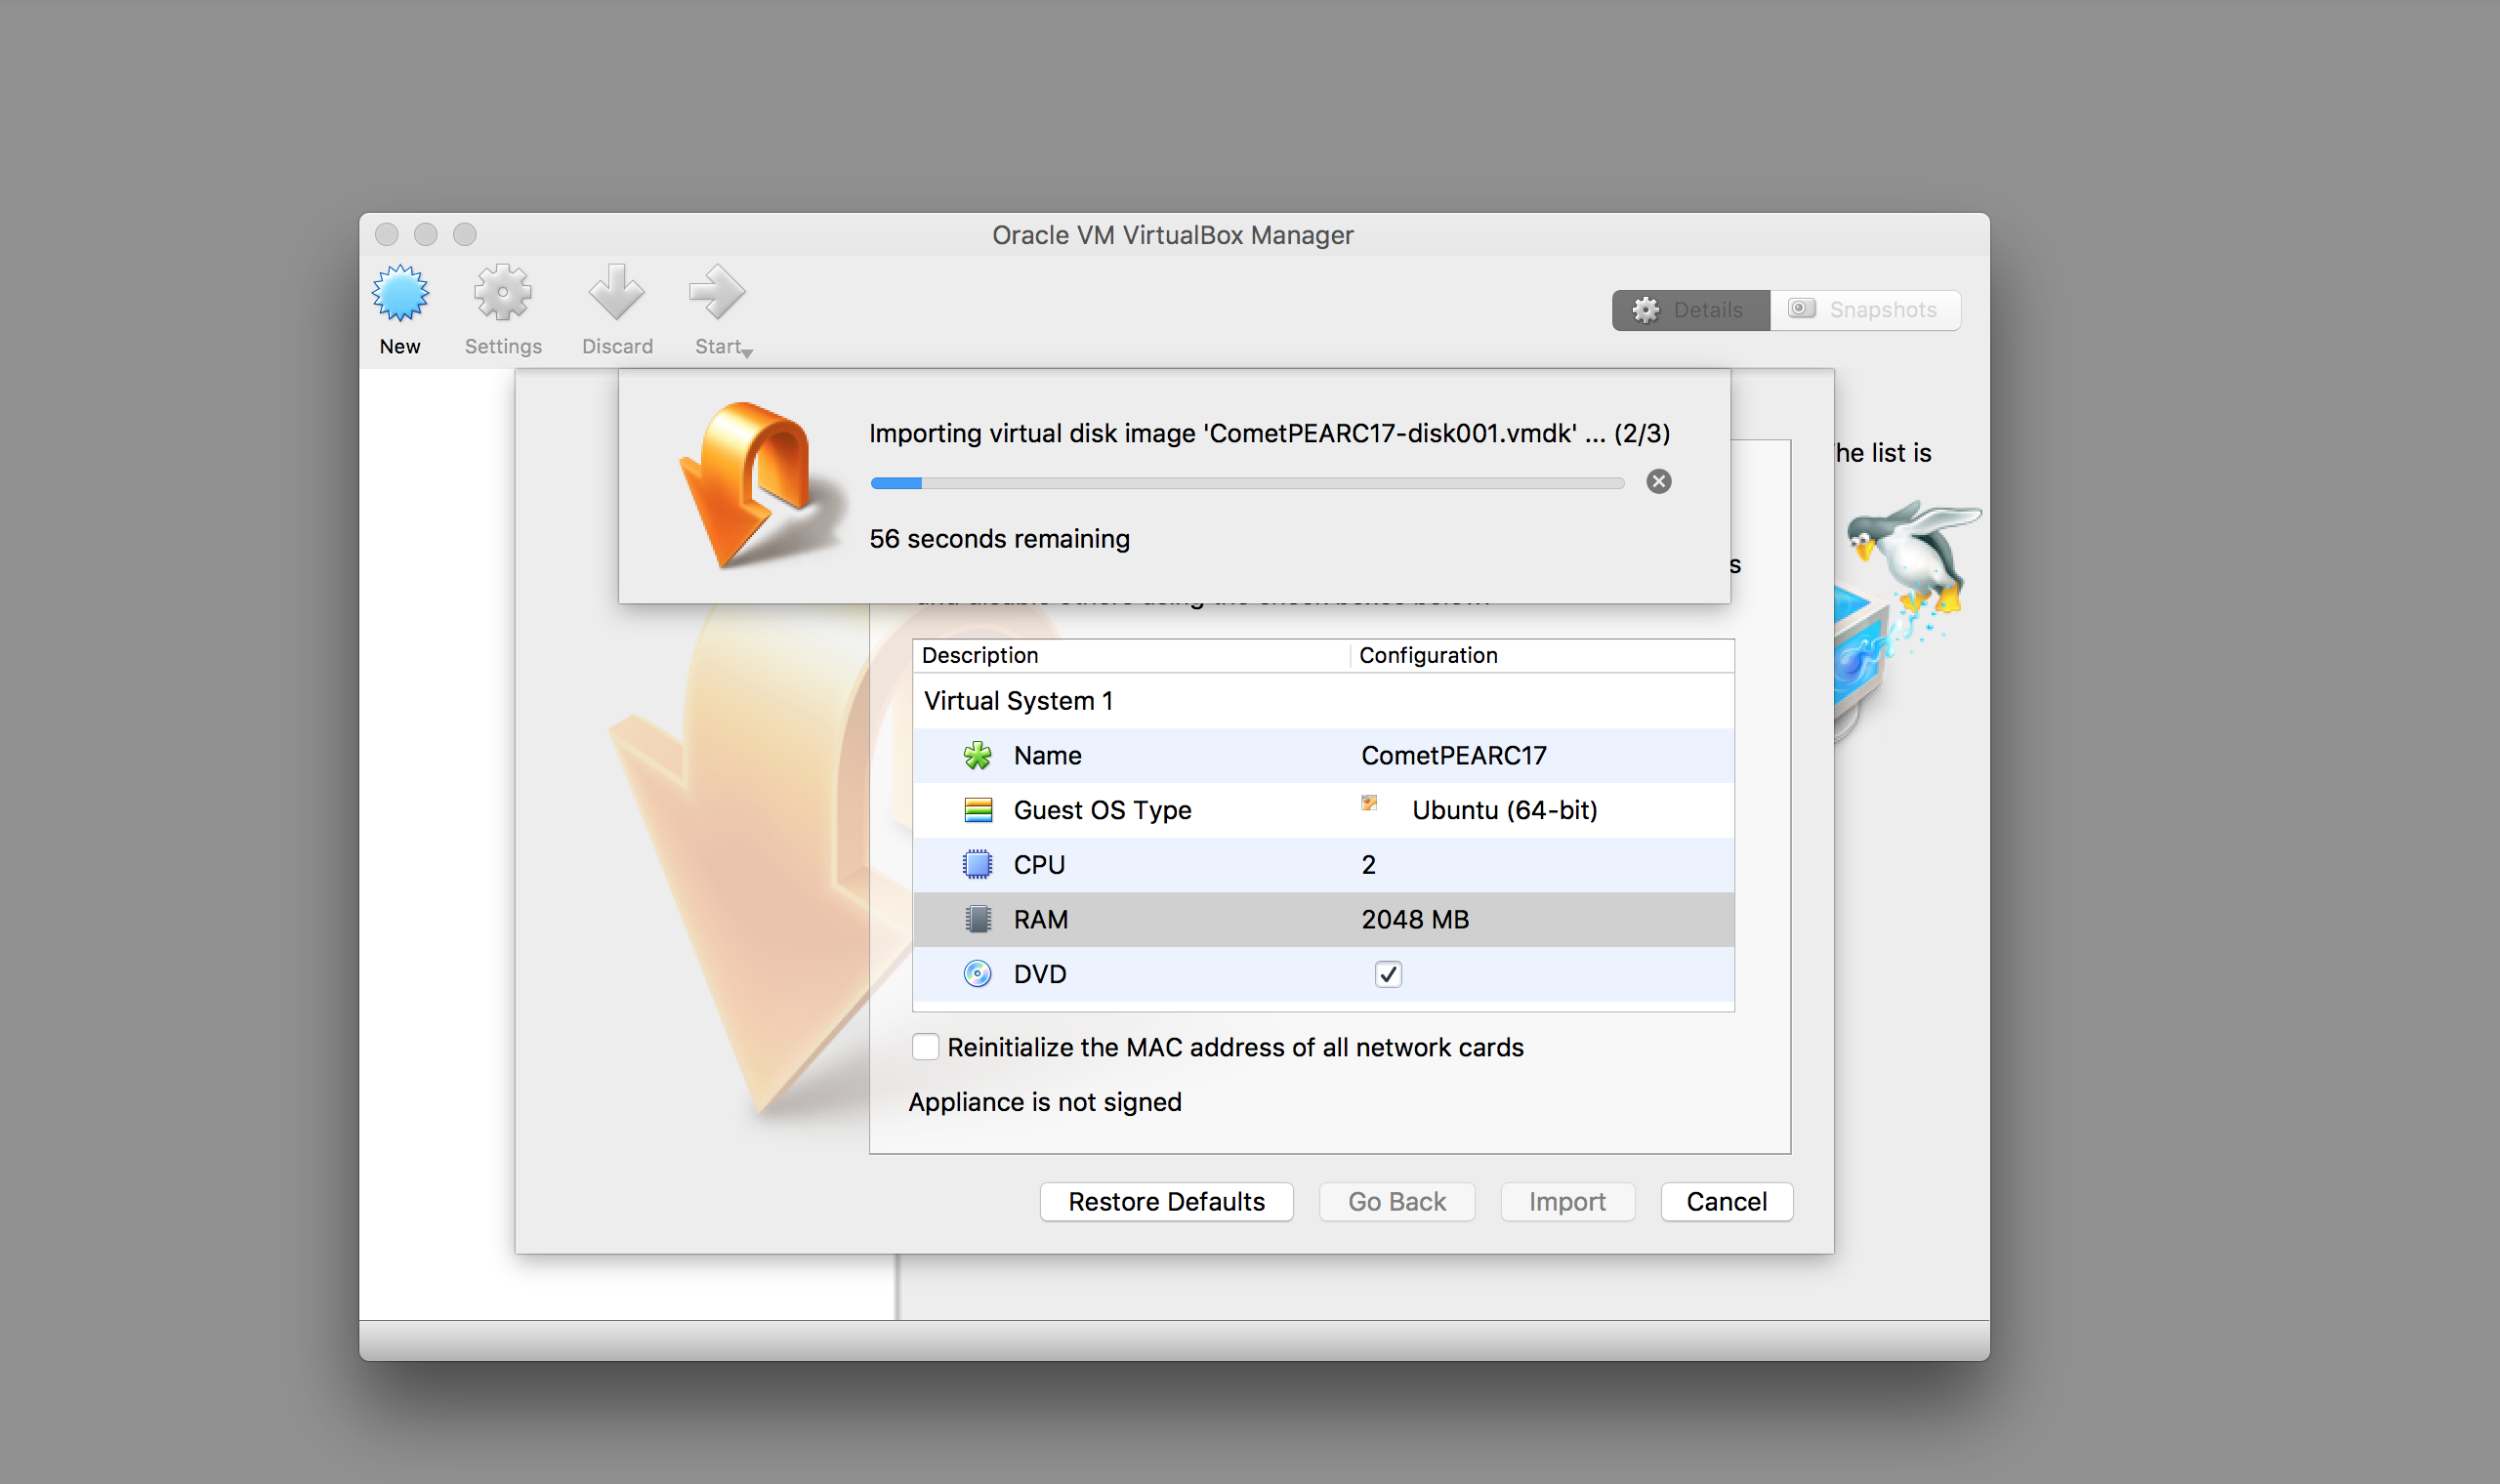
Figure: Import VirtualBox Appliance
Step 4: Run Comet PEARC17 VirtualBox Appliance
After you’ve successfully imported the Comet PEARC17 VirtualBox Appliance you can select the machine and click on the Start button to start the machine.
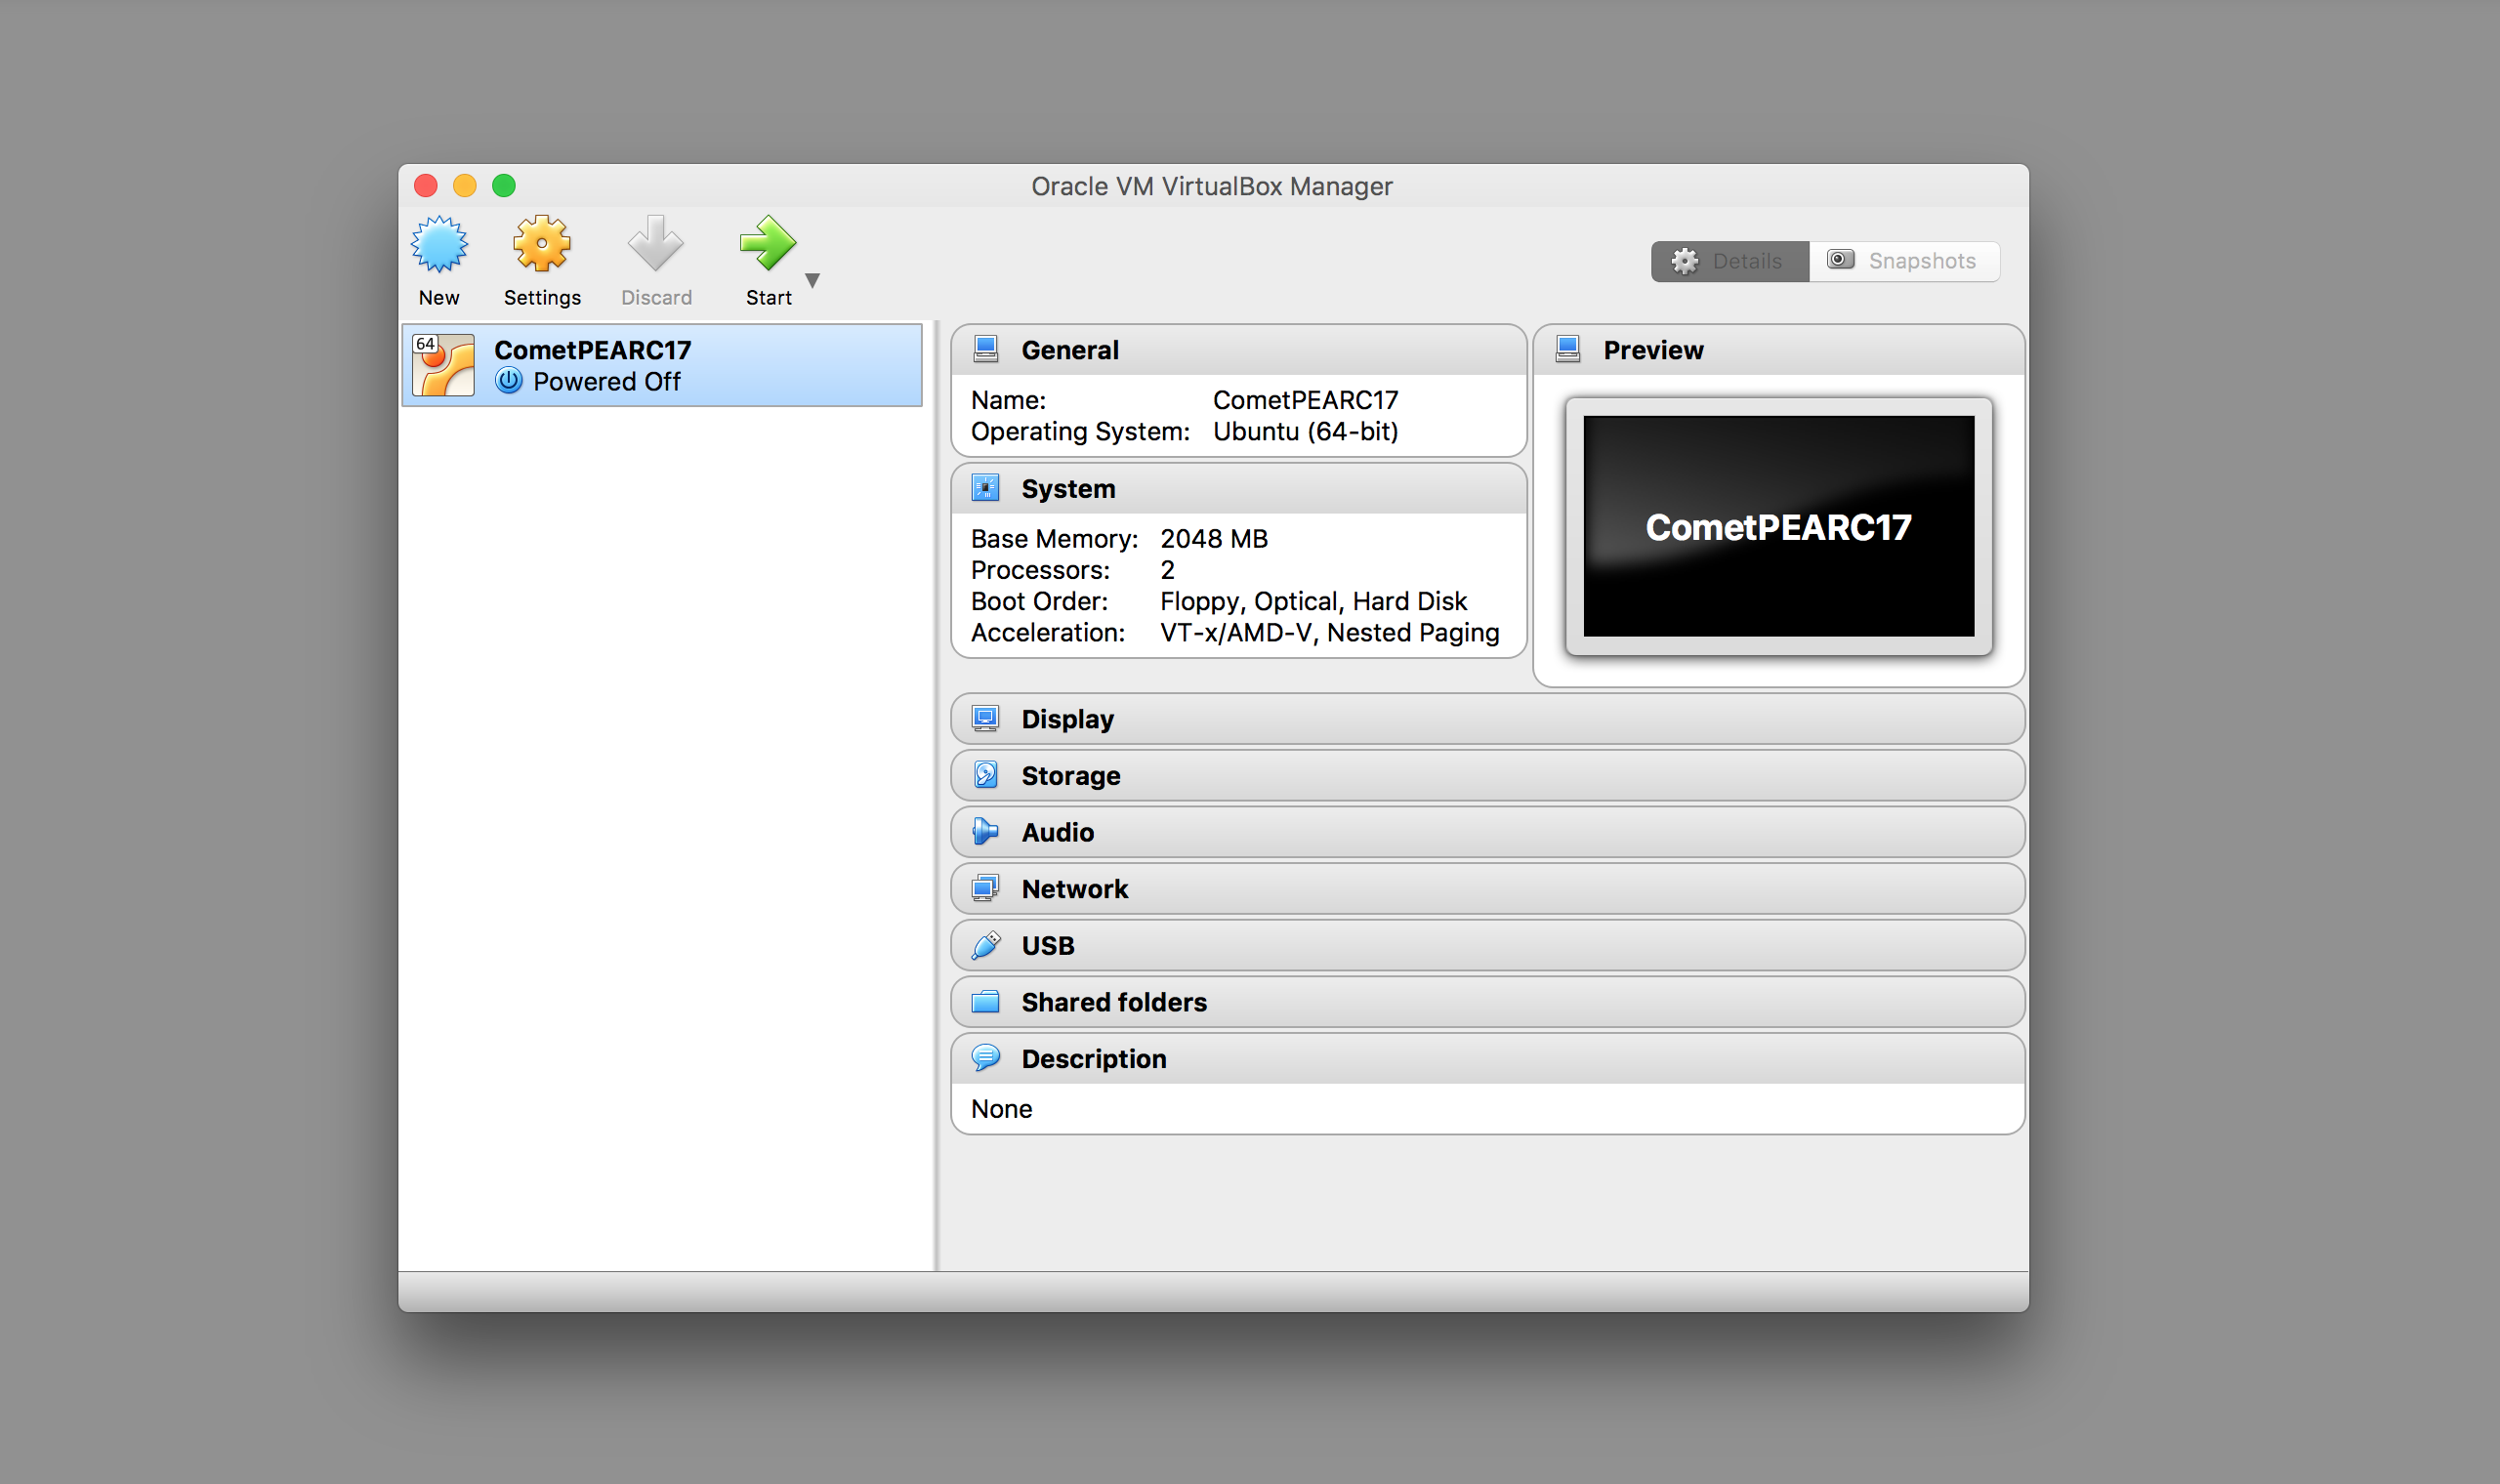
Figure: Start VirtualBox Appliance
Step 5: Open Terminal in Comet PEARC17 VirtualBox Appliance
After the Comet PEARC17 VirtualBox machine has booted you can open a terminal and start using Cloudmesh Client as it is pre-installed.
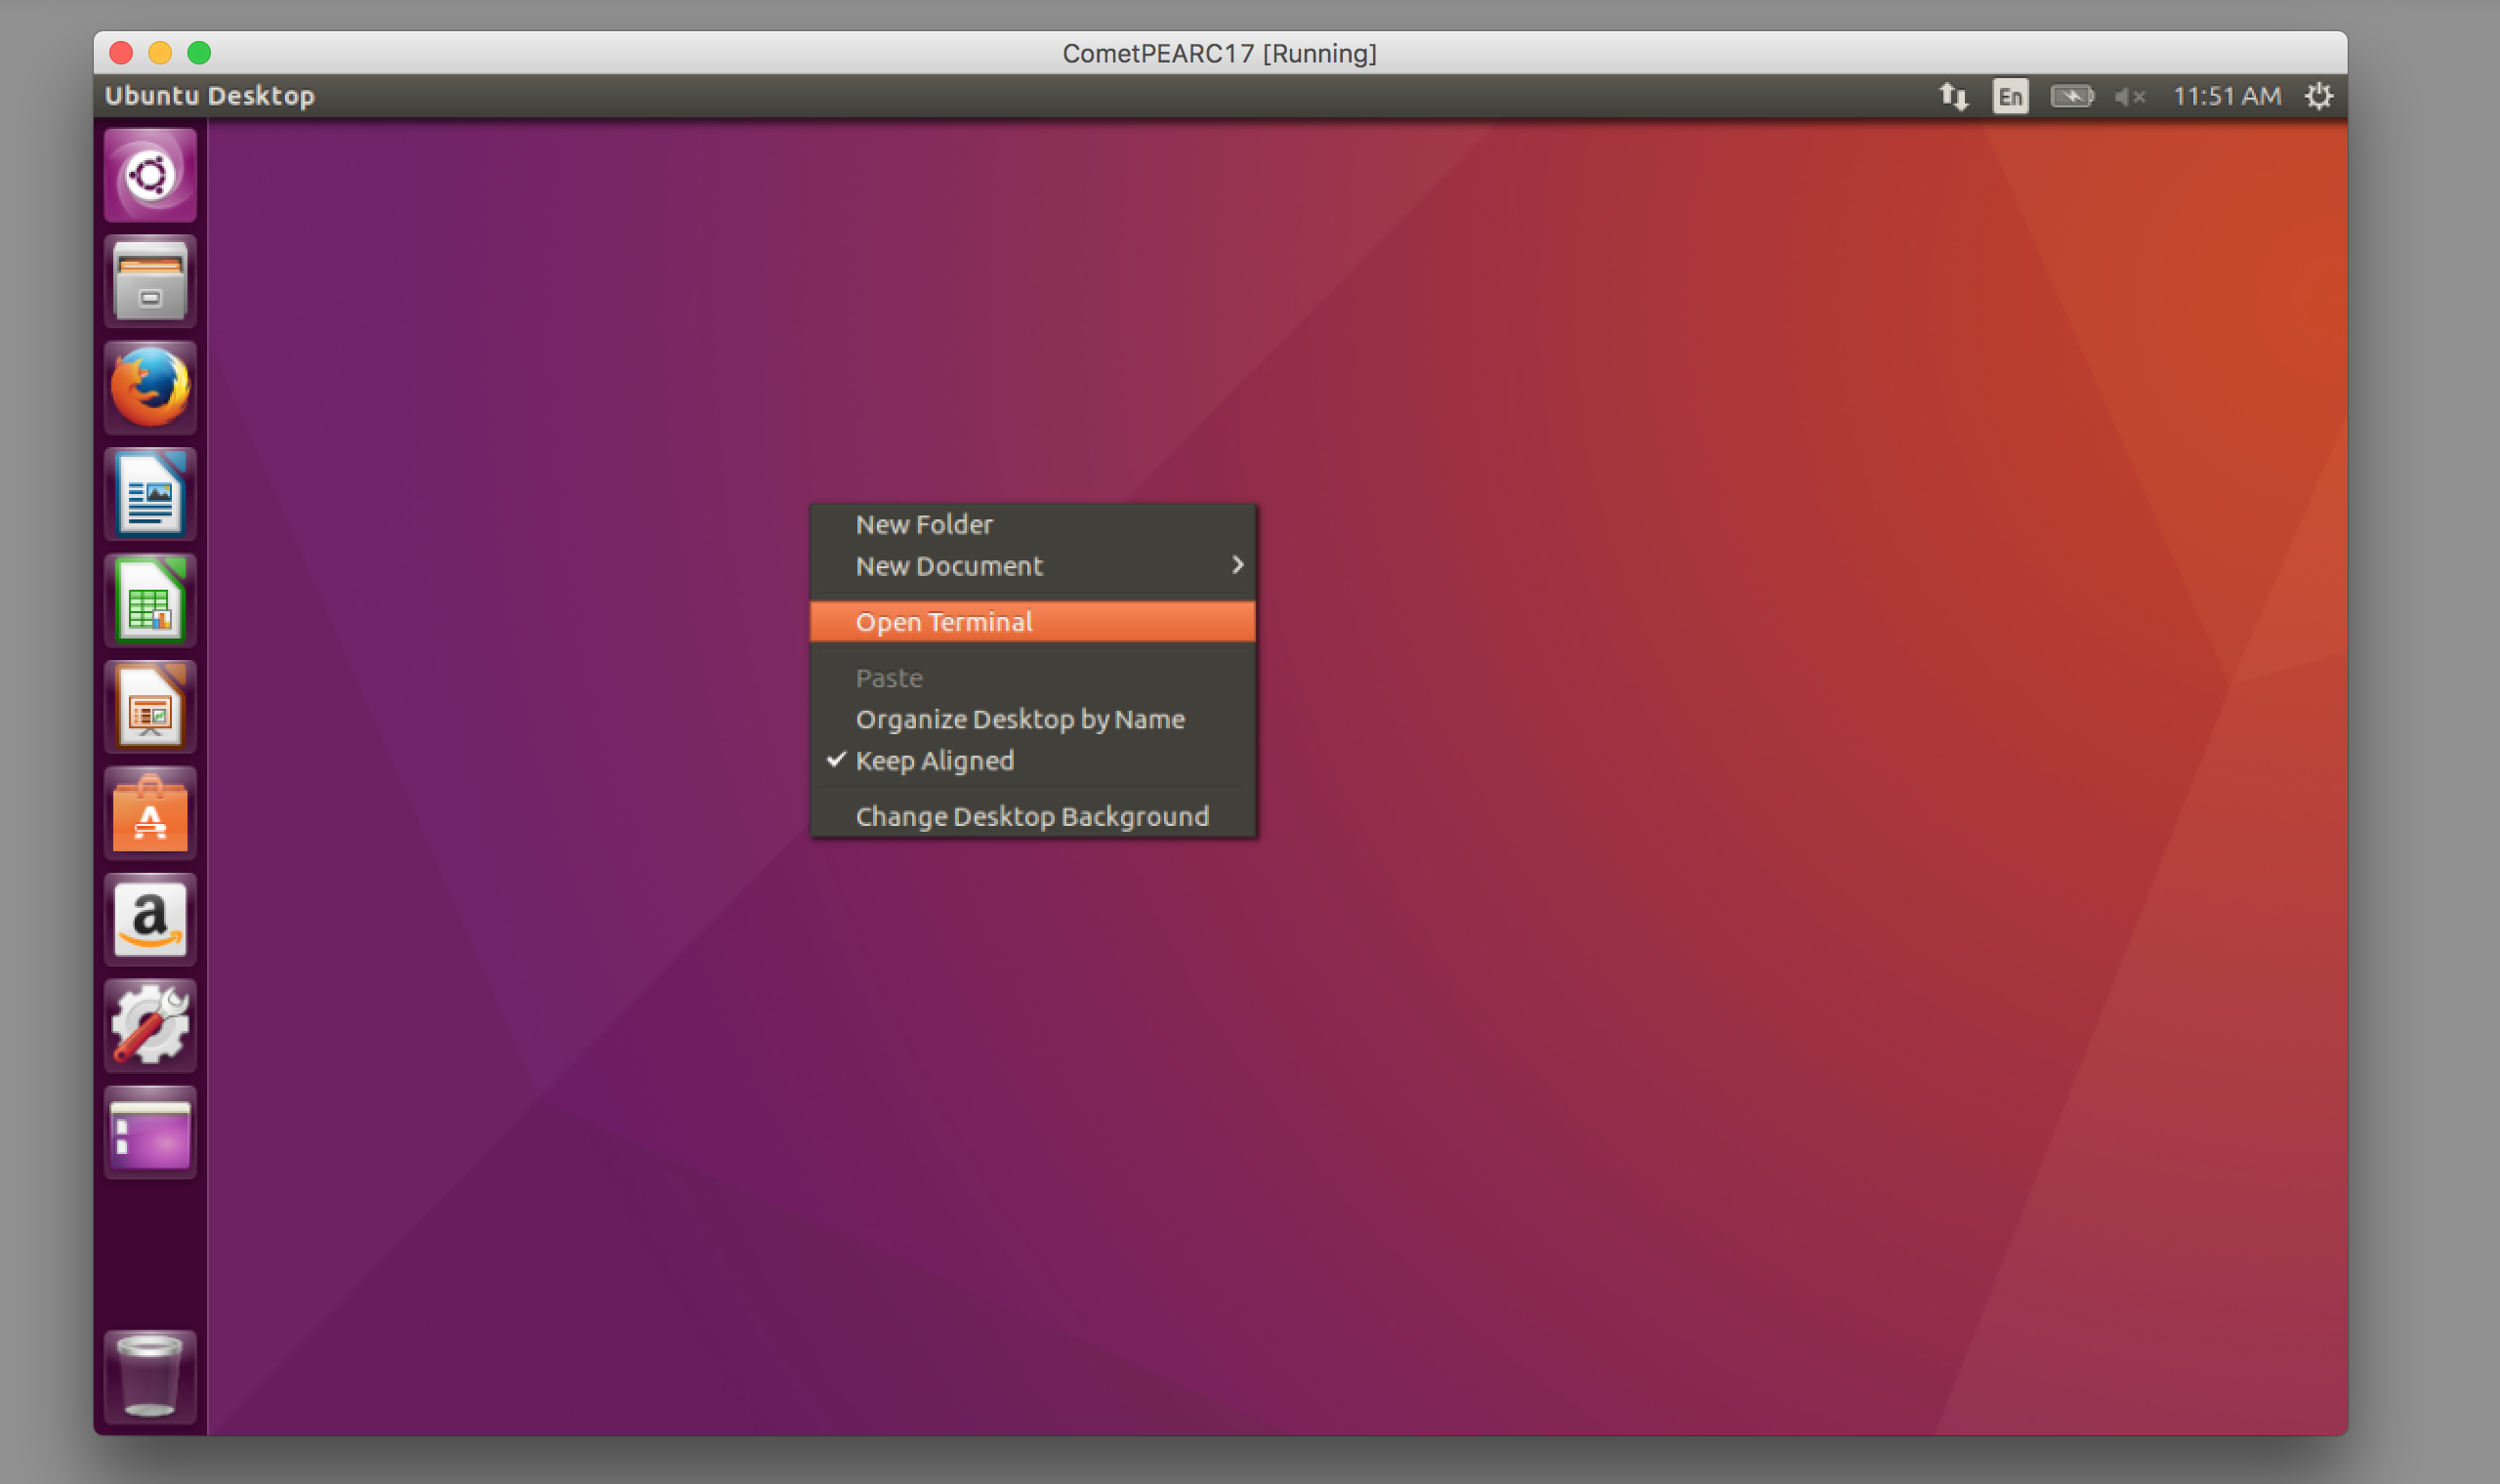
Figure: Open Terminal in Ubuntu Desktop
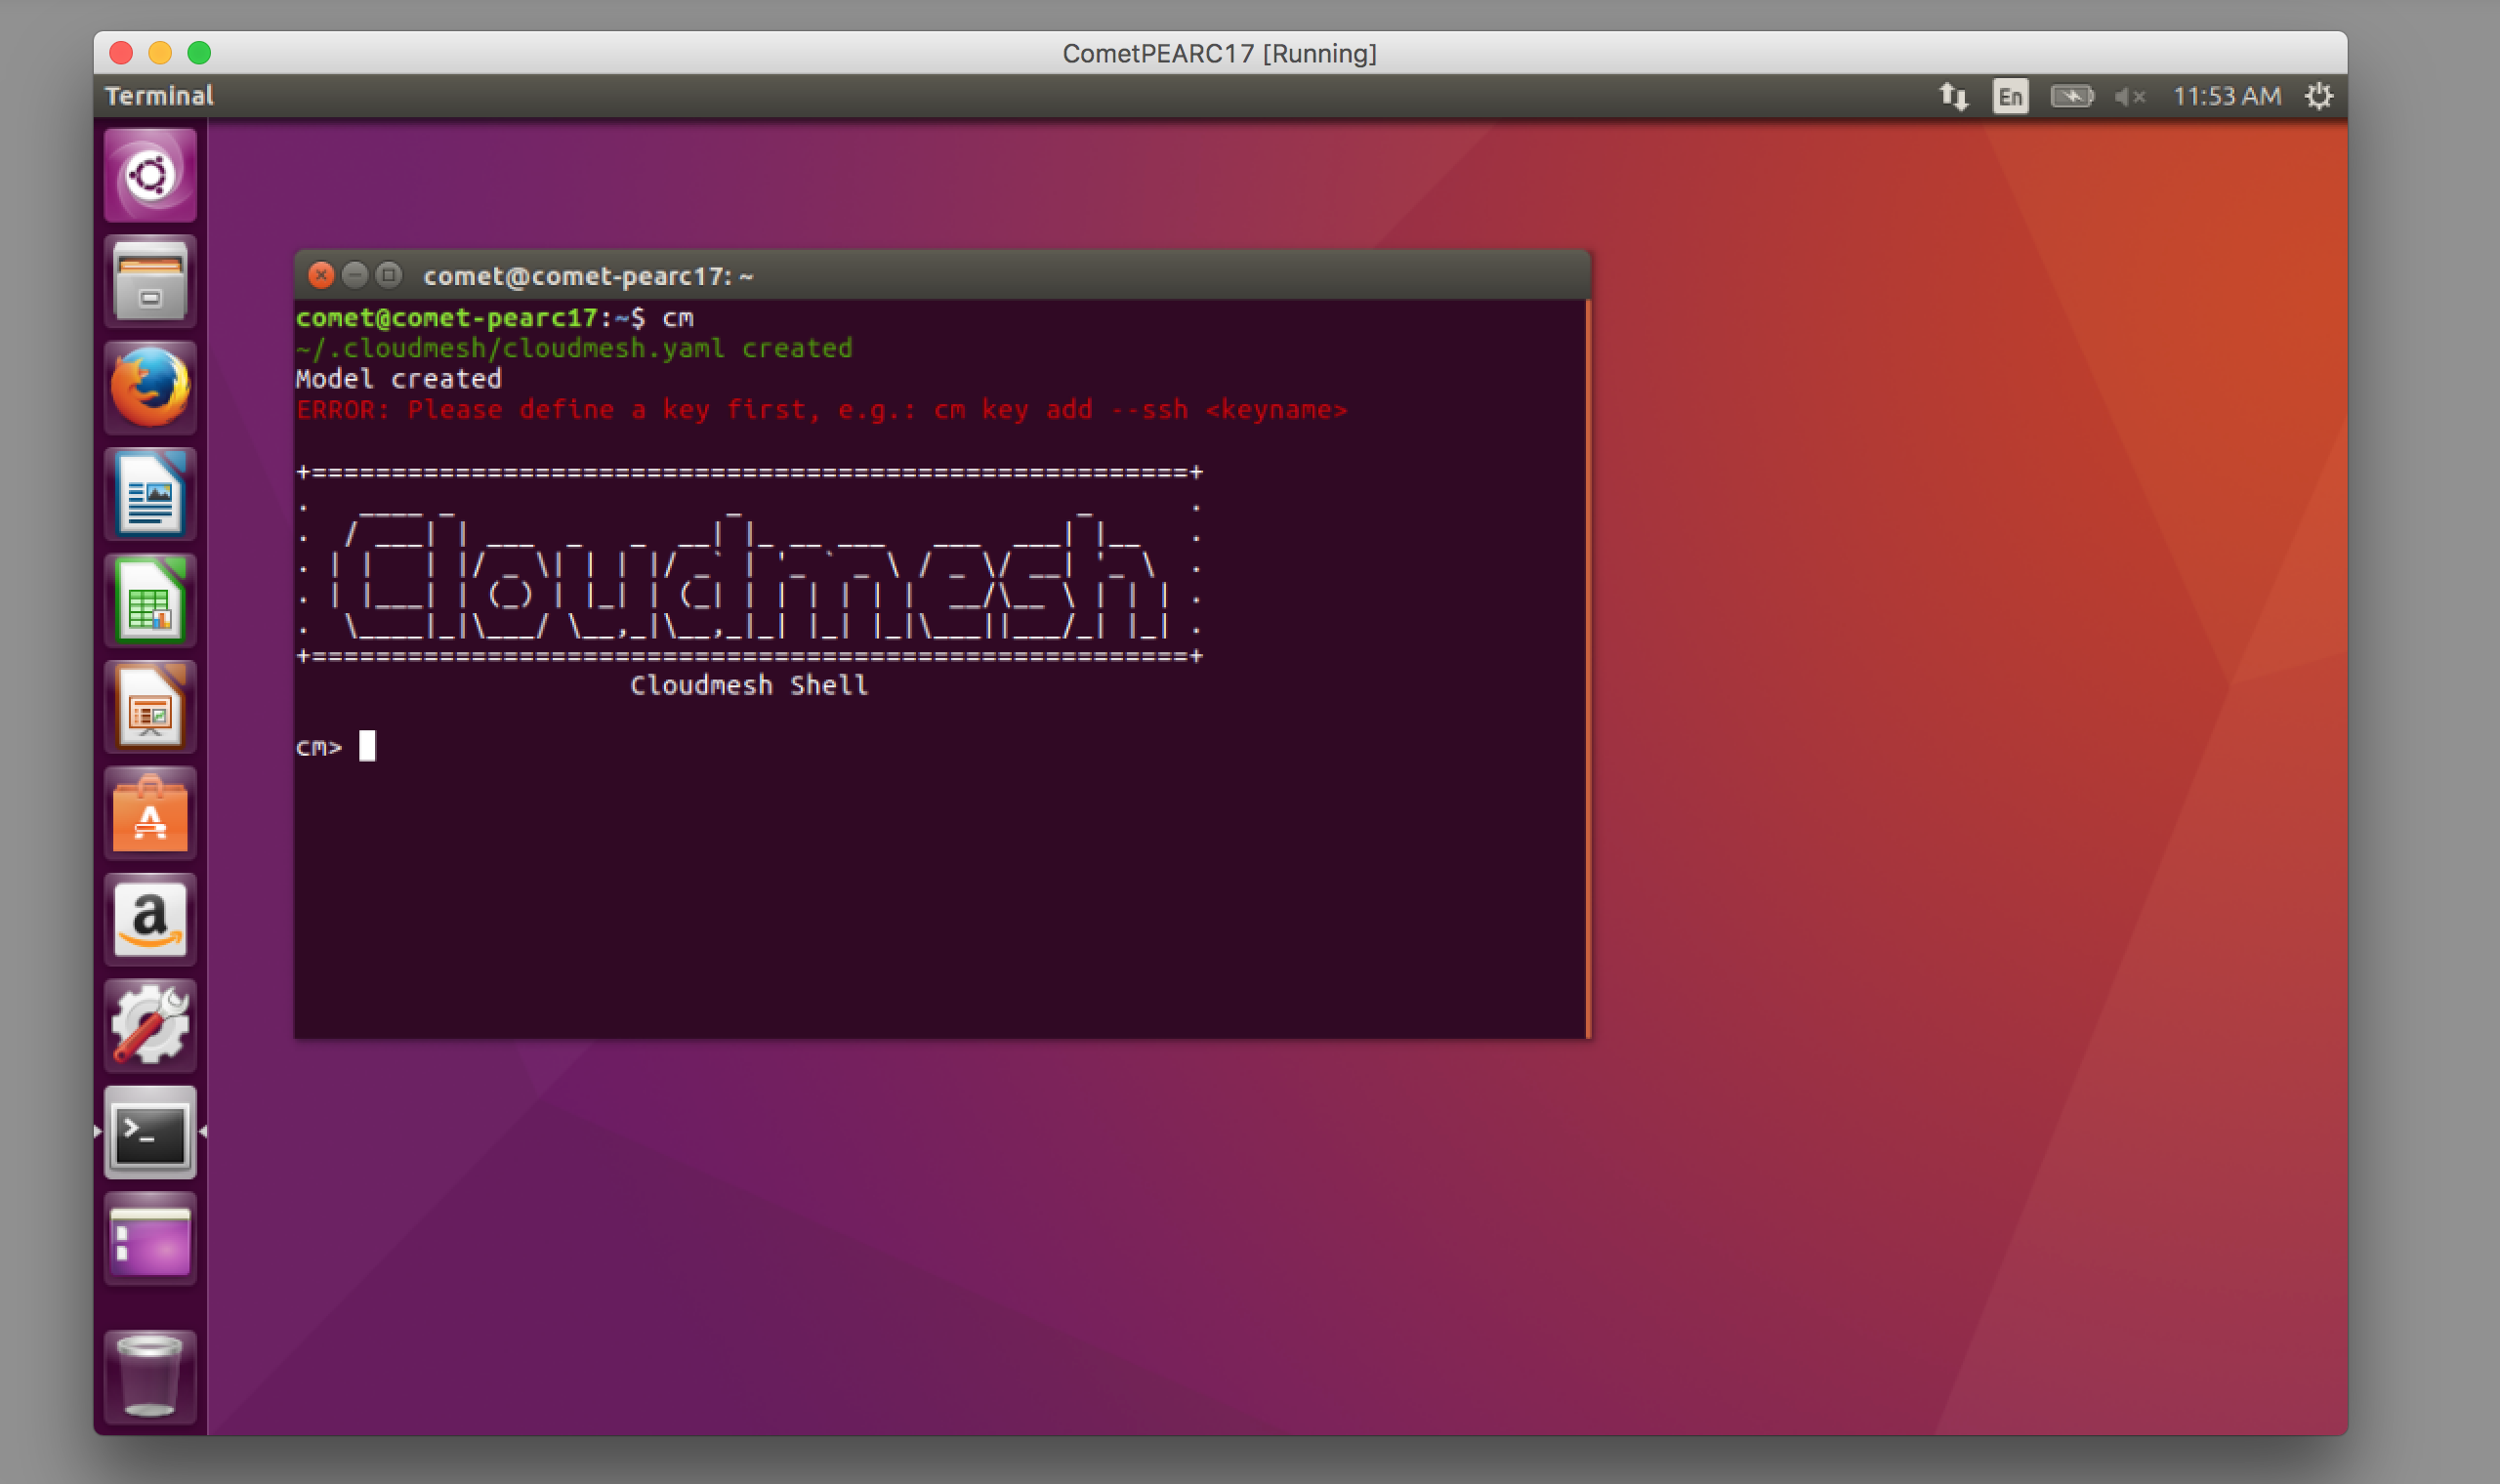
Figure: Run Cloudmesh Client in Terminal
Cloudmesh Client tool in empty Virtual Box Machine
Step 1: Install Virtual Box
For convenience we will be using Ubuntu Xenial in this demo to install the Cloudmesh client on it. Please make sure you have
- VirtualBox installed (downloads page).
Step 2: Download a VirtualBox Image
Next, please download the
and remember the location where you downloaded it. You will need that location later.
Step 3: Create a VirtualBox Machine
Create VirtualBox Machine, create a new VM (Ubuntu, 64bit)
Step 4: Associate the VM ISO
When asked for the ISO, use the folder icon to browse to the location of the downloaded image.
Step 5: Start the vm
Start and configure the system. Note in case the last step does not return, shut down or terminate the VM and restart it.
Step 6: Start a terminal
Once you have logged into the vm, start a terminal by clicking on the cog and type in terminal.
Step 7: VM guest additions
(optional) You may want to enable the vm guest addition and enable bidirectional shared clipboard and drag and drop. You may have to restart the vm so that these changes take effect.
Step 8: Install cloudmesh
wget -O cm-setup.sh http://bit.ly/cloudmesh-client-xenial sh cm-setup.sh
The script has the following contents:
sudo apt install python-pip -y
sudo apt install libssl-dev -y
sudo pip install pip -U
sudo apt install git -y
sudo pip install ansible
sudo pip install cloudmesh_client
python --version
pip --version
git –version
Make sure passlib is installed:
sudo pip install passlib
Cloudmesh Client Tool Installed Directly in MacOS
For system level packages installation, see: http://cloudmesh.github.io/client/system.html#osx
For the Cloudmesh client tool installation:
virtualenv ~/CM
source ~/CM/bin/activate
pip install -U pip
pip install cloudmesh_client
pip install passlib
Cloudmesh Client Tool Installed Directly in Linux
For system level packages installation, see: http://cloudmesh.github.io/client/system.html#ubuntu-16-04
For the Cloudmesh client tool installation:
virtualenv ~/CM source ~/CM/bin/activate
pip install -U pip pip install cloudmesh_client pip install passlib
Using Cloudmesh Client tool to access Comet VC
To verify the Cloudmesh client tool has been installed properly, try:
cm verion
cm help
And to initialize the comet authentication settings:
cm comet init
Use all default settings, and provide your Comet VC username/password to retrieve an API key:
Initializing the comet configuration file...
Set the active service endpoint to use. The availalbe endpoints are - dev/production [dev]:
Set the base url for the nucleus dev service [https://comet-nucleus-dev.sdsc.edu/nucleus]:
Set the api version for the nucleus dev service [v1]:
Authenticating to the nucleus dev service and obtaining the apikey...
Comet nucleus username [YOUR_COMET_VC_USER]:
Password:
api key retrieval and set was successful!
Virtual Cluster Architecture
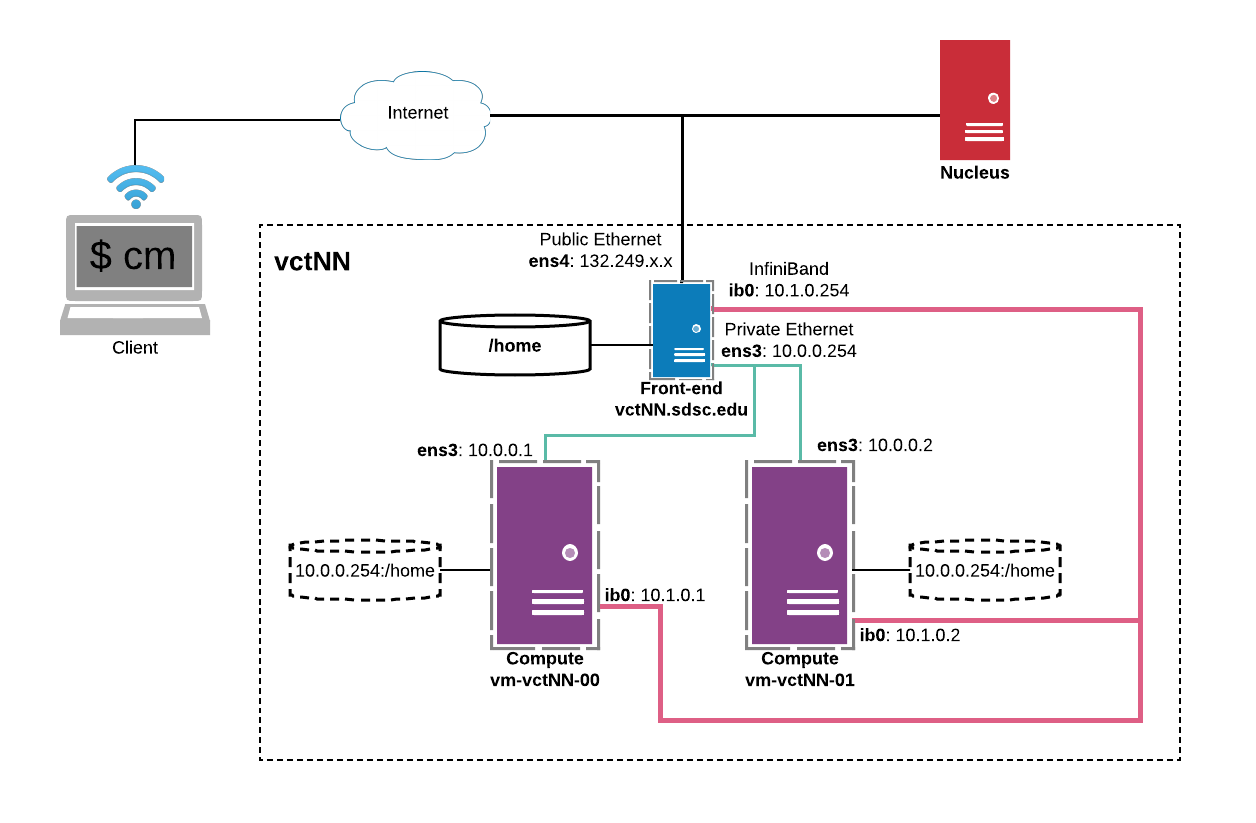
Figure: Virtual cluster architecture
Note
We used name vctNN in this tutorial as an example VC name. please replace this with the proper name assigned to you.
Getting access to your cluster
The cluster information can be obtained with the following commands:
cm comet ll
cm comet cluster
cm comet cluster vctNN
The list of ISO images that are currently available can be obtained with:
cm comet iso list
Install the VC front-end node
NOTE: During the PEARC17 Tutorial the initial install of the cluster frontend **has been completed in advance. The following steps are included to document **the process that was followed.
This section takes ~10 min to finish.
Find an iso and attach
cm comet iso list
This will return:
1: CentOS-7-x86_64-NetInstall-1511.iso
2: ubuntu-16.04.2-server-amd64.iso
3: ipxe.iso
...<snip>...
19: Fedora-Server-netinst-x86_64-25-1.3.iso
20: ubuntu-14.04.4-server-amd64.iso
Next we attach an iso. You can use either the name of the iso, or simply the id
cm comet iso attach 2 vctNN
Please note for this tutorial we use image 2, the latest Ubuntu 16.04.2.
Let us check the status of the server.
cm comet cluster vctNN
If it is already running, please power if off so the iso attach could take effect:
cm comet power off vctNN
Now we need to power on the server
cm comet power on vctNN
To see what is happening on the server and finish the installation, we need to attach a console to follow the installation steps:
cm comet console vctNN
Screenshots for the front-end node configuration are given next:
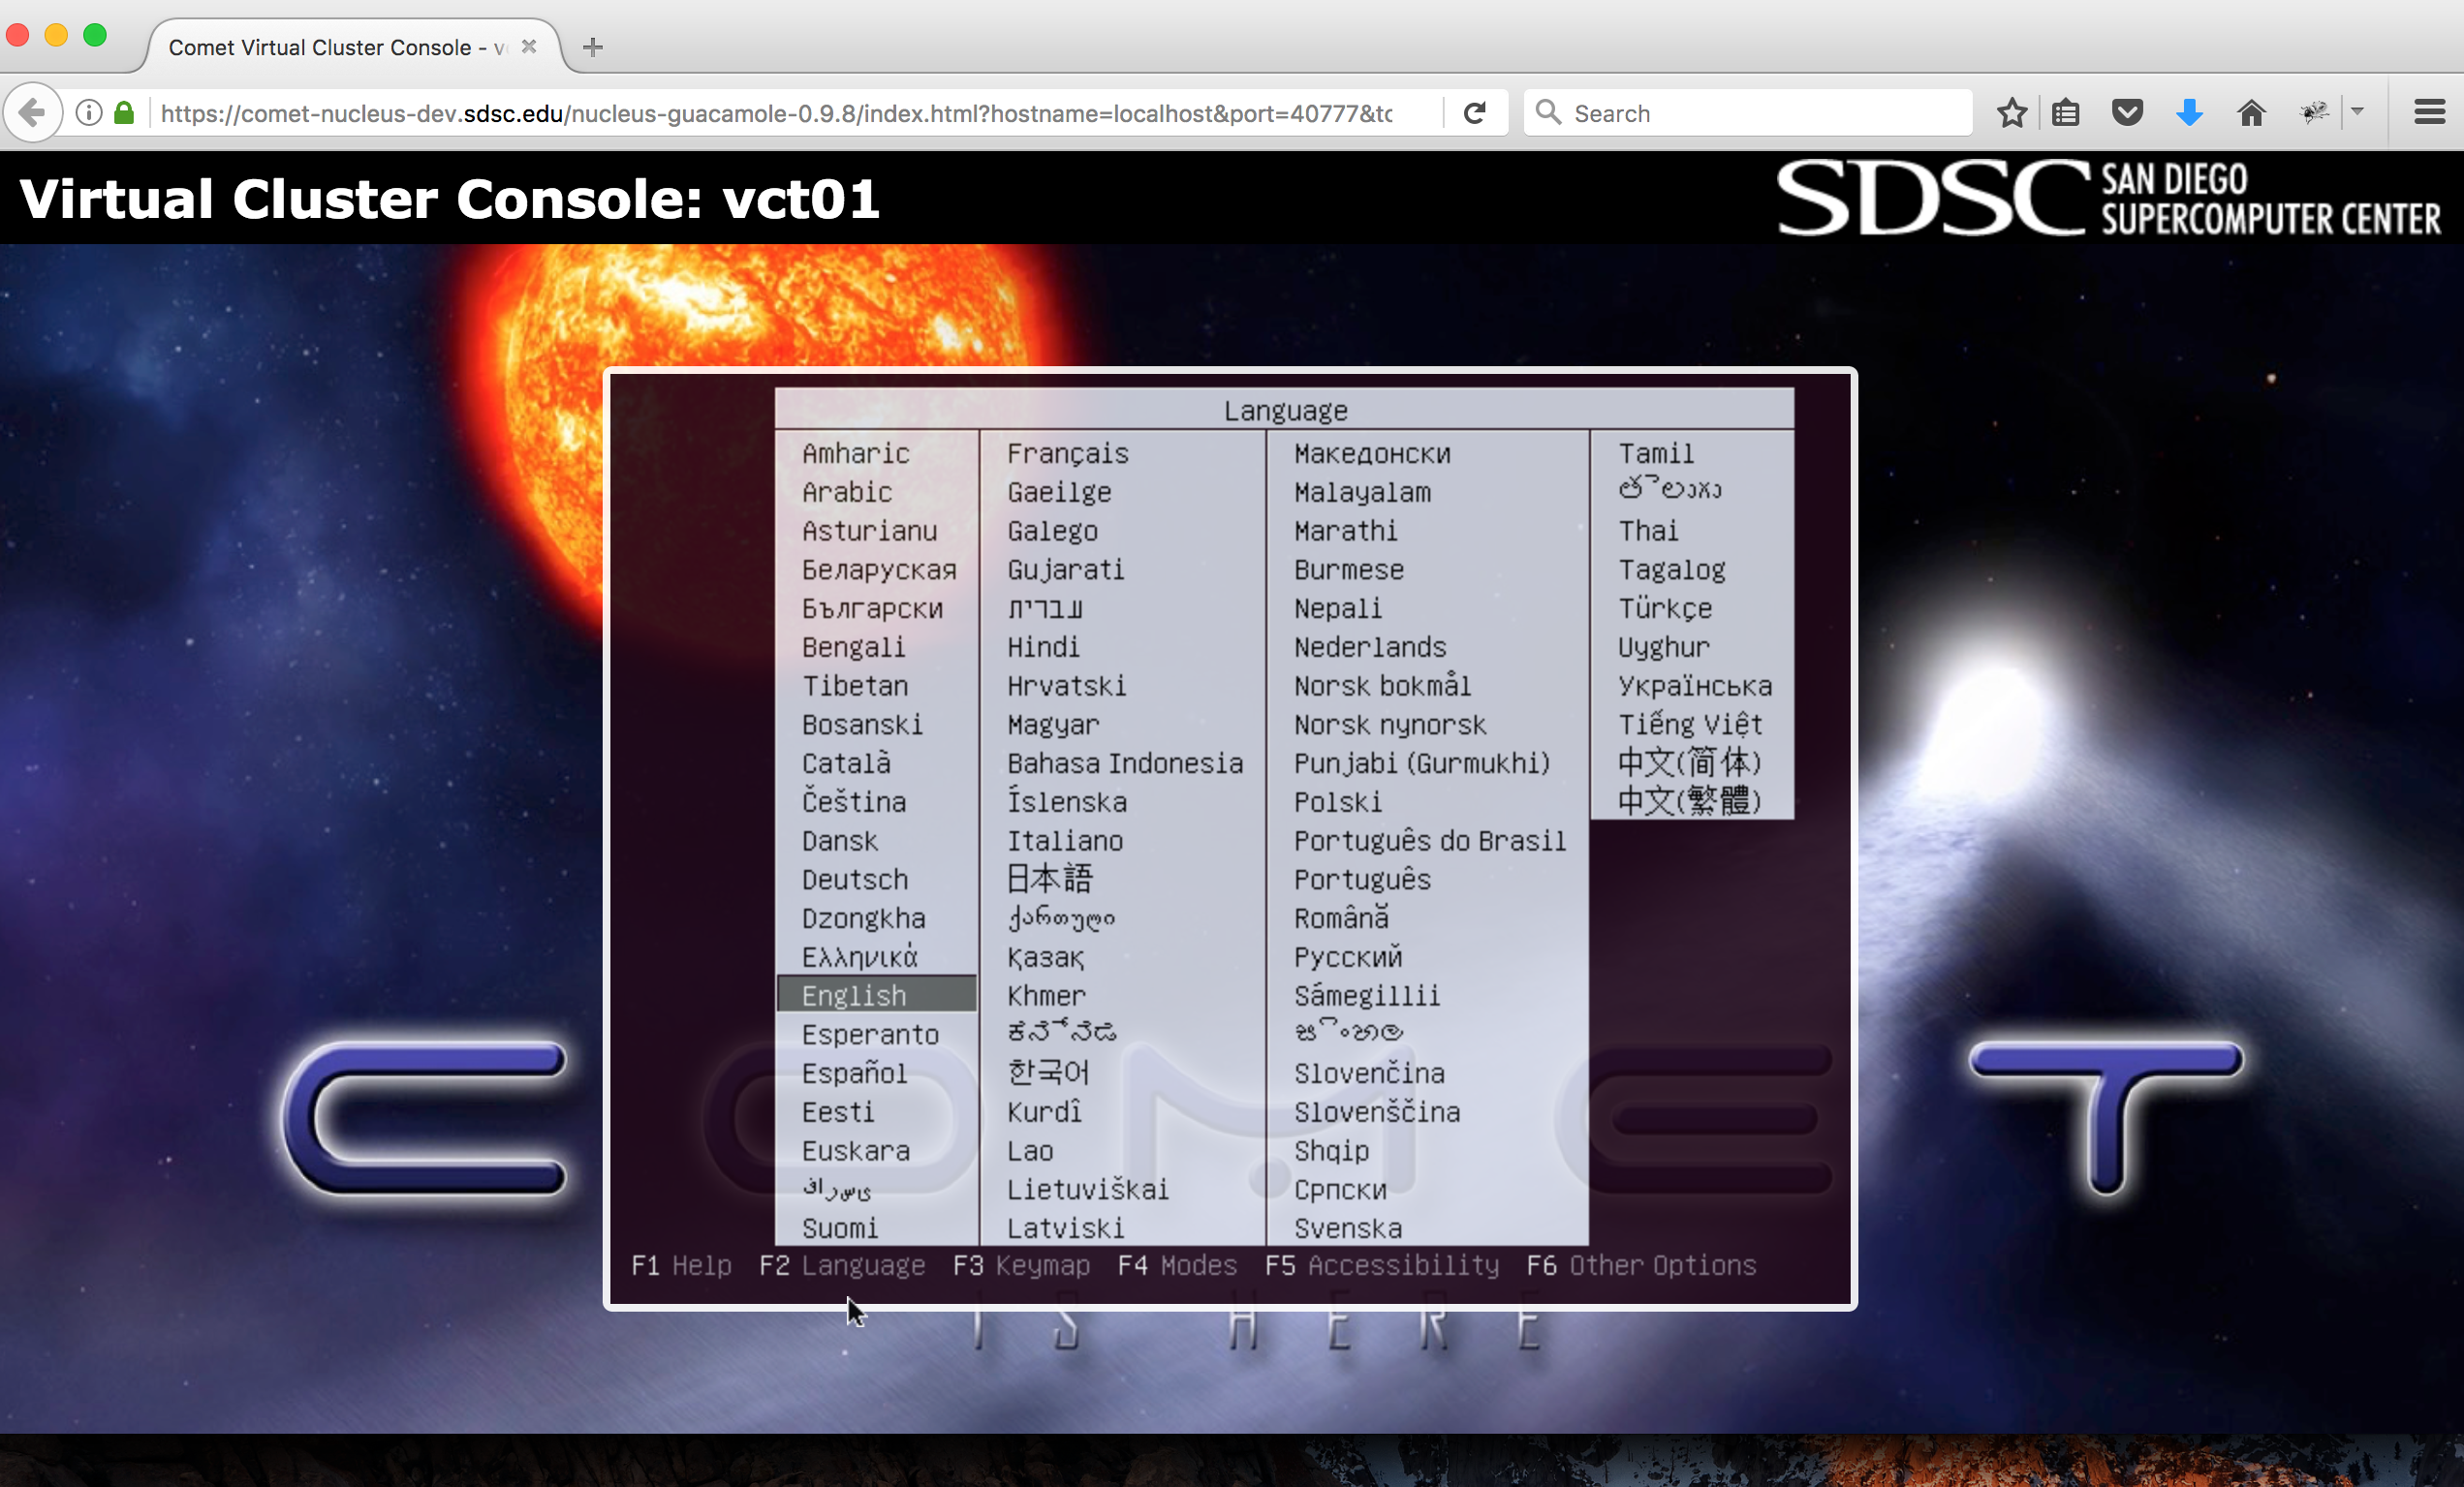
Figure: Initial screen after Front-end (FE) booted
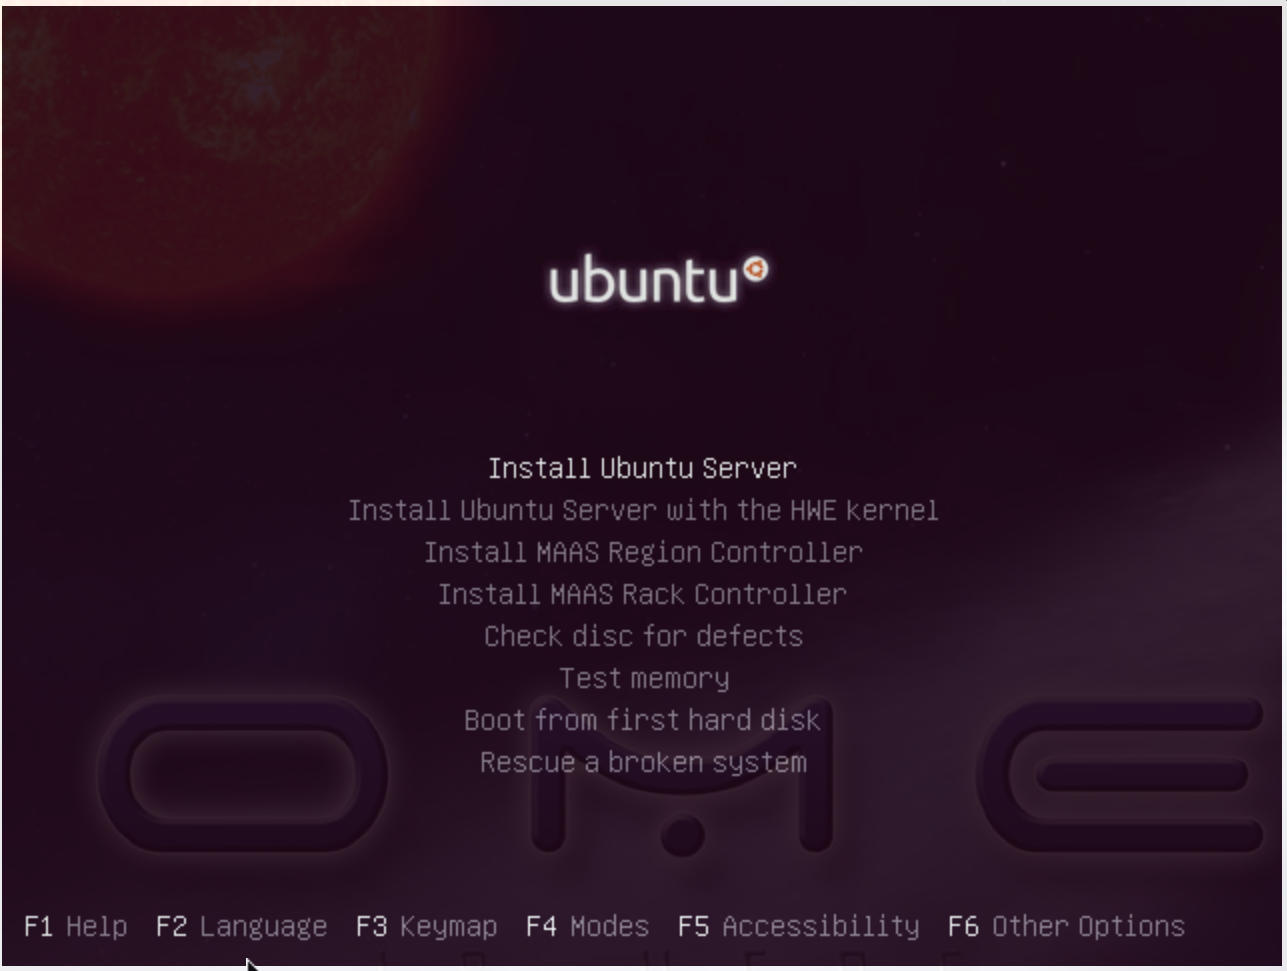
Figure: Install ubuntu server
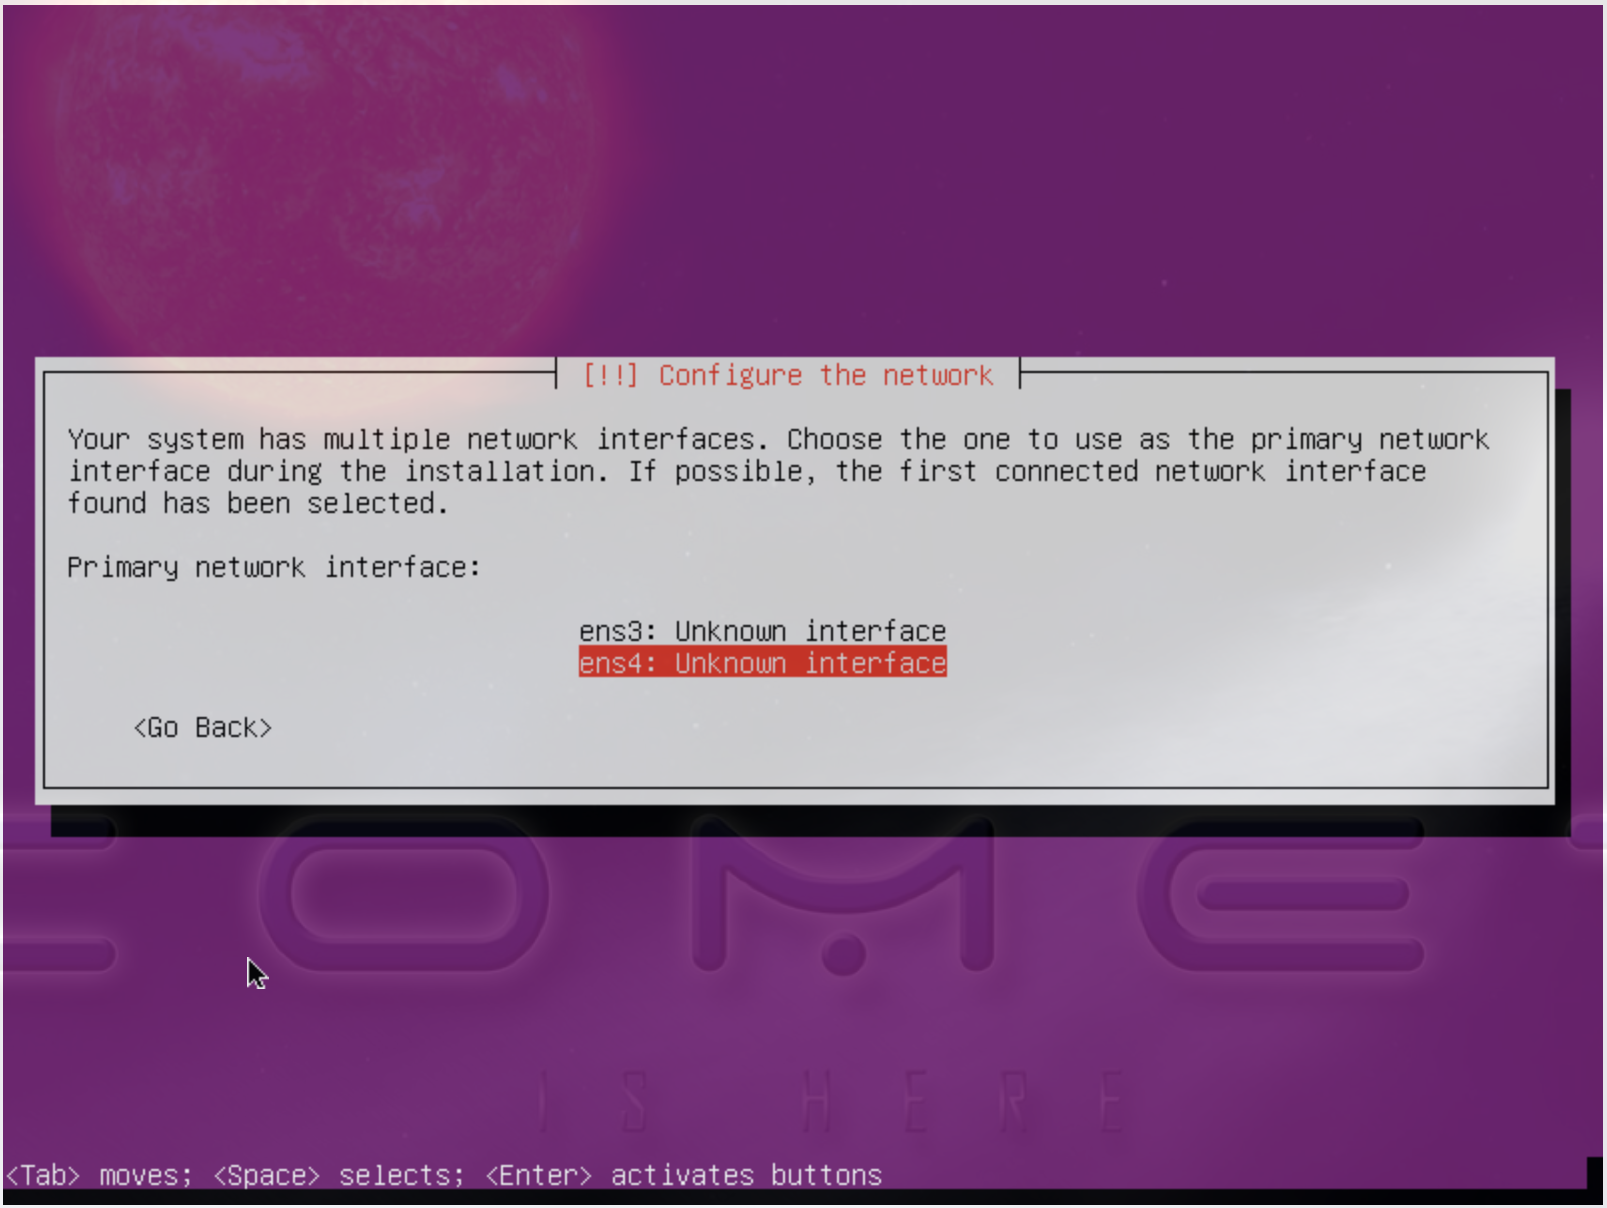
Figure: Configure the network. DHCP is configured on ens4 (the public interface)
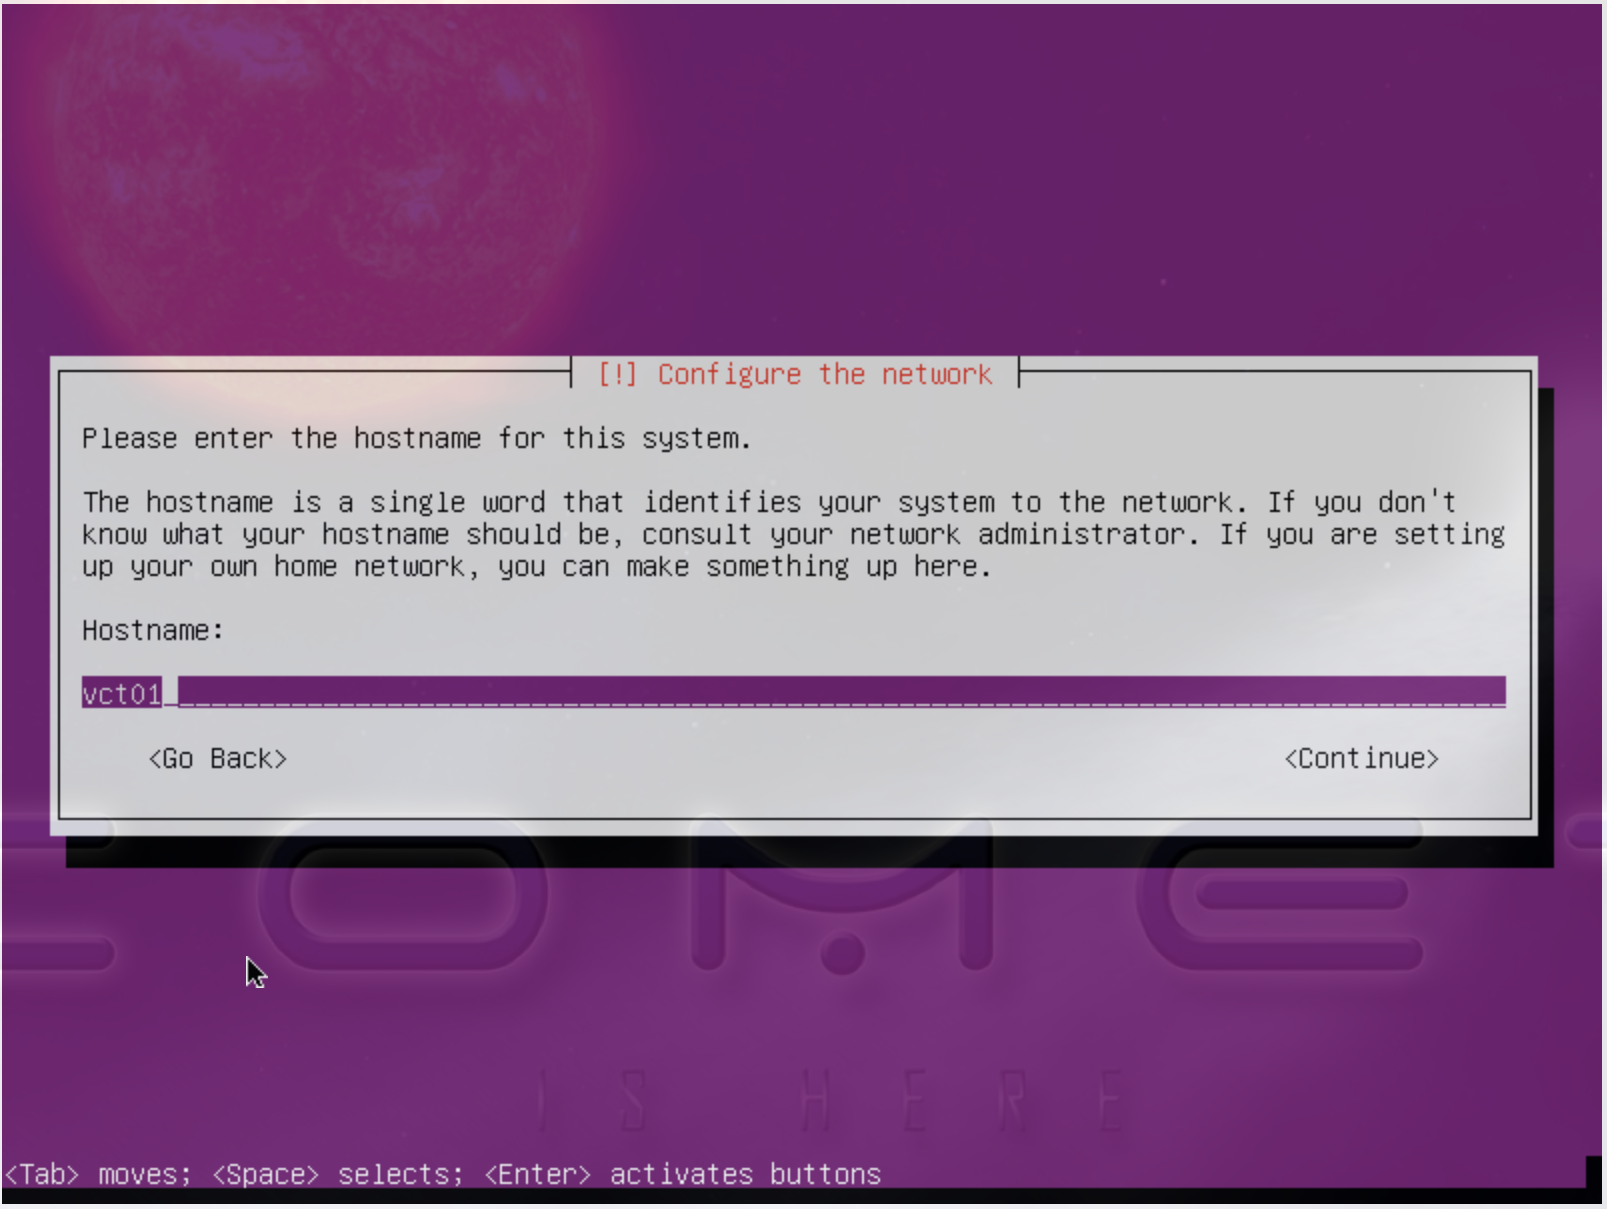
Figure: The hostname should be automatically set to the one assigned to you
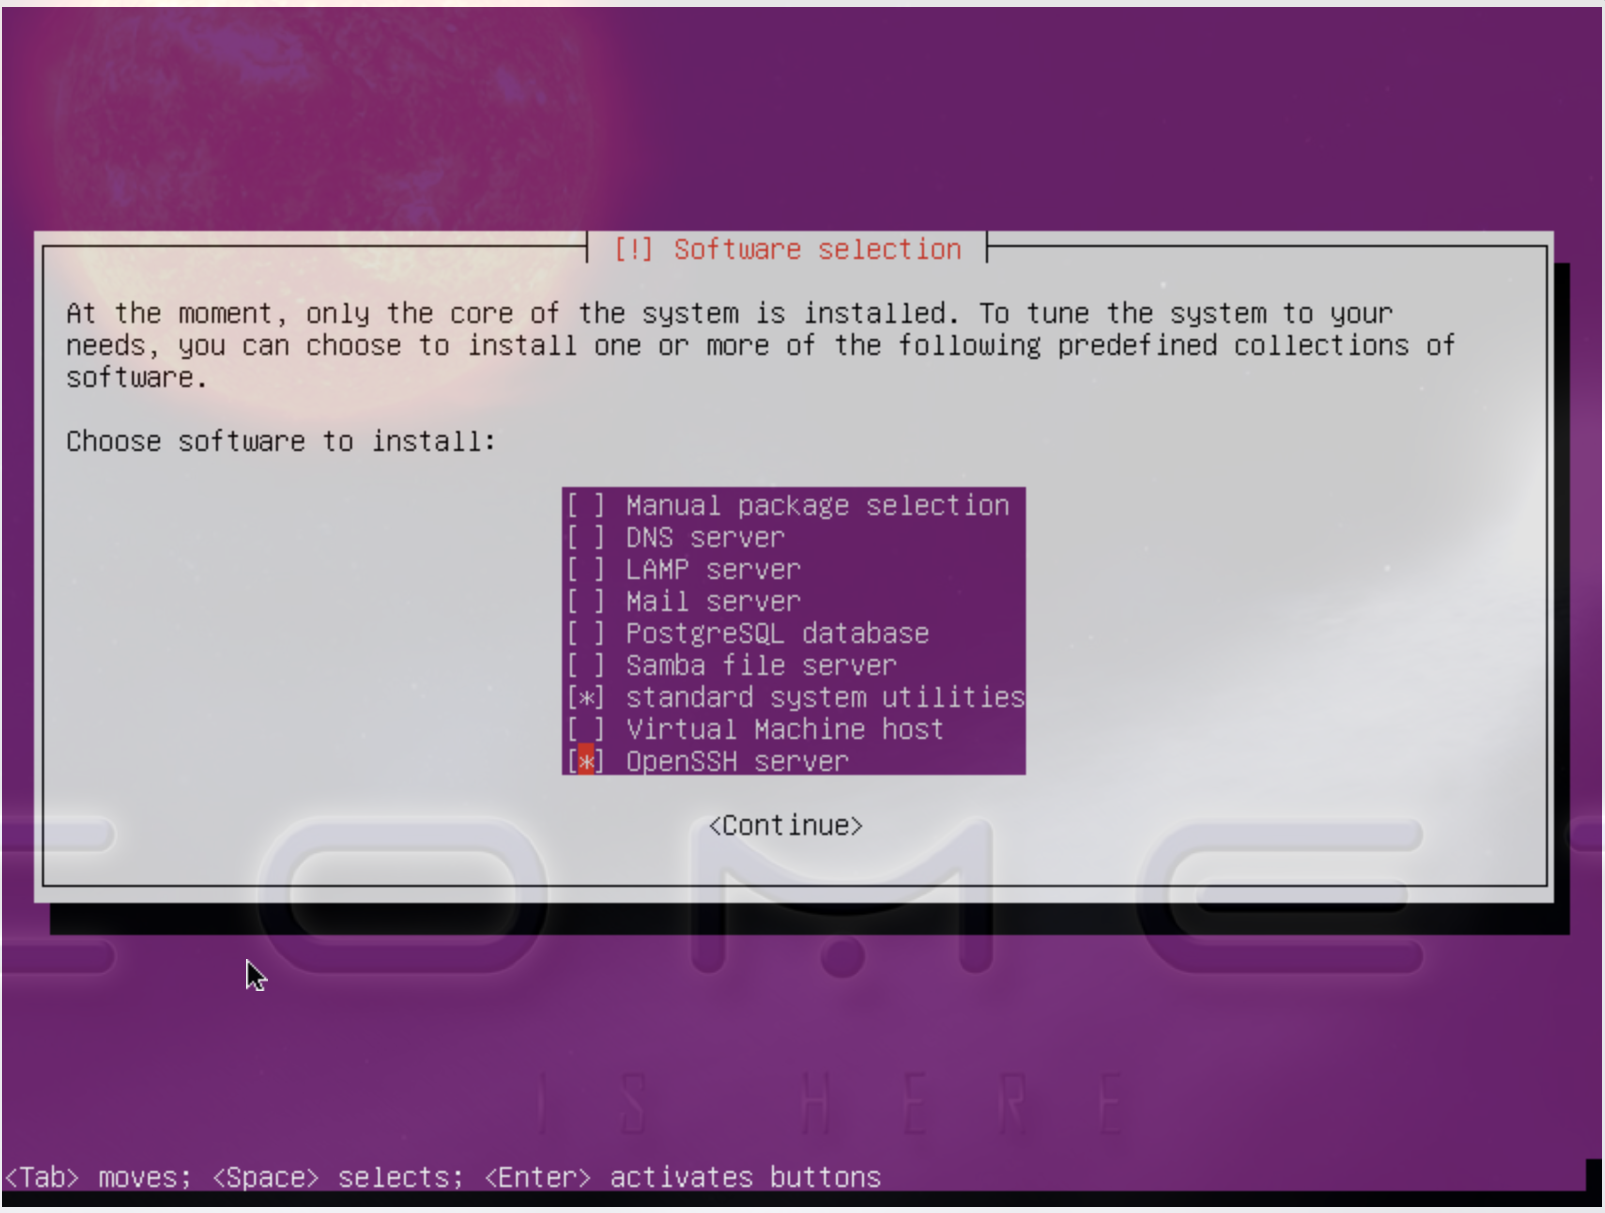
Figure: Select OpenSSH using the arrow keys and space bar and then tab to Continue
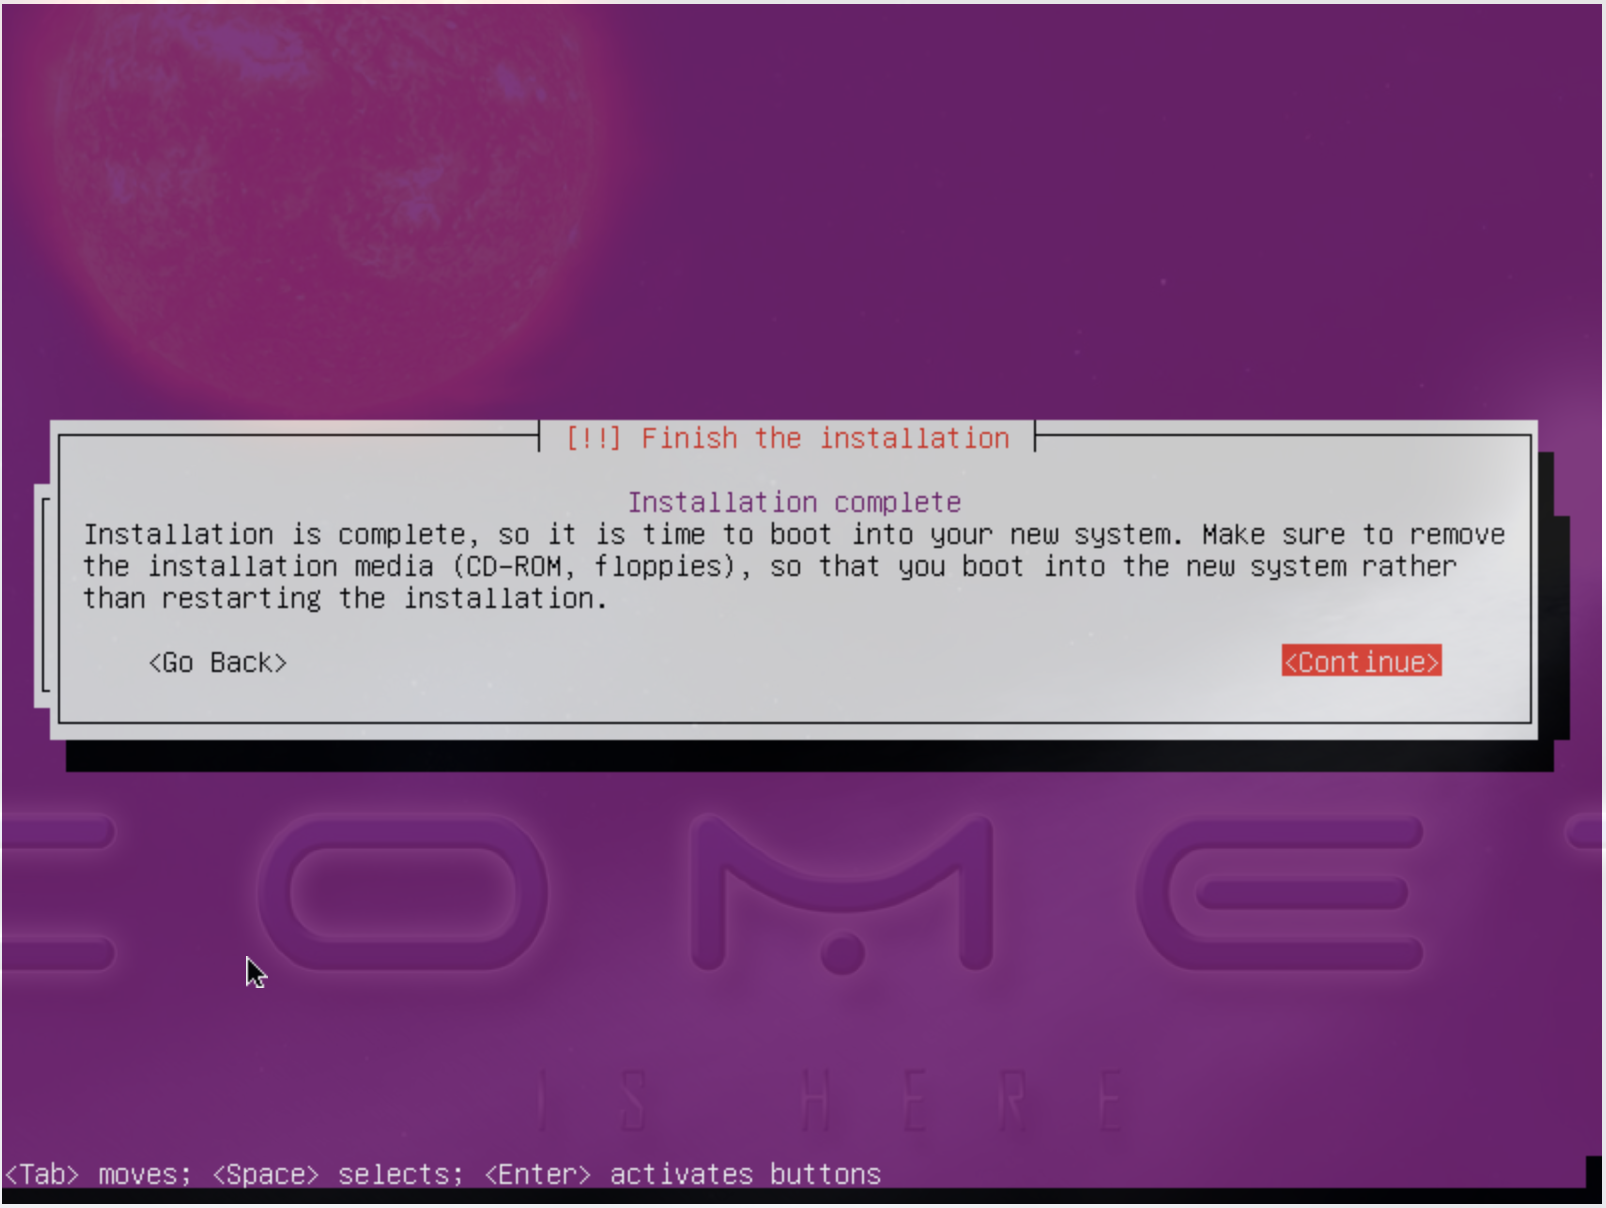
Figure: Complete the installation
Now the node will reboot. Watch carefully to find this screen, and then press ‘ESC’ key.
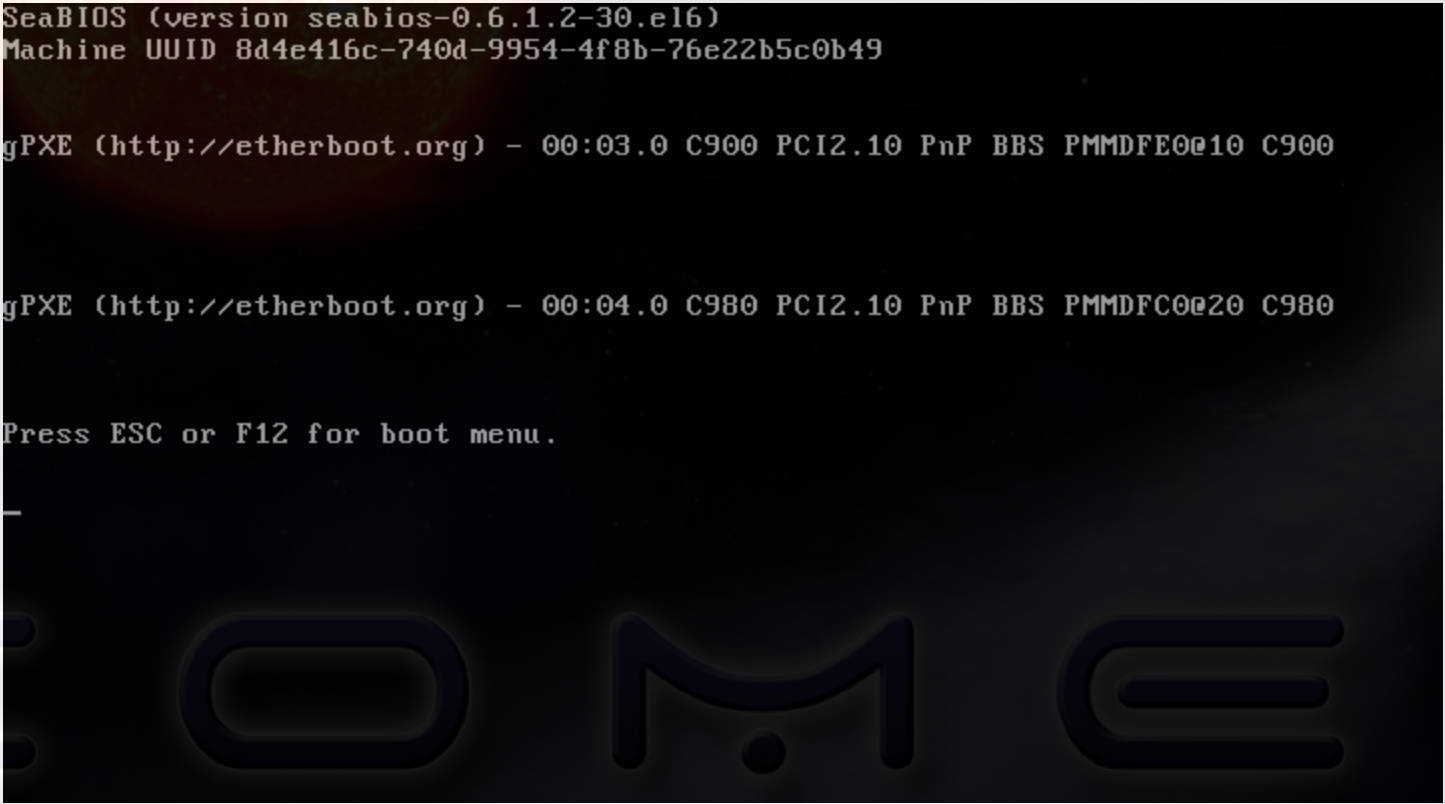
Figure: Booting menu after installation
Then choose the 3rd device - virtio disk
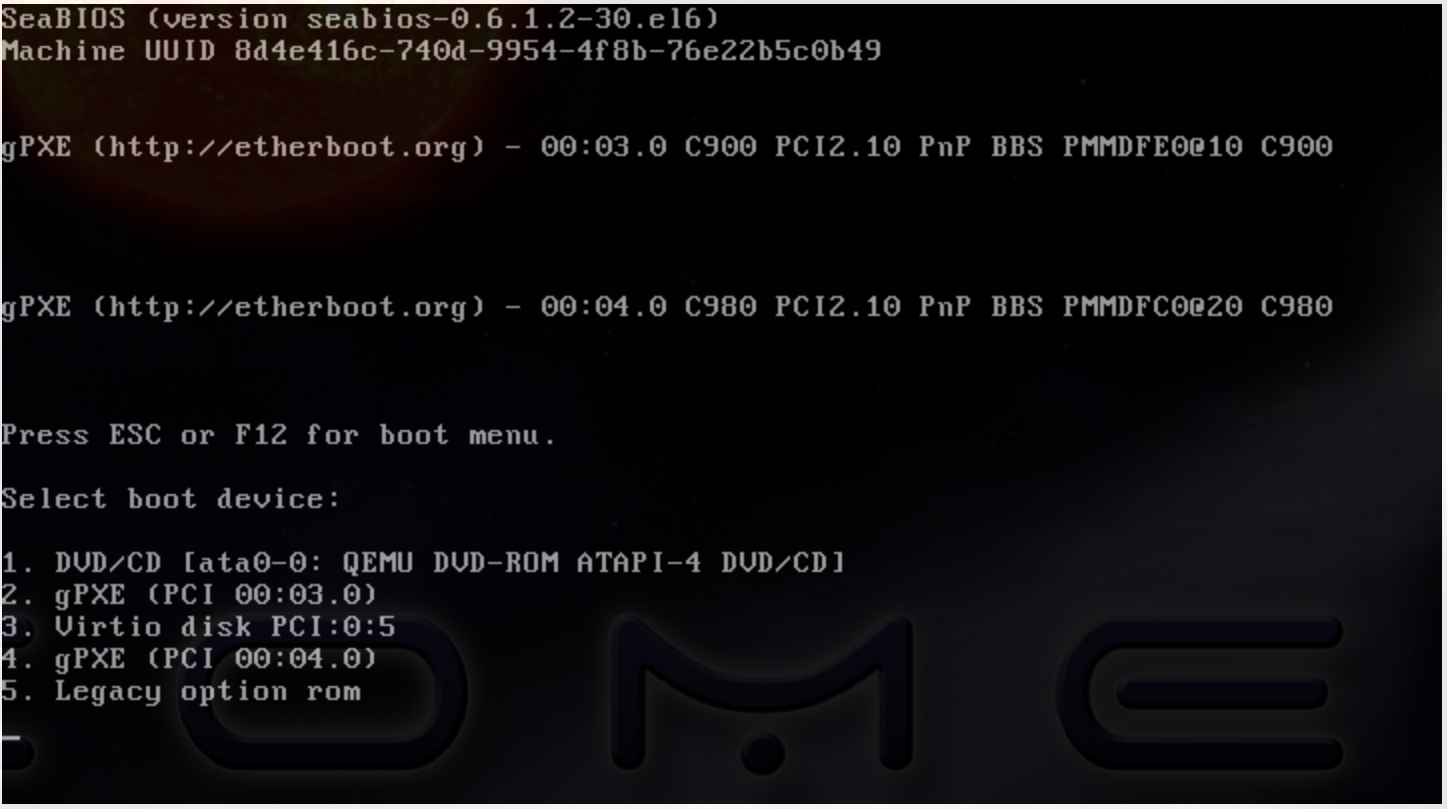
Figure: Choose to boot from the disk
In case you missed the ESC+F12 step, the node will be booted to the CD again.
Simply reboot the machine using CTRL+ALT+DEL to start again. Now choose ‘Boot
from first hard disk’, and carefully watch till it failed

Figure: From the CDROM boot menu, choose to boot from hard disk

Figure: Boot from HD from the CDROM boot menu will fail, press any key to reboot again
Then press any key so it reboot again, and try to catch the ESC+F12 screen again.

Figure: Login screen after boot
Configuring the front-end node
This section takes ~5 min to finish.
Now the FE node is back on, you can login and configure the cluster from your laptop/desktop.
To verify, you can try ssh login first. Use the uesrname and password you set during the FE node installation.
ssh USER@vctNN.sdsc.edu
Once the ssh login is verified, we can start the configuration of the FE node. We have scripted this process to only a few steps:
On your managing machine where Cloudmesh client tools is installed (make sure virtualenv is activated if you have used that):
mkdir ~/pearc17
cd ~/pearc17
git clone https://github.com/cloudmesh/cloudmesh.comet.vcdeploy.git
cd cloudmesh.comet.vcdeploy/ubuntu16.04.2
./deploy.sh <vctNN> <USER>
Note
You may be asked to provide the password for several times.
Note
It’s assumed that you have had a ssh keypair in ~/.ssh/. If you haven’t had one, use ssh-keygen to generate a keypair first.
This will finish the configuration. At the end you will see something like this:
PLAY RECAP **************************************************************
vctNN.sdsc.edu             : ok=48   changed=41   unreachable=0    failed=0
Which indicates the process has been completed successfully.
At this point we are done with the ISO so you could detach it:
cm comet iso detach vctNN
ISO are removed the next time the virtual node is shutdown or powered off (not when rebooted or reset). If the ISO stays attached, rebooting the FE node will boot to the CDROM boot menu again, and you will need to attach to console access to choose the boot options.
Install VC Compute Nodes
This section takes ~5 to 10 min to complete.
On your managing machine where Cloudmesh client tools is installed (make sure virtualenv is activated if you have used that):
cm comet start vctNN vm-vctNN-[00-01]
This starts the compute nodes. Once the resources are allocated and the nodes are booted, they will be net-installed automatically.
You can check the status of the nodes by running:
cm comet cluster vctNN --status
Cluster: vctNN      Frontend: vctNN IP: 132.249.xxx.xxx
+-------------+--------+------------+------------+-------------+
| name        | state  | computeset | allocation | admin_state |
+-------------+--------+------------+------------+-------------+
| vctNN       | active |            |            | synced      |
| vm-vctNN-00 | active | 26         | ABC123     | syncing     |
| vm-vctNN-01 | active | 26         | ABC123     | syncing     |
+-------------+--------+------------+------------+-------------+
At the end of the nodes installation the nodes will be powered off. Verify this by running the previous command, and check if the state is not active, and if the admin_state is ready.
Note
The state update may have some delay, e.g., half a minute or so. The active of state means the node is running; nostate or sometimes nostate-error means the node is powered off. For admin_state, synced means the node is running and the disk is synced; syncing means the disk is syncing to the backend, in which a power change of the node will be ignored; ready means the node is off and the disk is ready to be booted.
BEFORE powering them back on, you need to execute this from the FE node:
Login to the FE node if not yet:
ssh USER@vctNN.sdsc.edu
Now from the FE node:
sudo python cmutil.py setboot vctNN vm-vctNN-00 net=false sudo python cmutil.py setboot vctNN vm-vctNN-01 net=false
Otherwise the nodes will be net-installed again.
After disabled the netboot for the compute nodes, now on your managing host where Cloudmesh client is installed:
cm comet power on vctNN vm-vctNN-[00-01]
Wait for the compute nodes to be booted on (This could take a few minutes), which can be checked by:
cm comet cluster vctNN --status
to see if the state (2nd column) of the nodes is ‘active’.
Once the compute nodes are on, run these on the FE node:
python cmutil.py settrust vctNN
This will propagate the ssh keys, known hosts file from the FE node to the compute nodes, so ssh between any nodes within the VC could be easily done.
Login to compute nodes from front-end, and run your app.
DEMO1: Verifying InfiniBand Performance
We’ll start by verifying the InfiniBand connectivity between the
compute nodes using RDMA performance tests and the OSU
Micro-Benchmarks. The InfiniBand tests
are in the Ubuntu perftest package which is already installed on the
compute nodes. The InfiniBand tests must run as root so we’ll
change to root on the front-end and then use the SSH keys that are
in place to access the compute nodes.
From your managing machine open two SSH terminals to your virtual front-end. And then from the FE terminals:
In one terminal, start a server on the first compute node:
ssh vm-vctNN-00
Then in that vm type
ib_write_bw
In the other terminal, connect to the server from the second compute node and start the test:
ssh vm-vctNN-01
ib_write_bw vm-vctNN-00
The bandwidth results will confirm that we’re sending data over InfiniBand:
---------------------------------------------------------------------------------------
                    RDMA_Write BW Test
 Dual-port       : OFF              Device         : mlx4_0
 Number of qps   : 1                Transport type : IB
 Connection type : RC               Using SRQ      : OFF
 TX depth        : 128
 CQ Moderation   : 100
 Mtu             : 2048[B]
 Link type       : IB
 Max inline data : 0[B]
 rdma_cm QPs         : OFF
 Data ex. method : Ethernet
---------------------------------------------------------------------------------------
 local address: LID 0x3c QPN 0x0a1b PSN 0xecf3ce RKey 0x68010f00 VAddr 0x002b19db6f2000
 remote address: LID 0x11 QPN 0x0a1b PSN 0x3e7b9f RKey 0x68010f00 VAddr 0x002b41b62fd000
---------------------------------------------------------------------------------------
 #bytes     #iterations    BW peak[MB/sec]    BW average[MB/sec]   MsgRate[Mpps]
 65536      5000             6034.72            6033.76                0.096540
---------------------------------------------------------------------------------------
And the first server will show its results in the first terminal:
************************************
* Waiting for client to connect... *
************************************
---------------------------------------------------------------------------------------
                    RDMA_Write BW Test
 Dual-port       : OFF              Device         : mlx4_0
 Number of qps   : 1                Transport type : IB
 Connection type : RC               Using SRQ      : OFF
 CQ Moderation   : 100
 Mtu             : 2048[B]
 Link type       : IB
 Max inline data : 0[B]
 rdma_cm QPs         : OFF
 Data ex. method : Ethernet
---------------------------------------------------------------------------------------
 local address: LID 0x11 QPN 0x0a1b PSN 0x3e7b9f RKey 0x68010f00 VAddr 0x002b41b62fd000
 remote address: LID 0x3c QPN 0x0a1b PSN 0xecf3ce RKey 0x68010f00 VAddr 0x002b19db6f2000
---------------------------------------------------------------------------------------
 #bytes     #iterations    BW peak[MB/sec]    BW average[MB/sec]   MsgRate[Mpps]
 65536      5000             6034.72            6033.76                0.096540
---------------------------------------------------------------------------------------
Similarly, we can test the latency by running ib_write_lat in the
place of ib_write_bw. The results are as such. Please note we added
option -a to run the test with different run sizes:
---------------------------------------------------------------------------------------
 #bytes #iterations    t_min[usec]    t_max[usec]  t_typical[usec]
 2       1000          1.10           5.29         1.13
 4       1000          1.10           2.30         1.13
 8       1000          1.11           8.23         1.14
 16      1000          1.11           6.27         1.14
 32      1000          1.15           6.38         1.18
 64      1000          1.17           2.88         1.20
 128     1000          1.27           7.02         1.29
 256     1000          1.60           7.88         1.63
 512     1000          1.81           7.82         1.85
 1024    1000          2.04           7.45         2.08
 2048    1000          2.52           7.04         2.58
 4096    1000          2.85           6.62         2.91
 8192    1000          3.49           7.60         3.56
 16384   1000          4.74           7.46         4.98
 32768   1000          7.44           11.96        7.58
 65536   1000          12.71          36.10        12.91
 131072  1000          22.94          28.73        23.38
 262144  1000          43.66          46.34        44.16
 524288  1000          84.88          88.37        85.68
 1048576 1000          167.85         173.88       169.49
 2097152 1000          333.30         343.71       335.02
 4194304 1000          665.24         683.21       668.04
 8388608 1000          1442.65        1451.63      1447.71
---------------------------------------------------------------------------------------
DEMO2: OSU Micro-Benchmarks
The OSU Micro-Benchmarks are suite of individual applications measuring the latency and bandwidth of individual MPI calls. The cover both the performance of both the underlying network fabric and the MPI implementation. The Micro-Benchmarks provide coverage for the latest MPI standards but the version of Open MPI in the Ubuntu Trusty distribution is a bit older and not all of the messaging calls are available. We’ll focus only a few as part of the InfiniBand and MPI verification.
Begin by logging on to the first compute node where we’ll download and compile the benchmarks. This can be done with your non-privileged user account. Then download the benchmarks, extract, and configure the source.
ssh vm-vctNN-00
wget http://mvapich.cse.ohio-state.edu/download/mvapich/osu-micro-benchmarks-5.3.tar.gz
tar -zxf osu-micro-benchmarks-5.3.tar.gz
cd osu-micro-benchmarks-5.3/
./configure CC=/usr/bin/mpicc CXX=/usr/bin/mpicxx
After the source configuration step completes, go into the directory for the point-to-point communication benchmarks and compile them.
cd mpi/pt2pt/
make
To run the tests create a host file with the two compute nodes specified:
vm-vctNN-00
vm-vctNN-01
Remember where you’ve placed this ($HOME/two-hosts.txt is a good
idea) and run the bandwidth test.
mpirun -np 2 -hostfile ~/two-hosts.txt ./osu_bw
The results will go to the terminal and you can compare them to the
ib_write_bw performance. You can ignore Open MPI’s complaints
regarding registered memory, this is due to change in the driver:
# OSU MPI Bandwidth Test v5.3
# Size      Bandwidth (MB/s)
1                       9.04
2                      18.42
4                      37.70
8                      75.40
16                    146.69
32                    292.57
64                    428.43
128                   586.04
256                   909.23
512                  1595.34
1024                 3618.72
2048                 5236.77
4096                 6009.90
8192                 7854.50
16384               10265.02
32768               10829.96
65536               11345.41
131072              11442.63
262144              11430.55
524288              11322.77
1048576             10930.49
2097152             10711.41
4194304             10639.83
Now we’ll try a collective benchmark for MPI_Alltoall. We can
reuse our host file for 24 tasks and let MPI distribute the tasks.
cd ../collective/
make osu_alltoall
mpirun -np 24 -hostfile ~/two-hosts.txt ./osu_alltoall
Again, there perfomance results (this time for latency) go to the terminal:
# OSU MPI All-to-All Personalized Exchange Latency Test v5.3
# Size       Avg Latency(us)
1                       9.92
2                      10.31
4                      10.49
8                      10.60
16                     10.89
32                     11.34
64                     12.24
128                    15.14
256                    20.27
512                    37.53
1024                   29.62
2048                   53.92
4096                  119.42
8192                  192.33
16384                 314.22
32768                 557.86
65536                3082.00
131072               6302.07
262144              12704.54
524288              30272.60
1048576             50294.14
DEMO4 (optional): OpenFOAM
OpenFOAM is a parallel open-source computational fluid dynamics application that is available in a public Ubuntu repository. To install it, on each of the compute nodes run:
sudo apt install software-properties-common -y
sudo add-apt-repository http://download.openfoam.org/ubuntu
sudo apt-get update
sudo apt-get install openfoam4 -y --force-yes
Add the OpenFOAM profile to your .bashrc:
echo '. /opt/openfoam4/etc/bashrc' >> ~/.bashrc
source ~/.bashrc
We’re now able to setup the files and directories needed for a benchmarking run.
mkdir -p $FOAM_RUN
cd $FOAM_RUN
cp -r $FOAM_TUTORIALS/multiphase/interFoam/laminar/damBreak/damBreak .
foamCloneCase damBreak damBreakFine
cd damBreakFine
cp ~/comet-vc-tutorial/examples/OpenFOAM/blockMeshDict system/
cp ~/comet-vc-tutorial/examples/OpenFOAM/decomposeParDict system/
Setup the mesh and initial conditions.
blockMesh
cp -r 0/alpha.water.orig 0/alpha.water
setFields
Decompose the mesh.
decomposePar
Create a host file (hosts.txt) and run the code. For example,
create hosts.txt for 24 tasks on each compute node and run.
echo "vm-vctNN-00 slots=24" > hosts.txt
echo "vm-vctNN-01 slots=24" >> hosts.txt
mpirun  -hostfile ./hosts.txt -np 48 `which foamExec` interFoam -parallel
This will take a while (about 5-10 minutes).
The OpenFOAM packages include a version of ParaView for OpenFOAM that you can use to view the mesh. From a system with X windows SSH to your front-end and compute node with X forwarding enabled.
ssh -X <username>@vctNN.sdsc.edu
ssh -X vm-vctNN-00
cd $FOAM_RUN/damBreakFine
paraFoam -case processor1
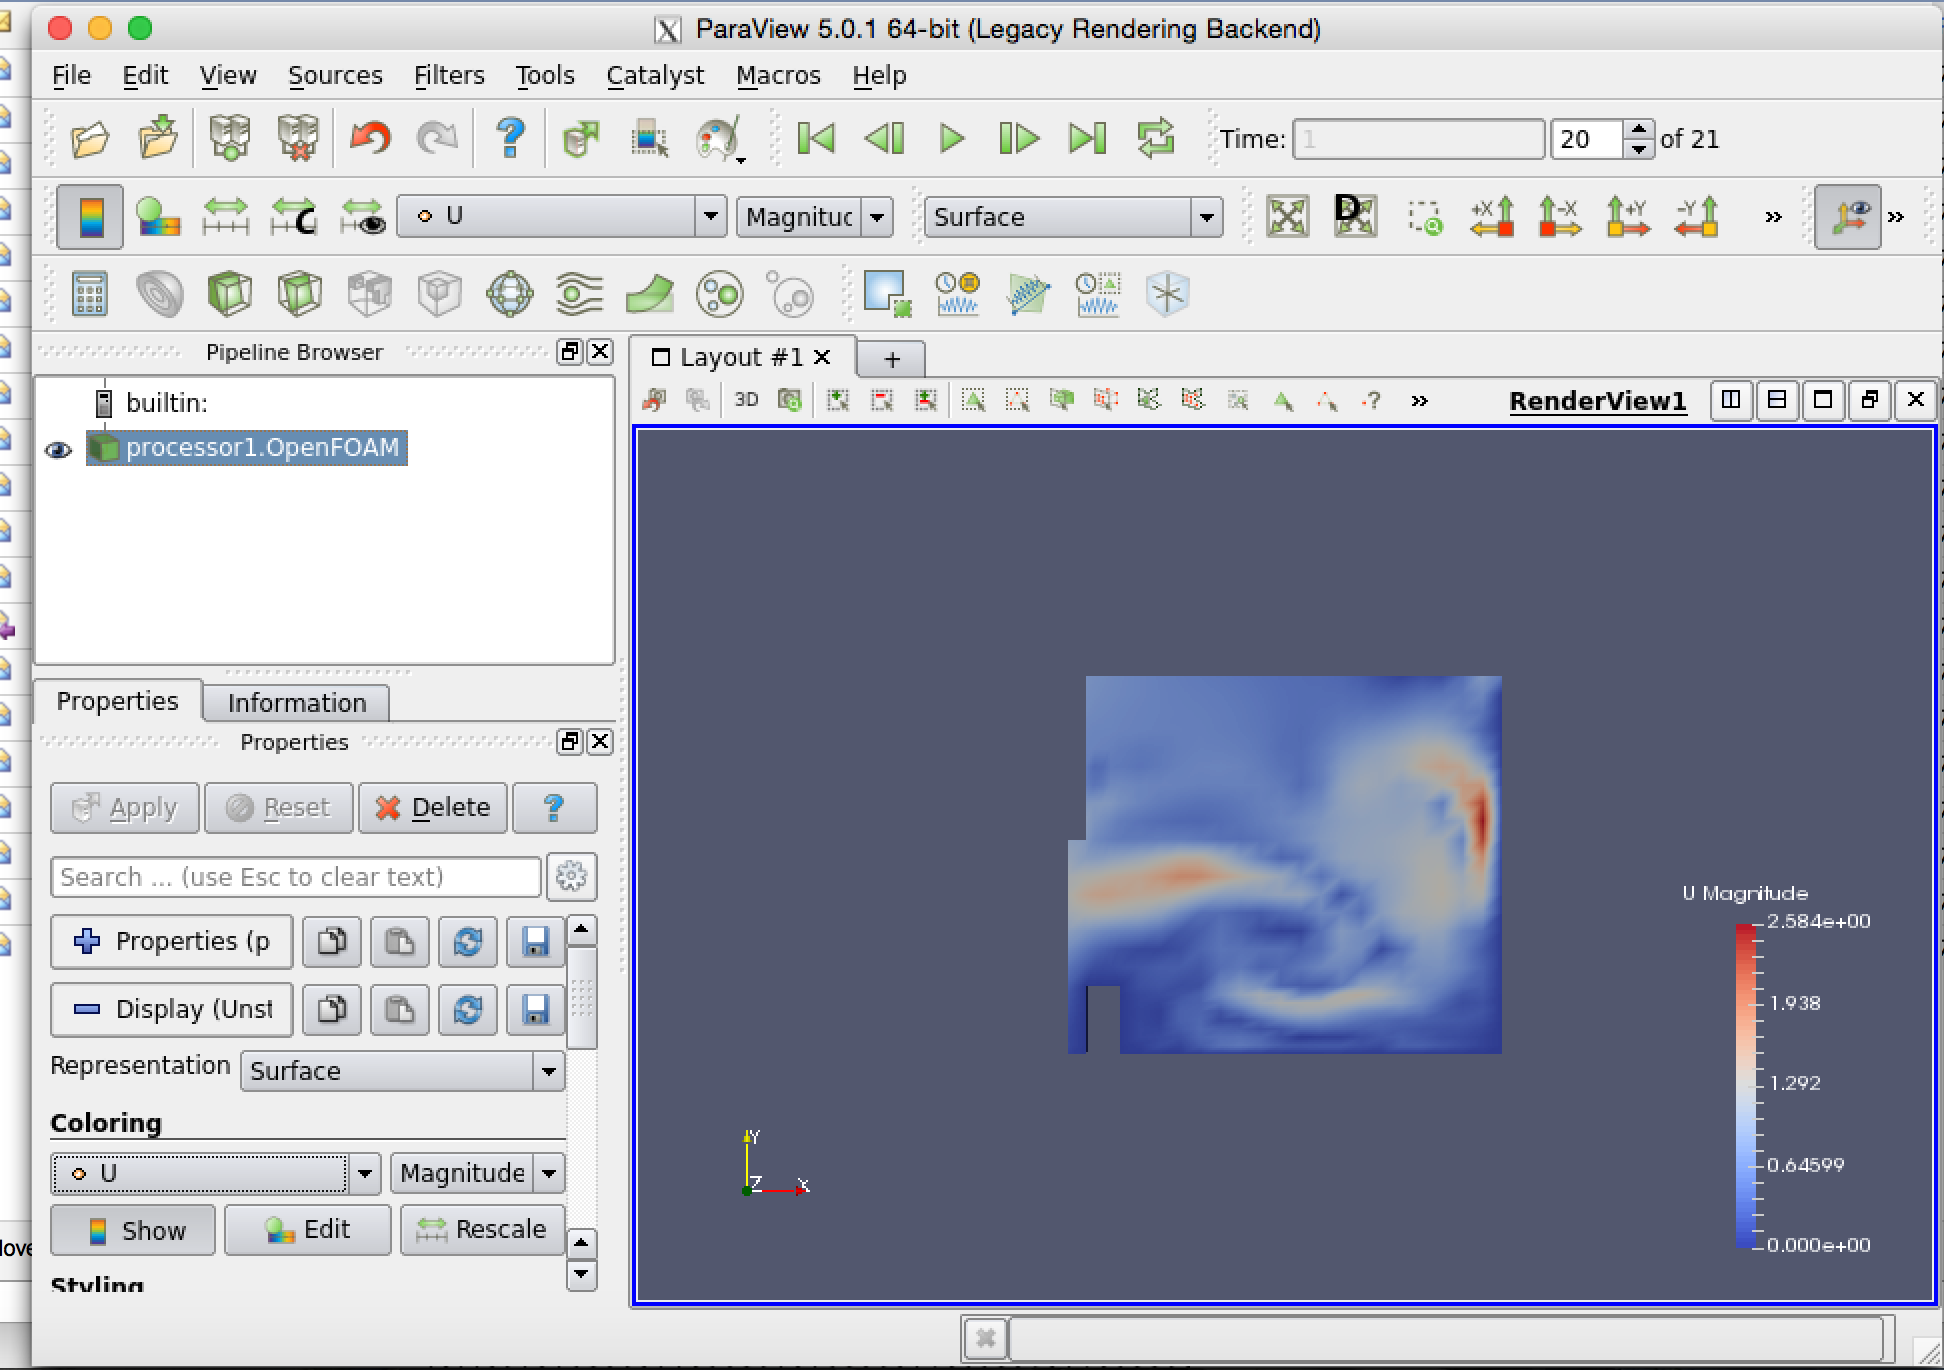
Figure: ParaView with OpenFOAM example data
DEMO5 (optional): Julia
Julia is a high-level, high-performance dynamic
programming language for numerical computing. It provides a sophisticated
compiler, distributed parallel execution, numerical accuracy, and an
extensive mathematical function library. Like OpenFOAM, Julia has Ubuntu
packages in public repositories. You can install on the compute nodes
following a similar process. On each compute node run the following
commands from the Julia installation instructions for Ubuntu. When prompted,
hit ENTER.
sudo add-apt-repository ppa:staticfloat/juliareleases
sudo add-apt-repository ppa:staticfloat/julia-deps
sudo apt-get update
sudo apt-get install julia -y
You can start Julia on the command line for interactive use:
rpwagner@vm-vctNN-00:~$ julia
               _
   _       _ _(_)_     |  A fresh approach to technical computing
  (_)     | (_) (_)    |  Documentation: http://docs.julialang.org
   _ _   _| |_  __ _   |  Type "?help" for help.
  | | | | | | |/ _` |  |
  | | |_| | | | (_| |  |  Version 0.4.6 (2016-06-19 17:16 UTC)
 _/ |\__'_|_|_|\__'_|  |  Official http://julialang.org release
|__/                   |  x86_64-linux-gnu

julia>
rpwagner@vm-vctNN-00:~$ julia --machinefile machinefile-jl.txt
               _
   _       _ _(_)_     |  A fresh approach to technical computing
  (_)     | (_) (_)    |  Documentation: http://docs.julialang.org
   _ _   _| |_  __ _   |  Type "?help" for help.
  | | | | | | |/ _` |  |
  | | |_| | | | (_| |  |  Version 0.4.6 (2016-06-19 17:16 UTC)
 _/ |\__'_|_|_|\__'_|  |  Official http://julialang.org release
|__/                   |  x86_64-linux-gnu

julia>