Cloudmesh Database
Cloudmesh stores its status in a database so that you can easily remember which services you used where and have an accurate account of them. We use as a database MongoDB to store this information. To use cloudmesh you simply need to create and start the database service.
We install a separate version of mongo in your ~/.cloudmesh directory. Use the command:
cms admin mongo install
On windows, you need to do this very carefully as there is one installation box that you need to ignore to make this possible.
First, you need to change the password for mongo in the cloudmesh.yaml file
Now you can create an empty database with
you can initialize it with
cms gui quick
cms init
MongoDB Installation Steps
The following steps document the MongoDB server configuration and installation steps from the standpoint of a fresh install. We recommend utilizing our build script for a seamless installation experience. However, If you already have a pre-existing installation of MongoDB, please feel free to skip ahead once you’ve reviewed the configuration steps and confirmed you have an admin user with a strong password created. Please also note that some commands we use during the development wipe out the database completely including all collections. So make a backup.
If you would like to remove an existing MongoDB installation, please skip to the next subsection in order to reference the uninstall steps for MongoDB; then revert back to this section to kick off a fresh install.
You should also note to not expose mongo on the internet in order to keep your information within mongo private.
Prior to starting the MongoDB installation, you will need to install and
configure the cloudmesh.yaml file if you have not already done so.
To install it, run the following command:
cms help
Then, be sure to edit the cloudmesh.yaml configuration file (which is created
under ~/.cloudmesh directory) and update the values of the parameters used in the
mongo install. You can use a text editor, such as:
emacs ~/.cloudmesh/cloudmesh.yaml
and change the password of the mongo entry to something of your choosing. Note, be sure to use a very strong password credential:
MONGO_PASSWORD: TBD
In case you do not have MongoDB installed, you can do so for macOS and Ubuntu 18.xx by setting the following variable:
MONGO_AUTOINSTALL: True
Alternatively, you can set these cloudmesh.yaml parameter values from the command line without using an editor by running the following:
cms config set cloudmesh.data.mongo.MONGO_AUTOINSTALL=True
cms config set cloudmesh.data.mongo.MONGO_PASSWORD=YOURPASSWORD
Another item to note is the default location of the MongoDB installation.
In a Linux/MacOS environment, the default installation path will be under
~/local/mongo/bin. In a Windows environment, the default path is under
C:\Users\USERNAME\.cloudmesh\mongo. If you would like to change these
paths, be sure to update these in the cloudmesh.yaml file.
Once the configuration of the cloudmesh.yaml file has been completed, run the following command (assuming you have the user in the c drive), where USERNAME is the username you installed cloudmesh in:
C:/Users/USERNAME\ENV3\Scripts\activate
cms admin mongo install
Note
In a Windows installation, we are only required to install
MongoDB commands, not MongoDB Service. By default, the
silent installer will attempt to install and start the
MongoDB System Service. When prompted that the service
failed to start, simply select Ignore.
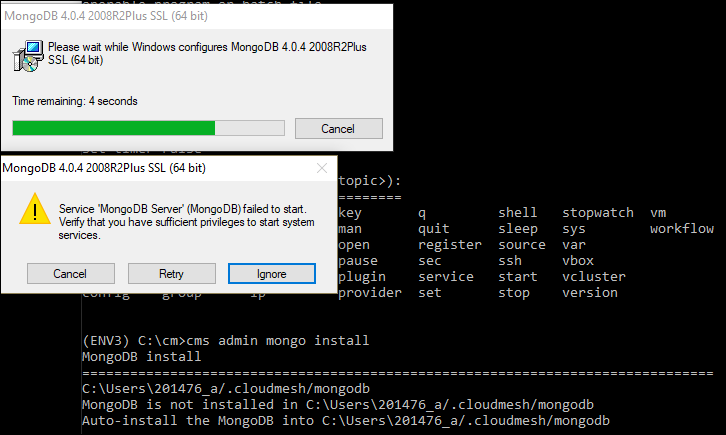
Figure: Mongo Windows install. Make sure to press ignore
After the installation completes, in a Linux/MacOS environment, confirm the
MongoDB installation path was added to the .bash_* file. This should have
already been done automatically if the cms admin mongo install command
was used to kick off the installation.
In a Windows environment, however, the default path is not automatically added to the Path variable, so you will need to add this manually:

Figure: Mongo Windows path configuration
Now that MongoDB has been installed, we initialize it with the following command:
cms init
In case you like to stop or start is you can say:
cms stop
cms start
Please remember that for cloudmesh to work properly you need to start mongo. In case you need a different port you can configure that in the yaml file.
Uninstall of MongoDB on Windows 10
This section documents steps required to uninstall MongoDB from a prior installation
Note that there are two distinct uninstallation steps to consider. If you have
installed MongoDB using the cloudmesh installer
(i.e. cms admin mongo install), Mongo is not installed with a service by
default and can be simply uninstalled by removing the install directories
under ~\.cloudmesh (reference the MONGO_PATH, MONGO_LOG, and MONGO_HOME
variables within the cloudmesh.yaml file for specifics).
If, however, you have a pre-existing installation of MongoDB, or have MongoDB Server Service installed through an alternative installation method outside of cloudmesh, proceed through the following steps if you wish to completely uninstall MongoDB.
To uninstall, please terminate the running MongoDB service (if applicable), then delete it. To stop the service, open Task Manager and confirm the status = Stopped. If it is not stopped, please do so. To delete it, run the following as an administrator from the command line:
sc.exe delete MongoDB
Next, delete the Mongo installation directories. Please reference the
cloudmesh.yaml file for the MONGO_HOME, MONGO_PATH, and MONGO_LOG path values if
cms admin mongo install was attempted at some point.
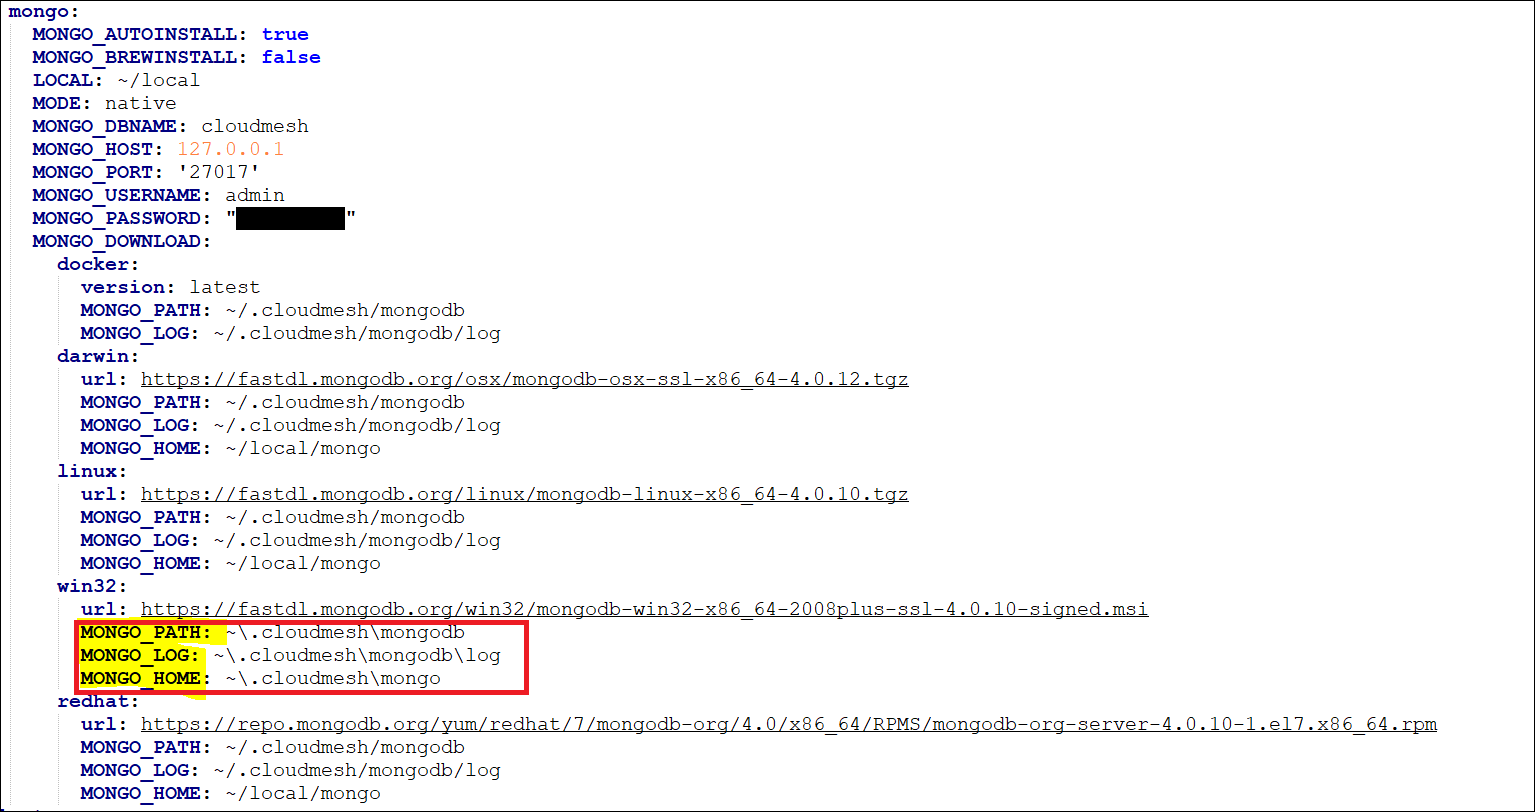
Figure: Mongo install path
Finally, execute the MongoDB msiexe installer to check if there are any remaining components that need to be uninstalled. Once launched, click on the Remove button. Note that this installer can be downloaded locally using the URL found under the MONGO_DOWNLOAD variable in the cloudmesh.yaml file.
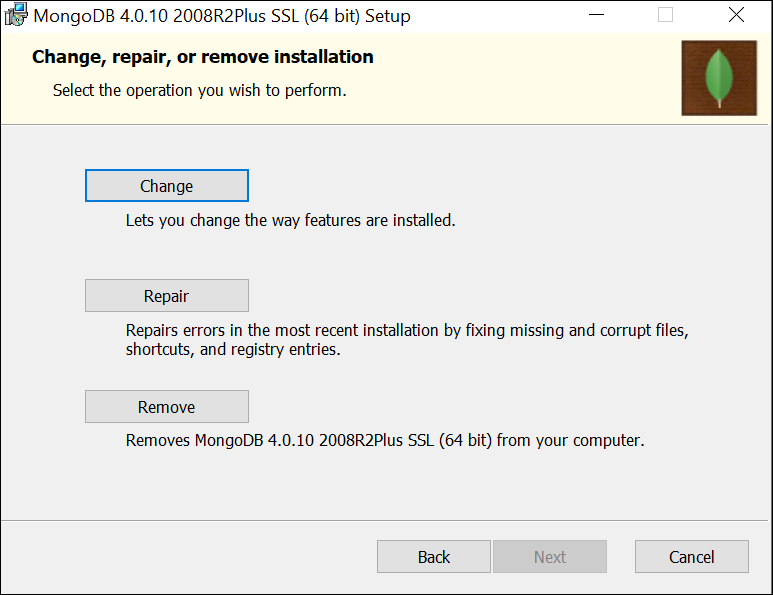
Figure: Mongo installation
Note
If Compass was installed, this can simply be removed by navigating to the Windows ‘Add Remove Programs’.
You have now successfully removed MongoDB, and are ready to reinstall a fresh instance.