Autogenerating Analytics Rest Services
Learning Objective
We will learn to create a REST service automatically from pyton functionsq with the help of cloudmesh-openapi. We use as example a Pipeline Anova SVM from which we generate an openapi server, and subsequently train the model with data and make predictions from said data. All code needed for this is provided in the cloudmesh-openapi repository. The code is largely based on this sklearn example. This includes
- Training ML models with stateless requests
- Generating RESTful APIs using
cms openapifor existing python code - Deploying openapi definitions onto a localserver
- Interacting with newly created openapi services
Topics Covered
1. Prerequisite
It is also assumed that the user has installed and has familiarity with the following:
- Install cloudmesh-openapi using the developer install as documented here
- Python 3.8.x
- Linux Command line
- Working in a python environment
2. The Python Code
First, let us ensure we are in the correct directory. If you followed
the cloudmesh-openapi installation directions as dictated in the
installation guide,
simply navigate to the root directory of cloudmesh-openapi. Notice
how we are still working in our python virtual environment ENV3 from
the installation guide.
(ENV3) > pwd
~/cm/cloudmesh-openapi
Let us take a look at the PipelineAnova SVM example code.
A Pipeline is a pipeline of transformations to apply with a final estimator. Analysis of variance (ANOVA) is used for feature selection. A Support vector machine SVM is used as the actual learning model on the features.
Use your favorite editor to look at it (whether it be vscode, vim, nano, etc). We will use emacs
(ENV3) > emacs ./tests/Scikitlearn-experimental/sklearn_svm.py
The class within this file has two main methods to interact with (except for the file upload capability which is added at runtime)
@classmethod
def train(cls, filename: str) -> str:
    """
    Given the filename of an uploaded file, train a PipelineAnovaSVM
    model from the data. Assumption of data is the classifications
    are in the last column of the data.

    Returns the classification report of the test split
    """
    # some code...

@classmethod
def make_prediction(cls, model_name: str, params: str):
    """
    Make a prediction based on training configuration
    """
    # some code...
Note the parameters that each of these methods takes in. These parameters are expected as part of the stateless request for each method.
3. Generating the OpenAPI YAML file
Let us now use the python code from above to create the openapi YAML file that we will deploy onto our server. To correctly generate this file, use the following command:
(ENV3) > cms openapi generate PipelineAnovaSVM
    \ --filename=./tests/Scikitlearn-experimental/sklearn_svm.py
    \ --import_class
    \ --enable_upload
Let us digest the options we have specified:
--filenameindicates the path to the python file in which our code is located--import_classnotifiescms openapithat the YAML file is generated from a class. The name of this class is specified asPipelineAnovaSVM--enable_uploadallows the user to upload files to be stored on the server for reference. This flag causescms openapito auto-generate a new python file with theuploadmethod appended to the end of the file. For this example, you will notice a new file has been added in the same directory assklearn_svm.py. The file is aptly called:sklearn_svm_upload-enabled.py
4. The OpenAPI YAML File (optional)
If Section 2 above was correctly, cms will have generated the corresponding openapi YAML file. Let us take a look at it.
(ENV3) > emacs ./tests/Scikitlearn-experimental/sklearn_svm.yaml
This YAML file has a lot of information to digest. The basic structure is documented here. However, it is not necessary to understand this information to deploy RESTful APIs.
However, take a look at paths: on line 9 in this file. Under this
section, we have several different endpoints for our API
listed. Notice the correlation between the endpoints and the python
file we generated from.
5. Starting the Server
Using the YAML file from Section 2, we can now start the server.
(ENV3) > cms openapi server start ./tests/Scikitlearn-experimental/sklearn_svm.yaml
The server should now be active. Navigate to http://localhost:8080/cloudmesh/ui.
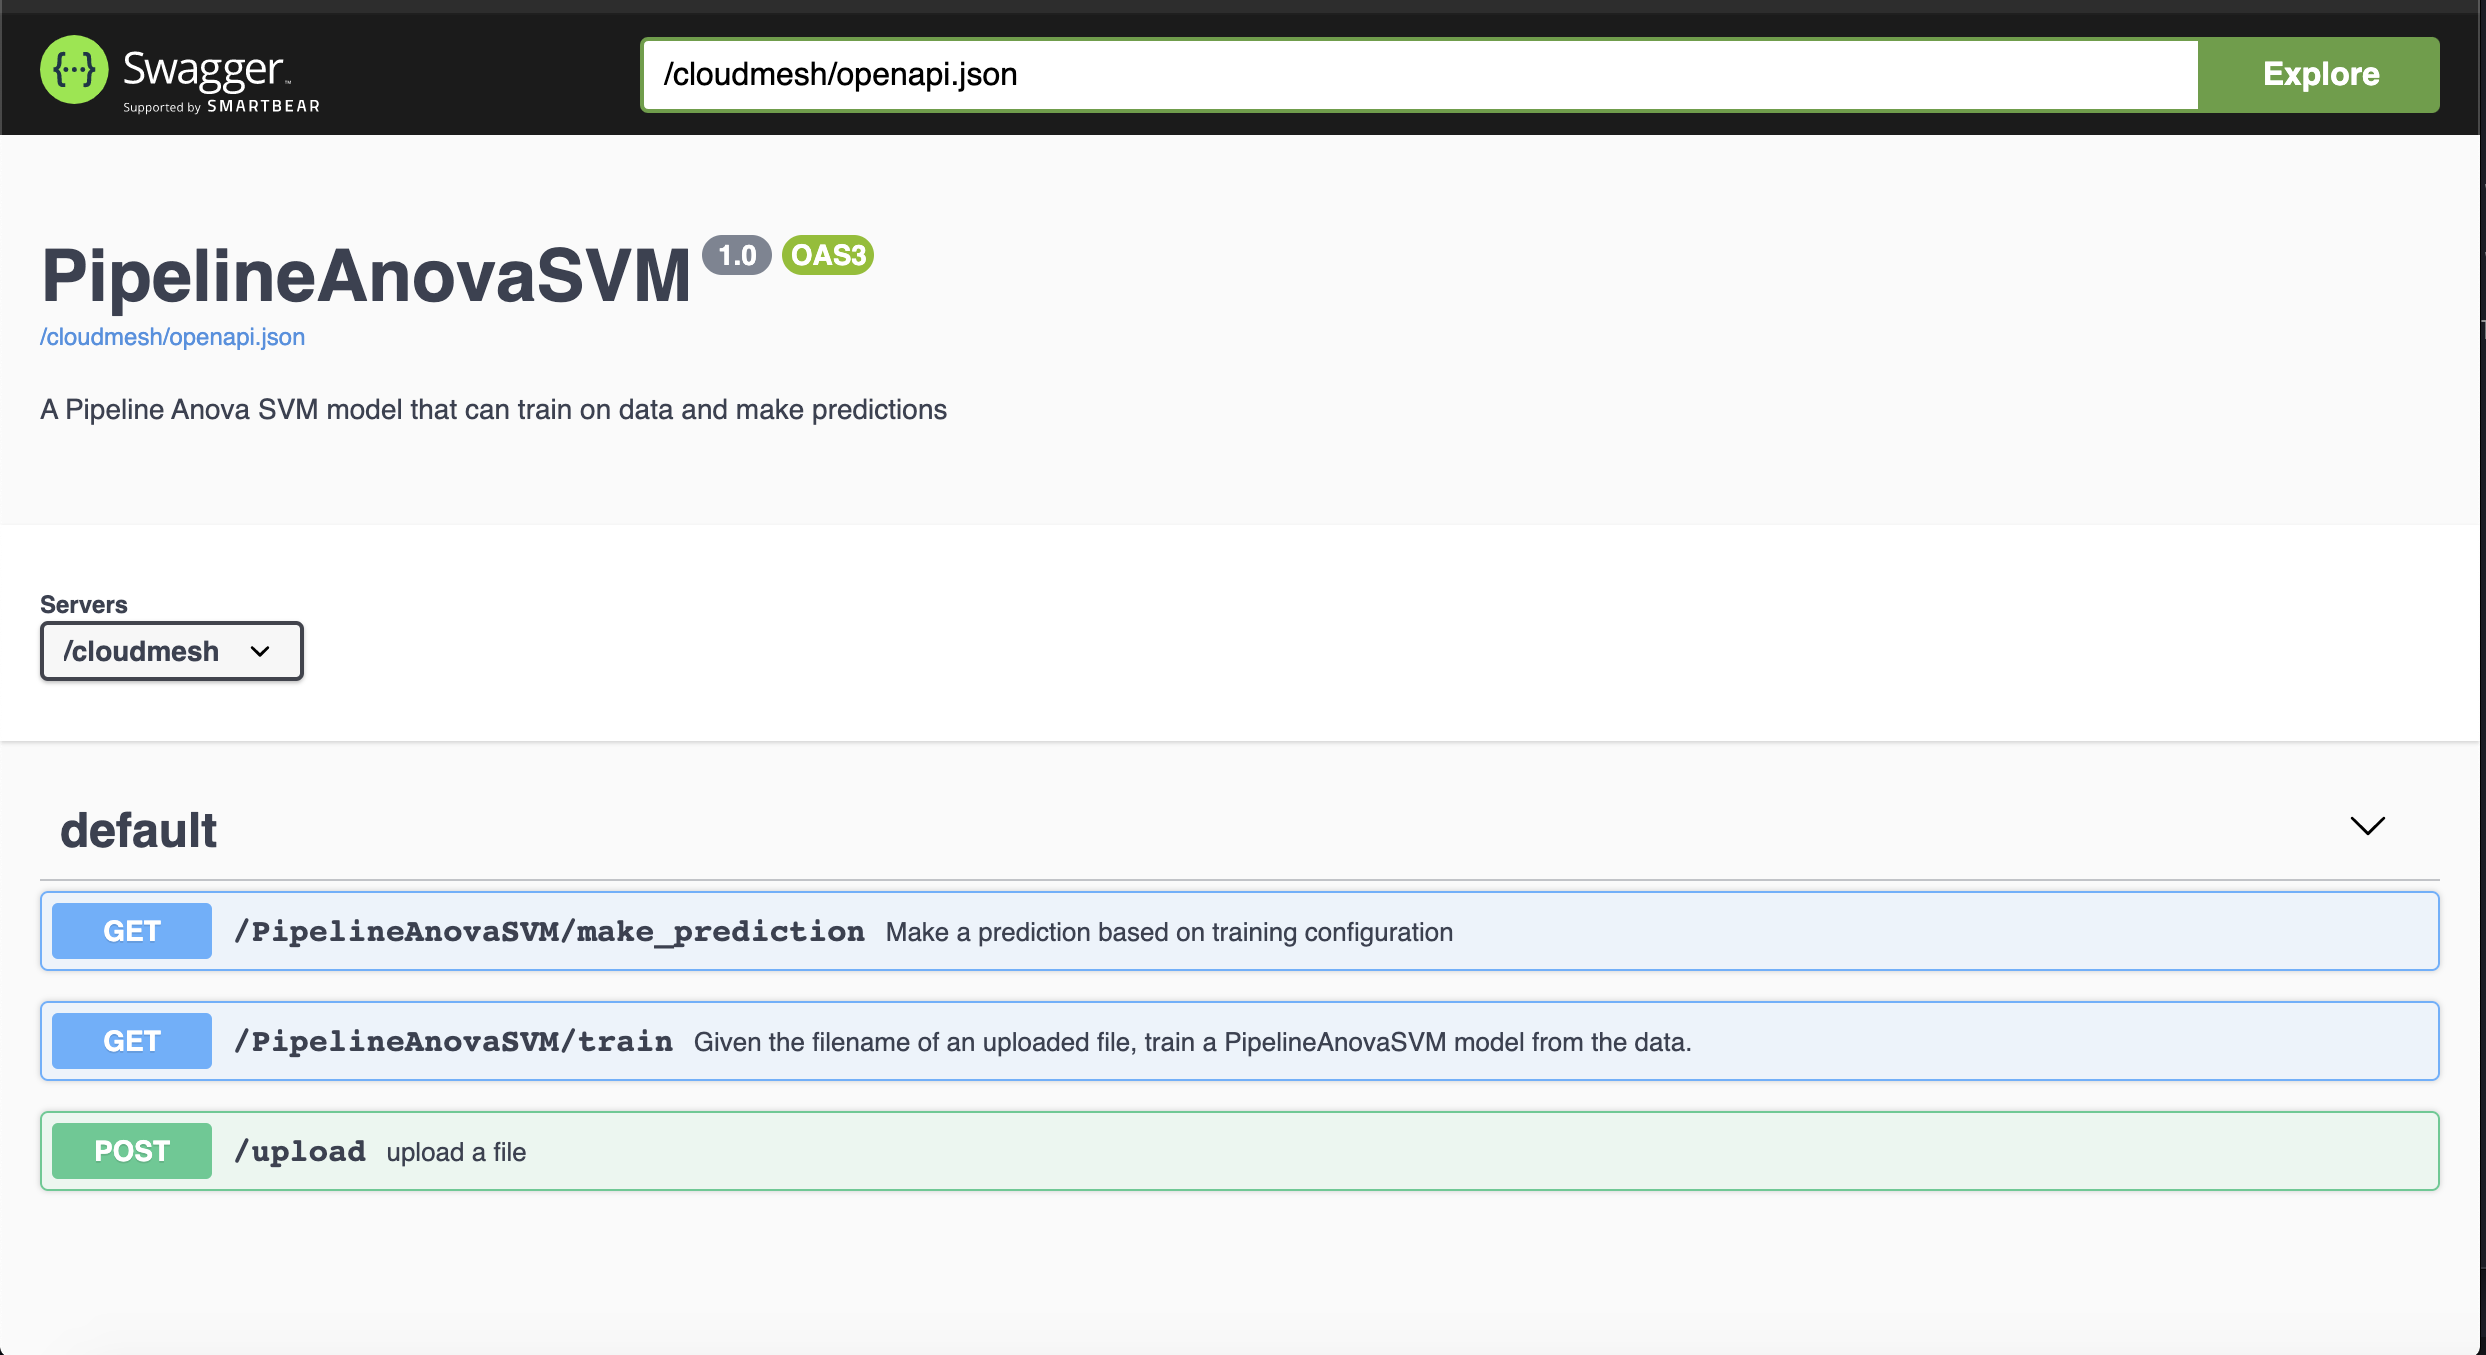
6. Interacting With the Endpoints
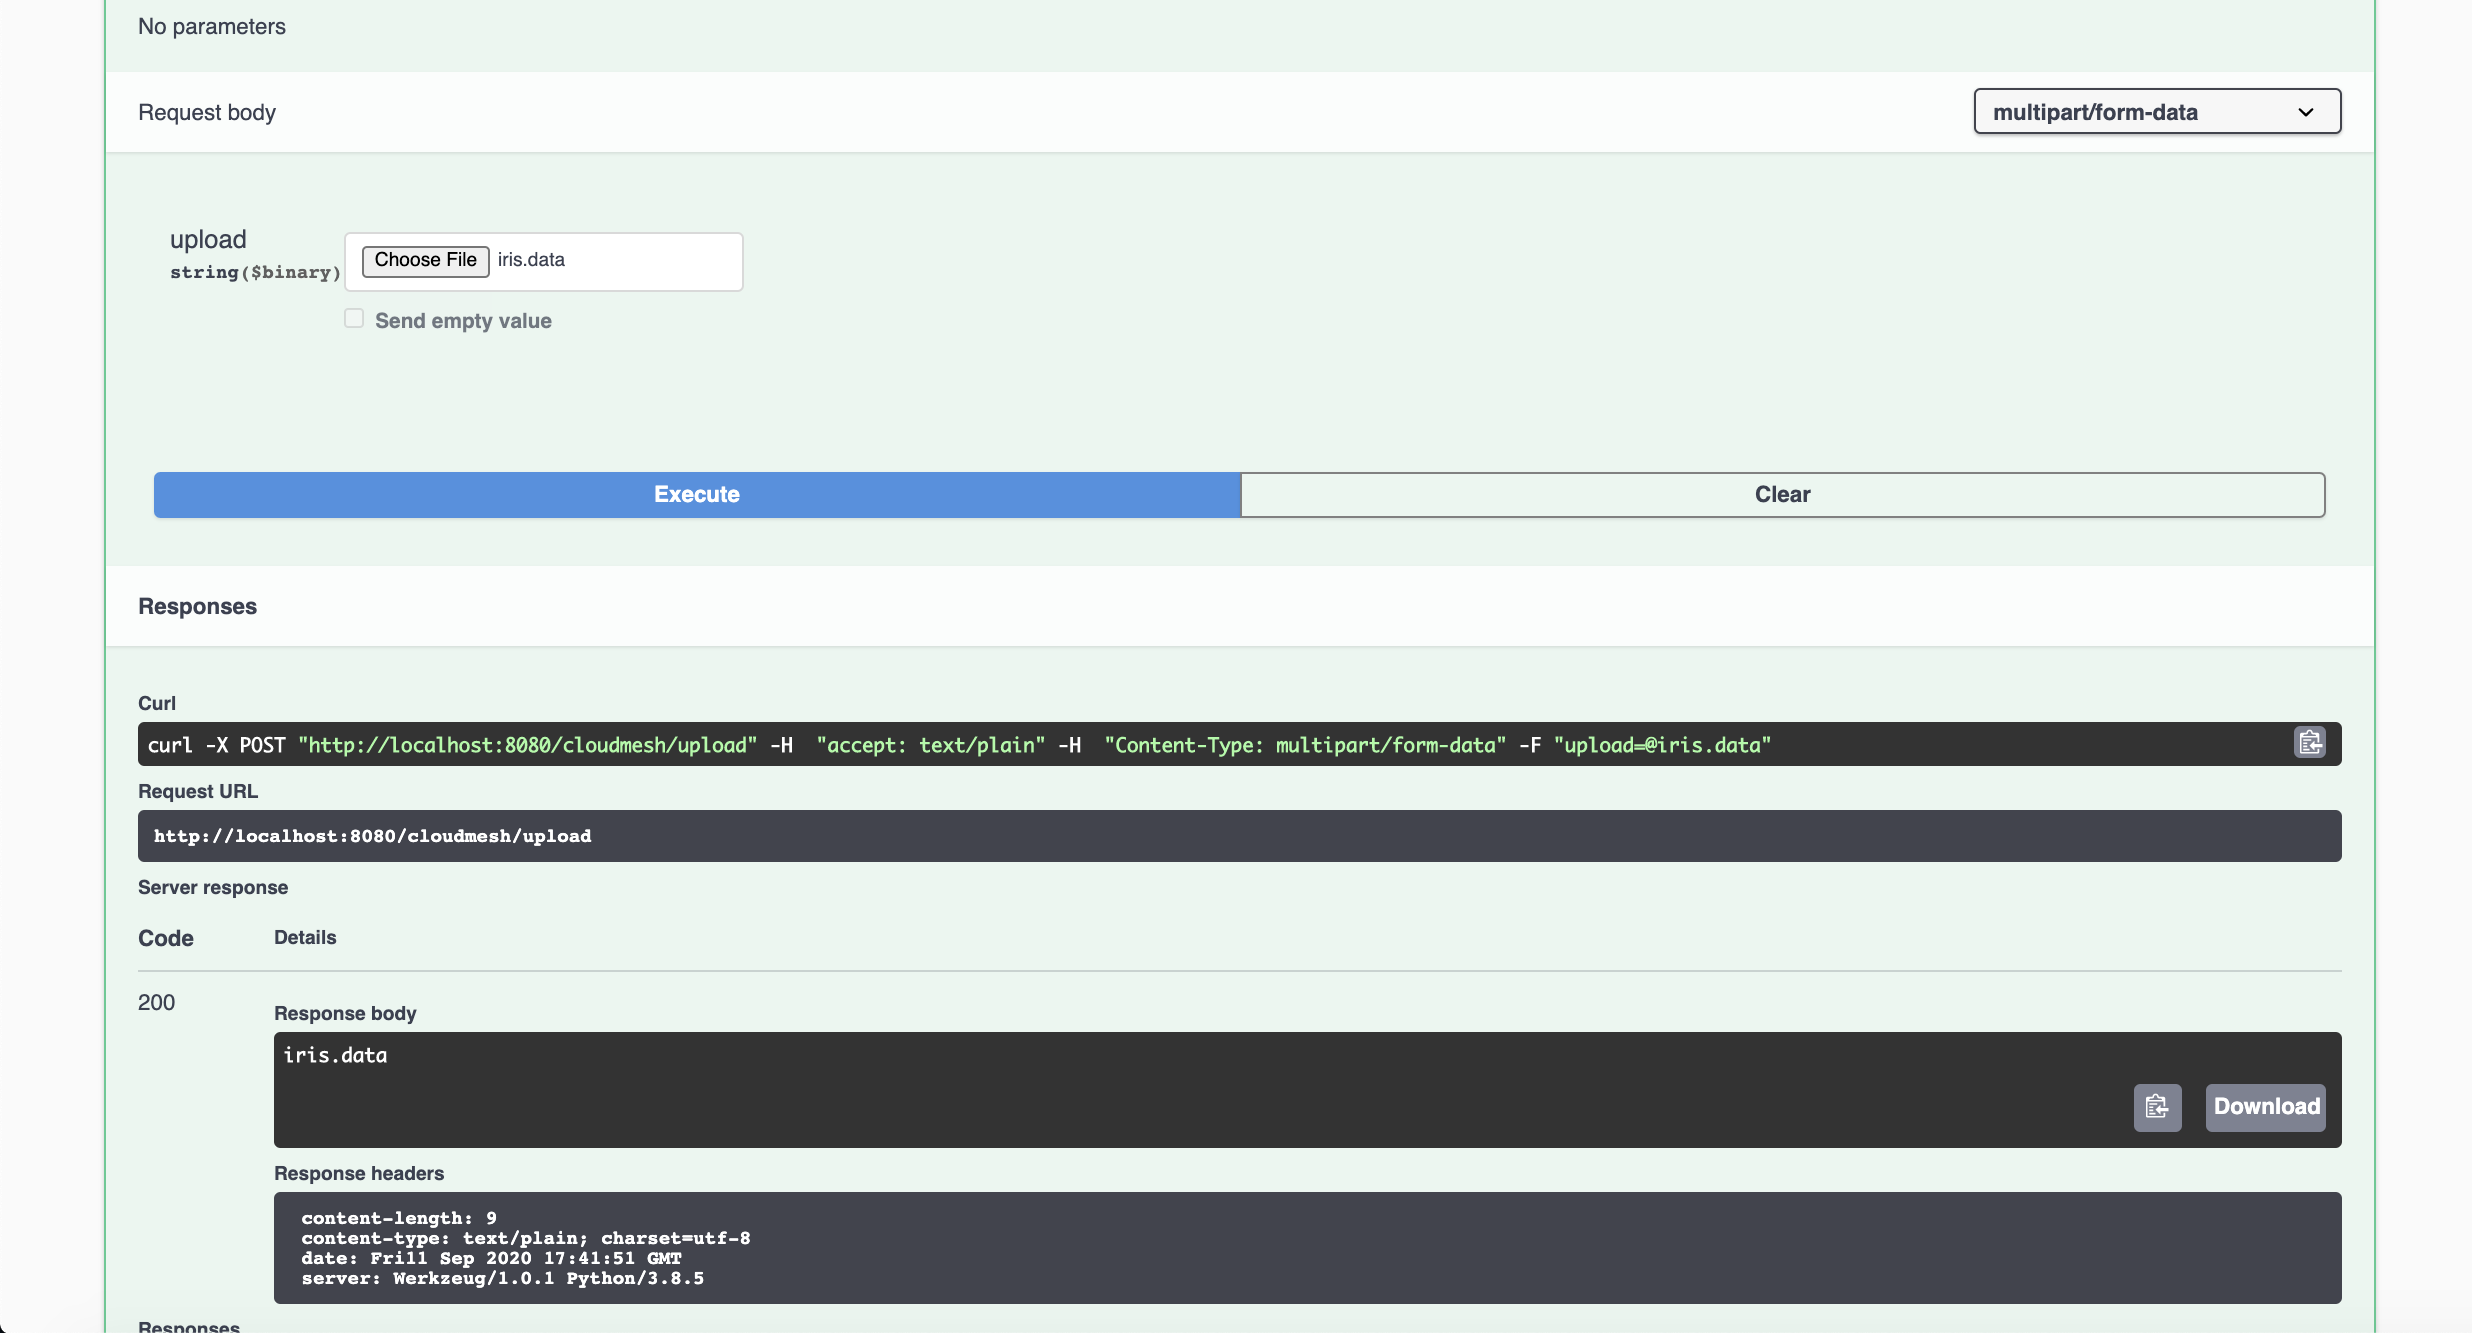
6.1 Uploading the Dataset
We now have a nice user inteface to interact with our newly generated
API. Let us upload the data set. We are going to use the iris data set
in this example. We have provided it for you to use. Simply navigate
to the /upload endpoint by clicking on it, then click Try it out.
We can now upload the file. Click on Choose File and upload the data
set located at ./tests/Scikitlearn-experimental/iris.data. Simply
hit Execute after the file is uploaded. We should then get a 200
return code (telling us that everything went ok).
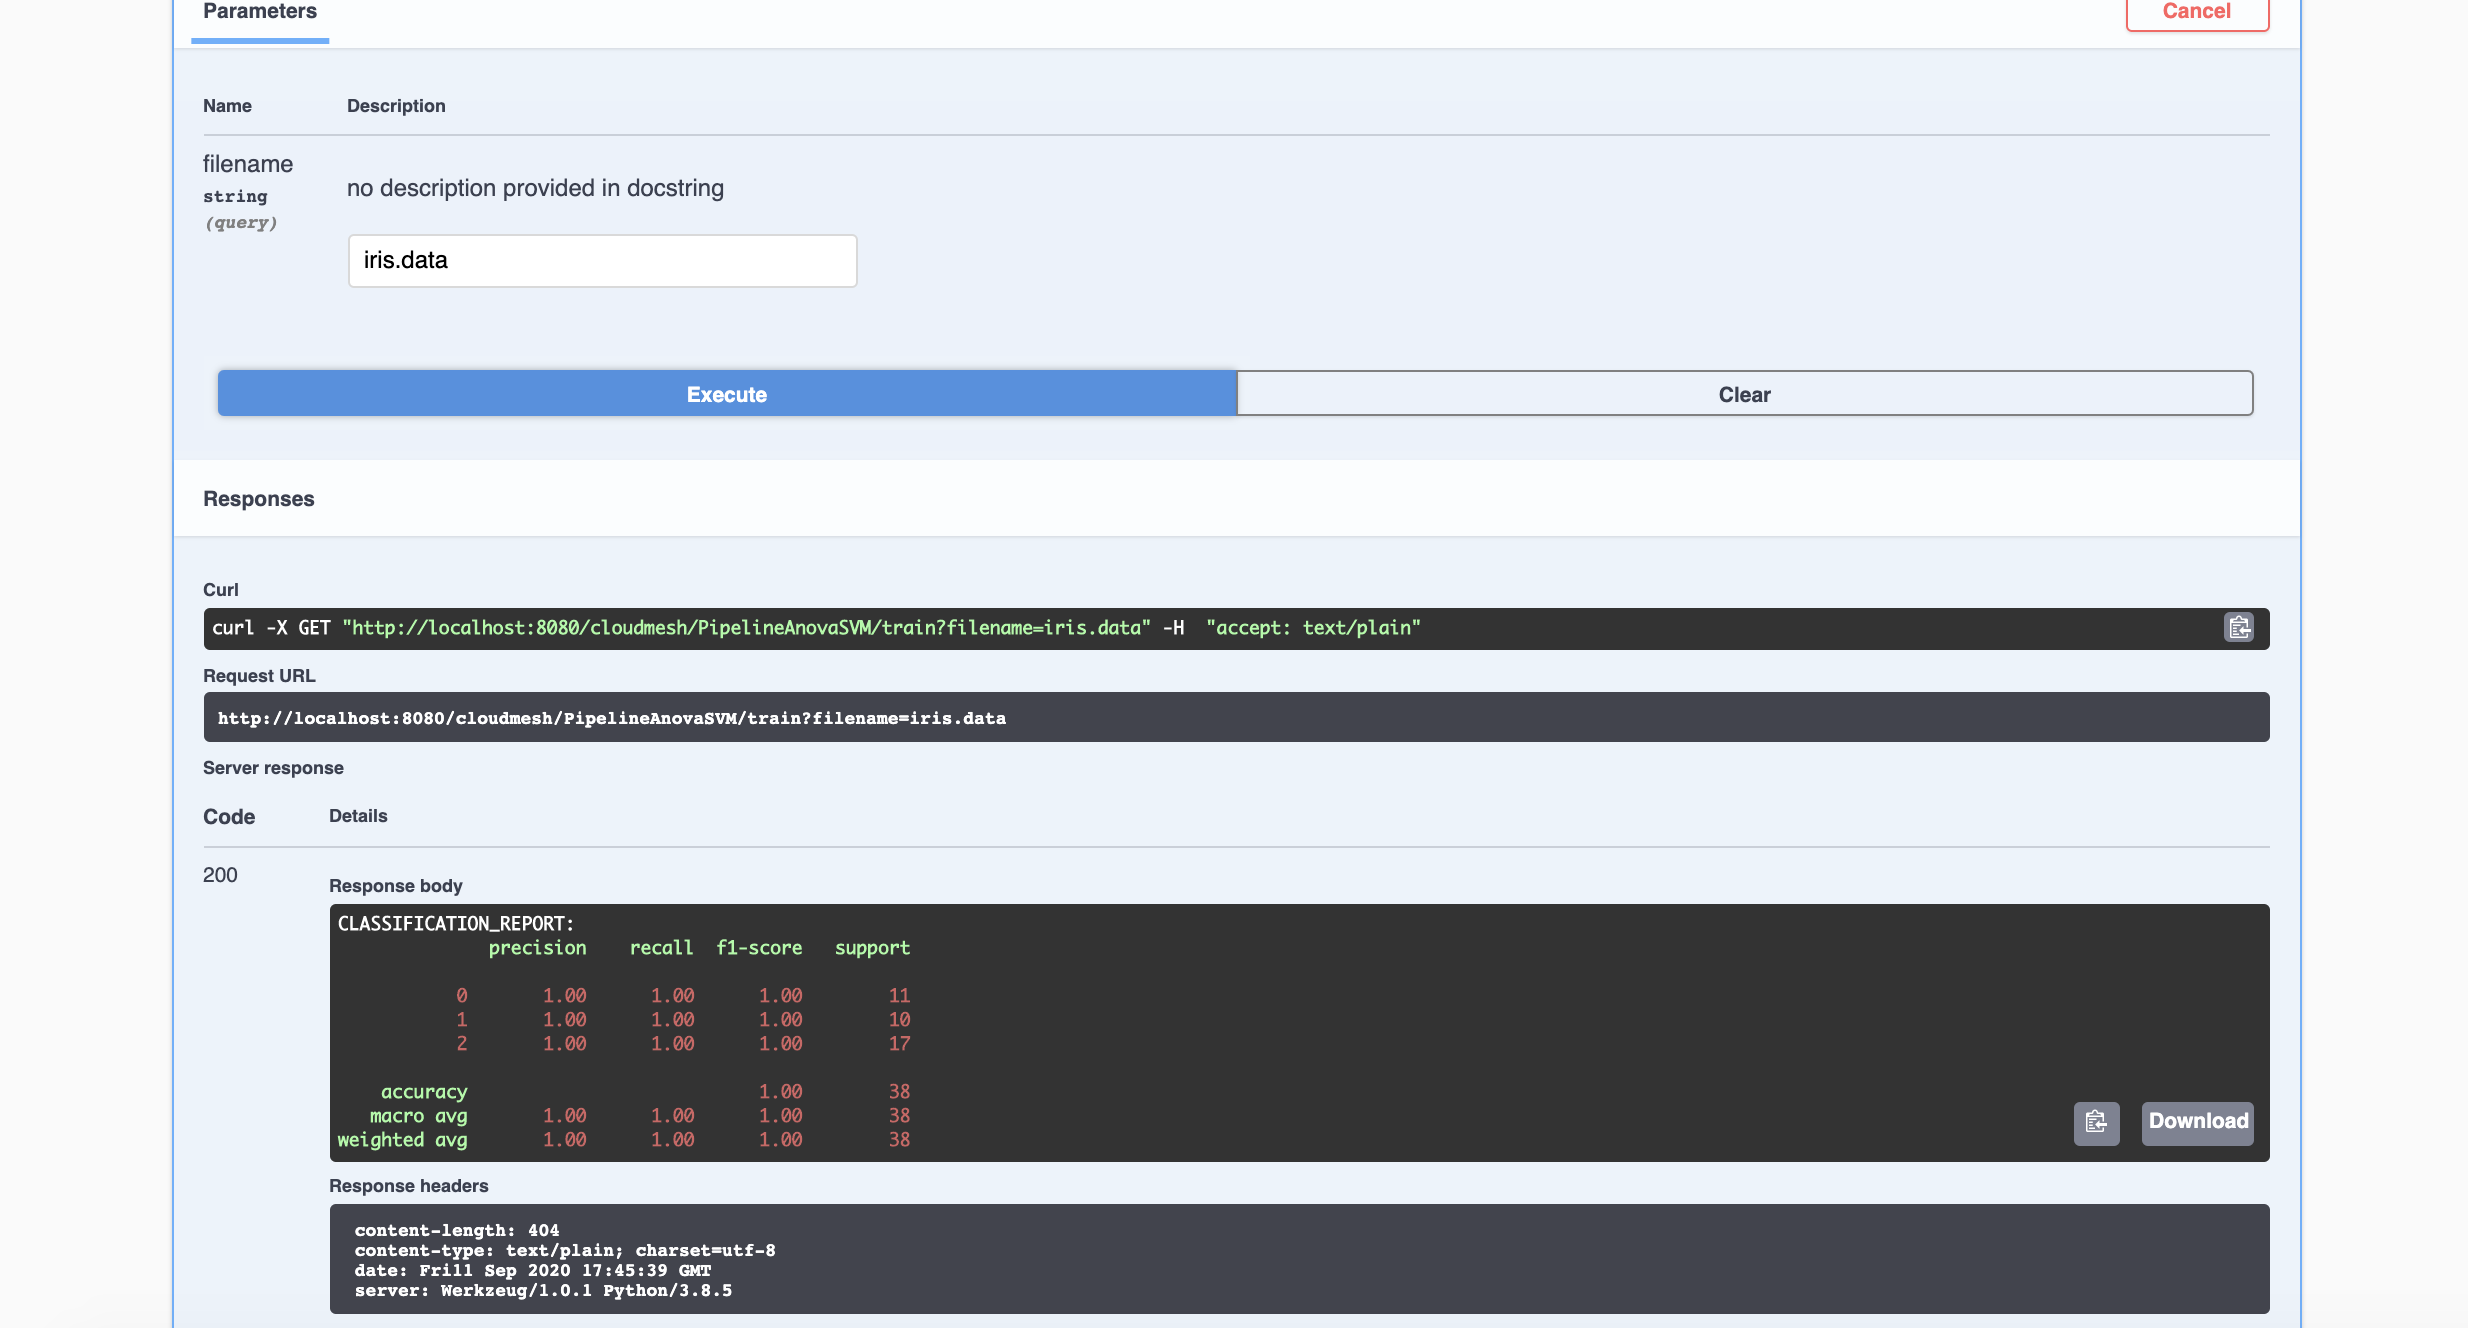
6.2 Training on the Dataset
The server now has our dataset. Let us now navigate to the /train
endpoint by, again, clicking on it. Similarly, click Try it out. The
parameter being asked for is the filename. The filename we are
interested in is iris.data. Then click execute. We should get another
200 return code with a Classification Report in the Response Body.
6.3 Making Predictions
We now have a trained model on the iris data set. Let us now use it to
make predictions. The model expects 4 attribute values: sepal length,
seapl width, petal length, and petal width. Let us use the values
5.1, 3.5, 1.4, 0.2 as our attributes. The expected classification is
Iris-setosa.
Navigate to the /make_prediction endpoint as we have with other
endpoints. Again, let us Try it out. We need to provide the name of
the model and the params (attribute values). For the model name, our
model is aptly called iris (based on the name of the data set).

As expected, we have a classification of Iris-setosa.
7. Clean Up (optional)
At this point, we have created and trained a model using cms openapi. After satisfactory use, we can shut down the server. Let us
check what we have running.
(ENV3) > cms openapi server ps
openapi server ps

INFO: Running Cloudmesh OpenAPI Servers

...

[{'name': 'sklearn_svm', 'pid': 7496, 'spec': './tests/Scikitlearn-experimental/sklearn_svm.yaml'}]
+-------------+------+--------------------------------------------------+
| name        | pid  | spec                                             |
+-------------+------+--------------------------------------------------+
| sklearn_svm | 7496 | ./tests/Scikitlearn-                             |
|             |      | experimental/sklearn_svm.yaml                    |
+-------------+------+--------------------------------------------------+
We can stop the server with the following command:
(ENV3) > cms openapi server stop sklearn_svm
We can verify the server is shut down by running the ps command again.
(ENV3) >
openapi server ps

INFO: Running Cloudmesh OpenAPI Servers

[]
None
8. Assignments
Many ML models follow the same basic process for training and testing:
- Upload Training Data
- Train the model
- Test the model
Using the PipelineAnovaSVM code as a template, write python code for a new model and deploy it as a RESTful API as we have done above. Train and test your model using the provided iris data set. There are plenty of examples that can be referenced here