Cases: Pi Cluster Cases
We list a number of different builds from small to larger scale compute and cloud cluster resources using Raspberry Pi’s.
NAS (1 Pi)
Although a NAS is not really a compute cluster the Pi has used many times to build a Network Attached Storage (NAS) server. In this configuration a HDD is attached to the Raspberry and the network features of the Raspberry is used to access the disk drive via software installed on the PI that make this easily possible. Many tutorials exists on the Web that help setting op such a device.
We like to hear from you if you have successfully developed such a NAS and provide us with such links. Links that may help include:
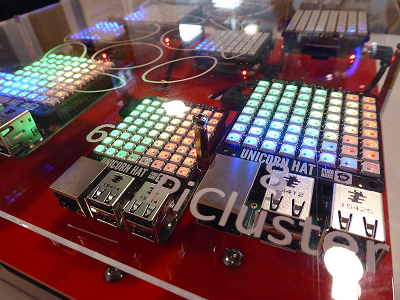
ClusterHat (4 Zero + 1 Pi)
The smallest cluster we came across is actually a hybrid cluster in which 4 Pi zeros attached to a Raspberry Pi 3. This sis achieved via an add on board to the Pi 3 allowing to plug in PI=i Zeros:
The Cluster HAT (Hardware Attached on Top) allows to attach 4 Raspberry Pi Zeros via to be attached to a regular Raspberry PI 3 to simulate a small cluster.
According to the Web Site it supports the following features:
- USB Gadget Mode: Ethernet and Serial Console.
- Onboard 4 port USB 2.0 hub.
- Raspberry Pi Zeros powered via Controller Pi GPIO (USB optional).
- Individual Raspberry Pi Zero power controlled via the Controller Pi GPIO (I2C).
- Connector for Controller Serial Console (FTDI Basic).
- Controller Pi can be rebooted without interrupting power to Pi Zeros (network recovers on boot).

Although this setup seems rather appealing, the issue is with obtaining Pi Zeros for the regional price of $5. Typically users can only by one for that price and must pay shipping. To by more one has to buy a kit for about $20. However, for that amount of money it may just be worth while to get Pi 3’s instead of zero’s. Nevertheless the form factor is rather appealing.
Additional information can be found at:
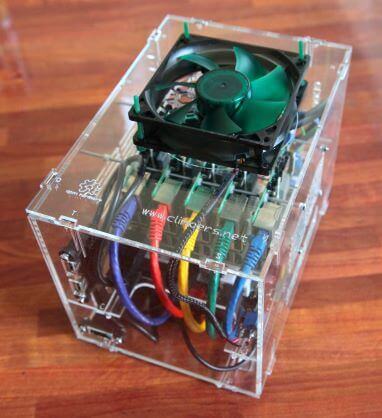
Cluster Case With Cooling (5 Pi’s)
Many instructions on the Web exist describing how to build clusters with 3 or more Pi’s. One of the considerations that we have to think about is that we may run rather demanding applications on such clusters causing heat issues. To eliminate them we must provide proper cooling. In some cluster projects cooling is not adequately addressed. Hence we like to provide an example that discusses in detail how to add a fan and what the fan has for an impact on the temperature.
From the previous Web page we find the following information as shown in the following table. From the data in the table it is clear that we need to keep the Pi from throttling while being in a case by adding a fan as obvious from experiment No. 2.
Table: Temperature comparison of fan impact
No. Case Fan Direction RPM Idle 100% Load Performance
1 no no - - 41.0C 75.5C OK (barely) 2 yes no - - 45.0C 82.5C throttles 3 yes 5V in unknown 37.9C 74.5C OK (barely) 4 yes 7V in 800 35.6C 69.5C OK 5 yes 12V in 1400 32.5C 61.1C OK 6 yes 7V out 800 34.5C 66.4C OK
Interesting is also the design of the case that uses snaps instead of screws to affix the walls to each other. The case layout can be found at:
Octapi (8 Pi’s)
A set of instructions on building an is available at
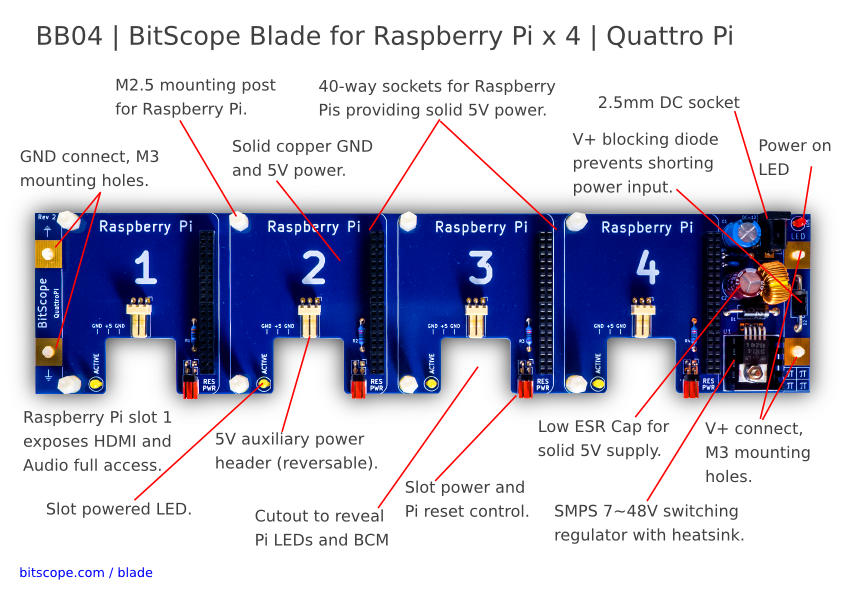
Bitscope Case (40 Pi’s)
A company from Australia called BitScope Designs offers a number of cases that leverage their Pi Blade boards allowing up to four Pis to be put together and sharing the same power supply. The blades are shown in the next Figure. The rack to place 10 of them is shown in the Figure after that.
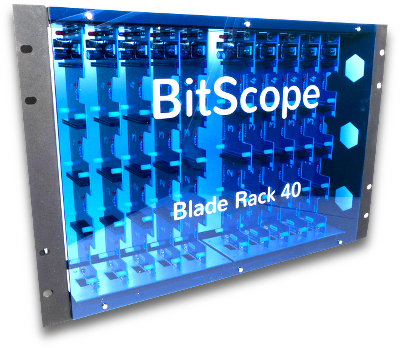
The cost of the blade rack is $ 795.45 + $60.00 shipping + import tax. This may originally sound expensive when compared to a single case, however as we can store 40 Pis in them and they can share the power-supply and reduce cabling we think this case is quite interesting overall due to its price-point of $20 per Pi.
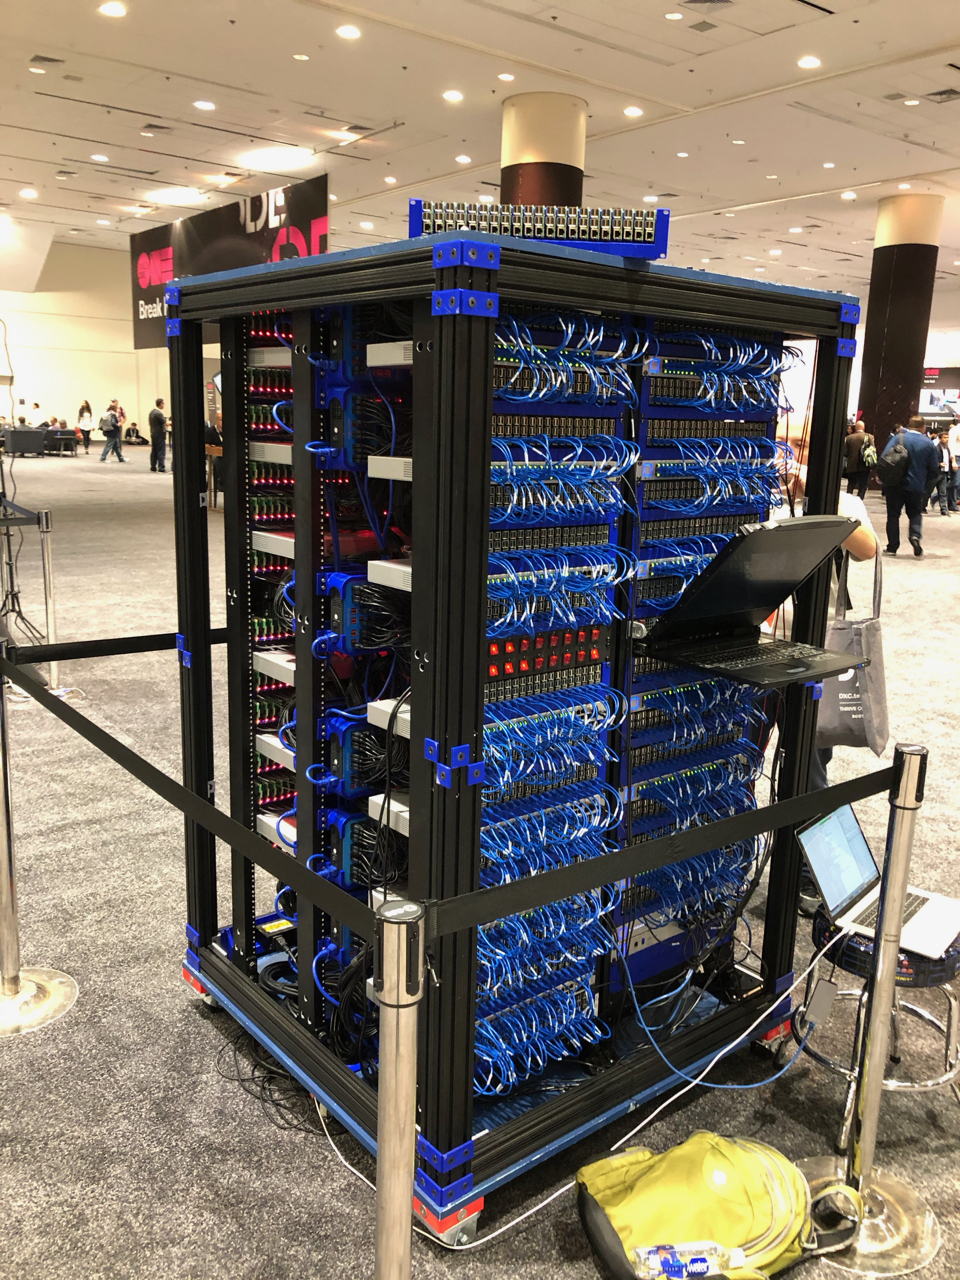
BitScope Cluster (144 Pi’s)
Together with LANL a new cluster module that holds 144 Pis is developed. This system is targeted to be placed into a rack to create a large Pi cluster. The cost for such a module is about $15K.
The next Figure shows the module.

The next figure shows how multiple modules can be placed into a single rack.

Additional information about this form factor can be found at the following links:
- https://cluster.bitscope.com/solutions
- https://www.pcper.com/news/General-Tech/BitScope-Unveils-Raspberry-Pi-Cluster-2880-CPU-Cores-LANL-HPC-RD
- http://my.bitscope.com/store/
- http://my.bitscope.com/store/?p=view\&i=item+7
- http://www.newark.com/bitscope/bb04b/quattro-pi-board-raspberry-pi/dp/95Y0643
- http://linuxgizmos.com/rpi-expansion-boards-support-up-to-40-pi-clusters/
Oracle Cluster (1060 Pi’s)
Oracle has displayed at Oracle World 2019 a 1060 node Raspberry Pi Cluster.
More images are available at this (link)[https://imgur.com/gallery/wx1hZ5D]. the supercomputer features scores of racks with 21 Raspberry Pi 3 B+ boards each. The system is used to demonstrate Oracle Autonomous Linux source.
Build Your Own 5 Node Pi Cluster
To experiment with building an elementary cluster one does not need to have a big budget. Such clusters are often dedicated to research tasks and are bound into security protocols that do not allow direct access. Instead it is possible to build such a cluster based on Raspberry Pi’s yourself if you are willing to spend the money or if you have access to Pi’s that you may loan from your department.
Table Parts lists one such possible parts list that will allow you to build a cluster for up to 5 nodes. However make sure to buy at least 3 Raspberry Pi’s with the appropriate memory. At minimum we recommend you get the 32GB SD card. We do not recommend any smaller as otherwise you will run out of memory. Additionally, you can add memory and disks on the USB ports. If you attach a HDD, make sure it has an external power supply and do not drive it from the USB power as otherwise the PI becomes unstable. A fan is at this time not yet included.
Naturally it is possible to modify the parts list and adapt. If you find better parts let us know. We have not included any case and you are welcome to share your suggestions with the class. For a case we are looking also for a good solution for a fan.
We suggest that when you build the cluster to do it on a table with a large white paper or board, or a tablecloth and take pictures of the various stages of the build so we can include it in this document.
Initially we just put Raspbian as Operating system on the SD cards and test out each PI. To do so you will naturally need an SD card writer that you can hook up to your computer if it does not have one. As you will have to potentially do this more than once it is not recommended to buy an SD card with the OS on it. Buy the SD card writer instead so you can redo the flashing of the card when needed. In addition to the SD card you need a USB mouse and keyboard and a monitor or TV with HDMI port.
Locate setup instructions and write a section in markdown that we will include here once it is finished. The section is to be managed on github.
| Price | Description | URL |
|---|---|---|
| $29.99 | Anker 60W 6-Port USB Wall Charger, PowerPort 6 for iPhone 7 / 6s / Plus, iPad Pro / Air 2 / mini, Galaxy S7 / S6 / Edge / Plus, Note 5 / 4, LG, Nexus, HTC and More | link |
| $8.90 | Cat 6 Ethernet Cable 1 ft White (6 Pack) - Flat Internet Network Cable - Jadaol Cat 6 Computer Cable short - Cat6 Ethernet Patch Lan Cable With | link |
| $19.99 1 | D-link 8-Port Unmanaged Gigabit Switch (GO-SW-8G) | link |
| $10.49 | SanDisk Ultra 32GB microSDHC UHS-I Card with Adapter, Grey/Red, Standard Packaging (SDSQUNC-032G-GN6MA) | link |
| $8.59 | Short USB Cable, OKRAY 10 Pack Colorful Micro USB 2.0 Charging Data Sync Cable Cord for Samsung, Android Phone and Tablet, Nexus, HTC, Nokia, LG, Sony, Many Digital Cameras-0.66ft (7.87 Inch) | link |
| $7.69 | 50 Pcs M2 x 20mm + 5mm Hex Hexagonal Threaded Spacer Support | link |
| $7.99 | Easycargo 15 pcs Raspberry Pi Heatsink Aluminum + Copper + 3M 8810 thermal conductive adhesive tape for cooling cooler Raspberry Pi 3, Pi 2, Pi Model B+ | link |
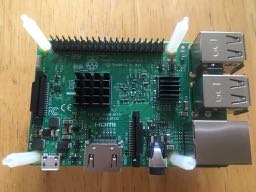
| $34.49 | Raspberry Pi 4 Model B Motherboard 8 GB (you need at least 3 of them, at least 4GB) | link |
| $59.99 2 | 1TB drive | link |
| $15.19 | 64GB flash | link |
| $6.99 | HDMI Cable, Rankie 2-Pack 6FT Latest Standard HDMI 2.0 HDTV Cable - Supports Ethernet, 3D, 4K and Audio Return (Black) - R1108 | link |
| $12.99 | AUKEY USB C Adapter, USB C to USB 3.0 Adapter Aluminum 2 Pack for Samsung Note 8 S8 S8+, Google Pixel 2 XL, MacBook Pro, Nexus 6P 5X, LG G5 V20 (Gray) | link |
| $19.19 | For Raspberry Pi 3 2 TFT LCD Display, kuman 3.5 Inch 480x320 TFT Touch Screen Monitor for Raspberry Pi Model B B+ A+ A Module SPI Interface with Touch Pen SC06 | link |
1 items were replaced with similar 2 item was not available
Assembling the Pi Cluster
| Figure | Description |
|---|---|
 | First, aluminum and copper heat syncs need to be attached to each Pi. The two aluminum heat syncs are attached to the Broadcom chip and the SMSC Ethernet controller located on the top of the Pi. The blades of the heat syncs are parallel to the longer side of the Pi as shown in black aluminum fanned heat syncs are attached to the top of the pi as shown. |
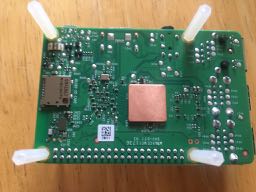 | Flat copper heat sync is attached to the bottom of the pi as shown. |
 | After attaching the heat syncs, threaded hexagonal spacer supports are used to connect the Pis together. A fully-assembled 5-node Pi cluster is shown. |
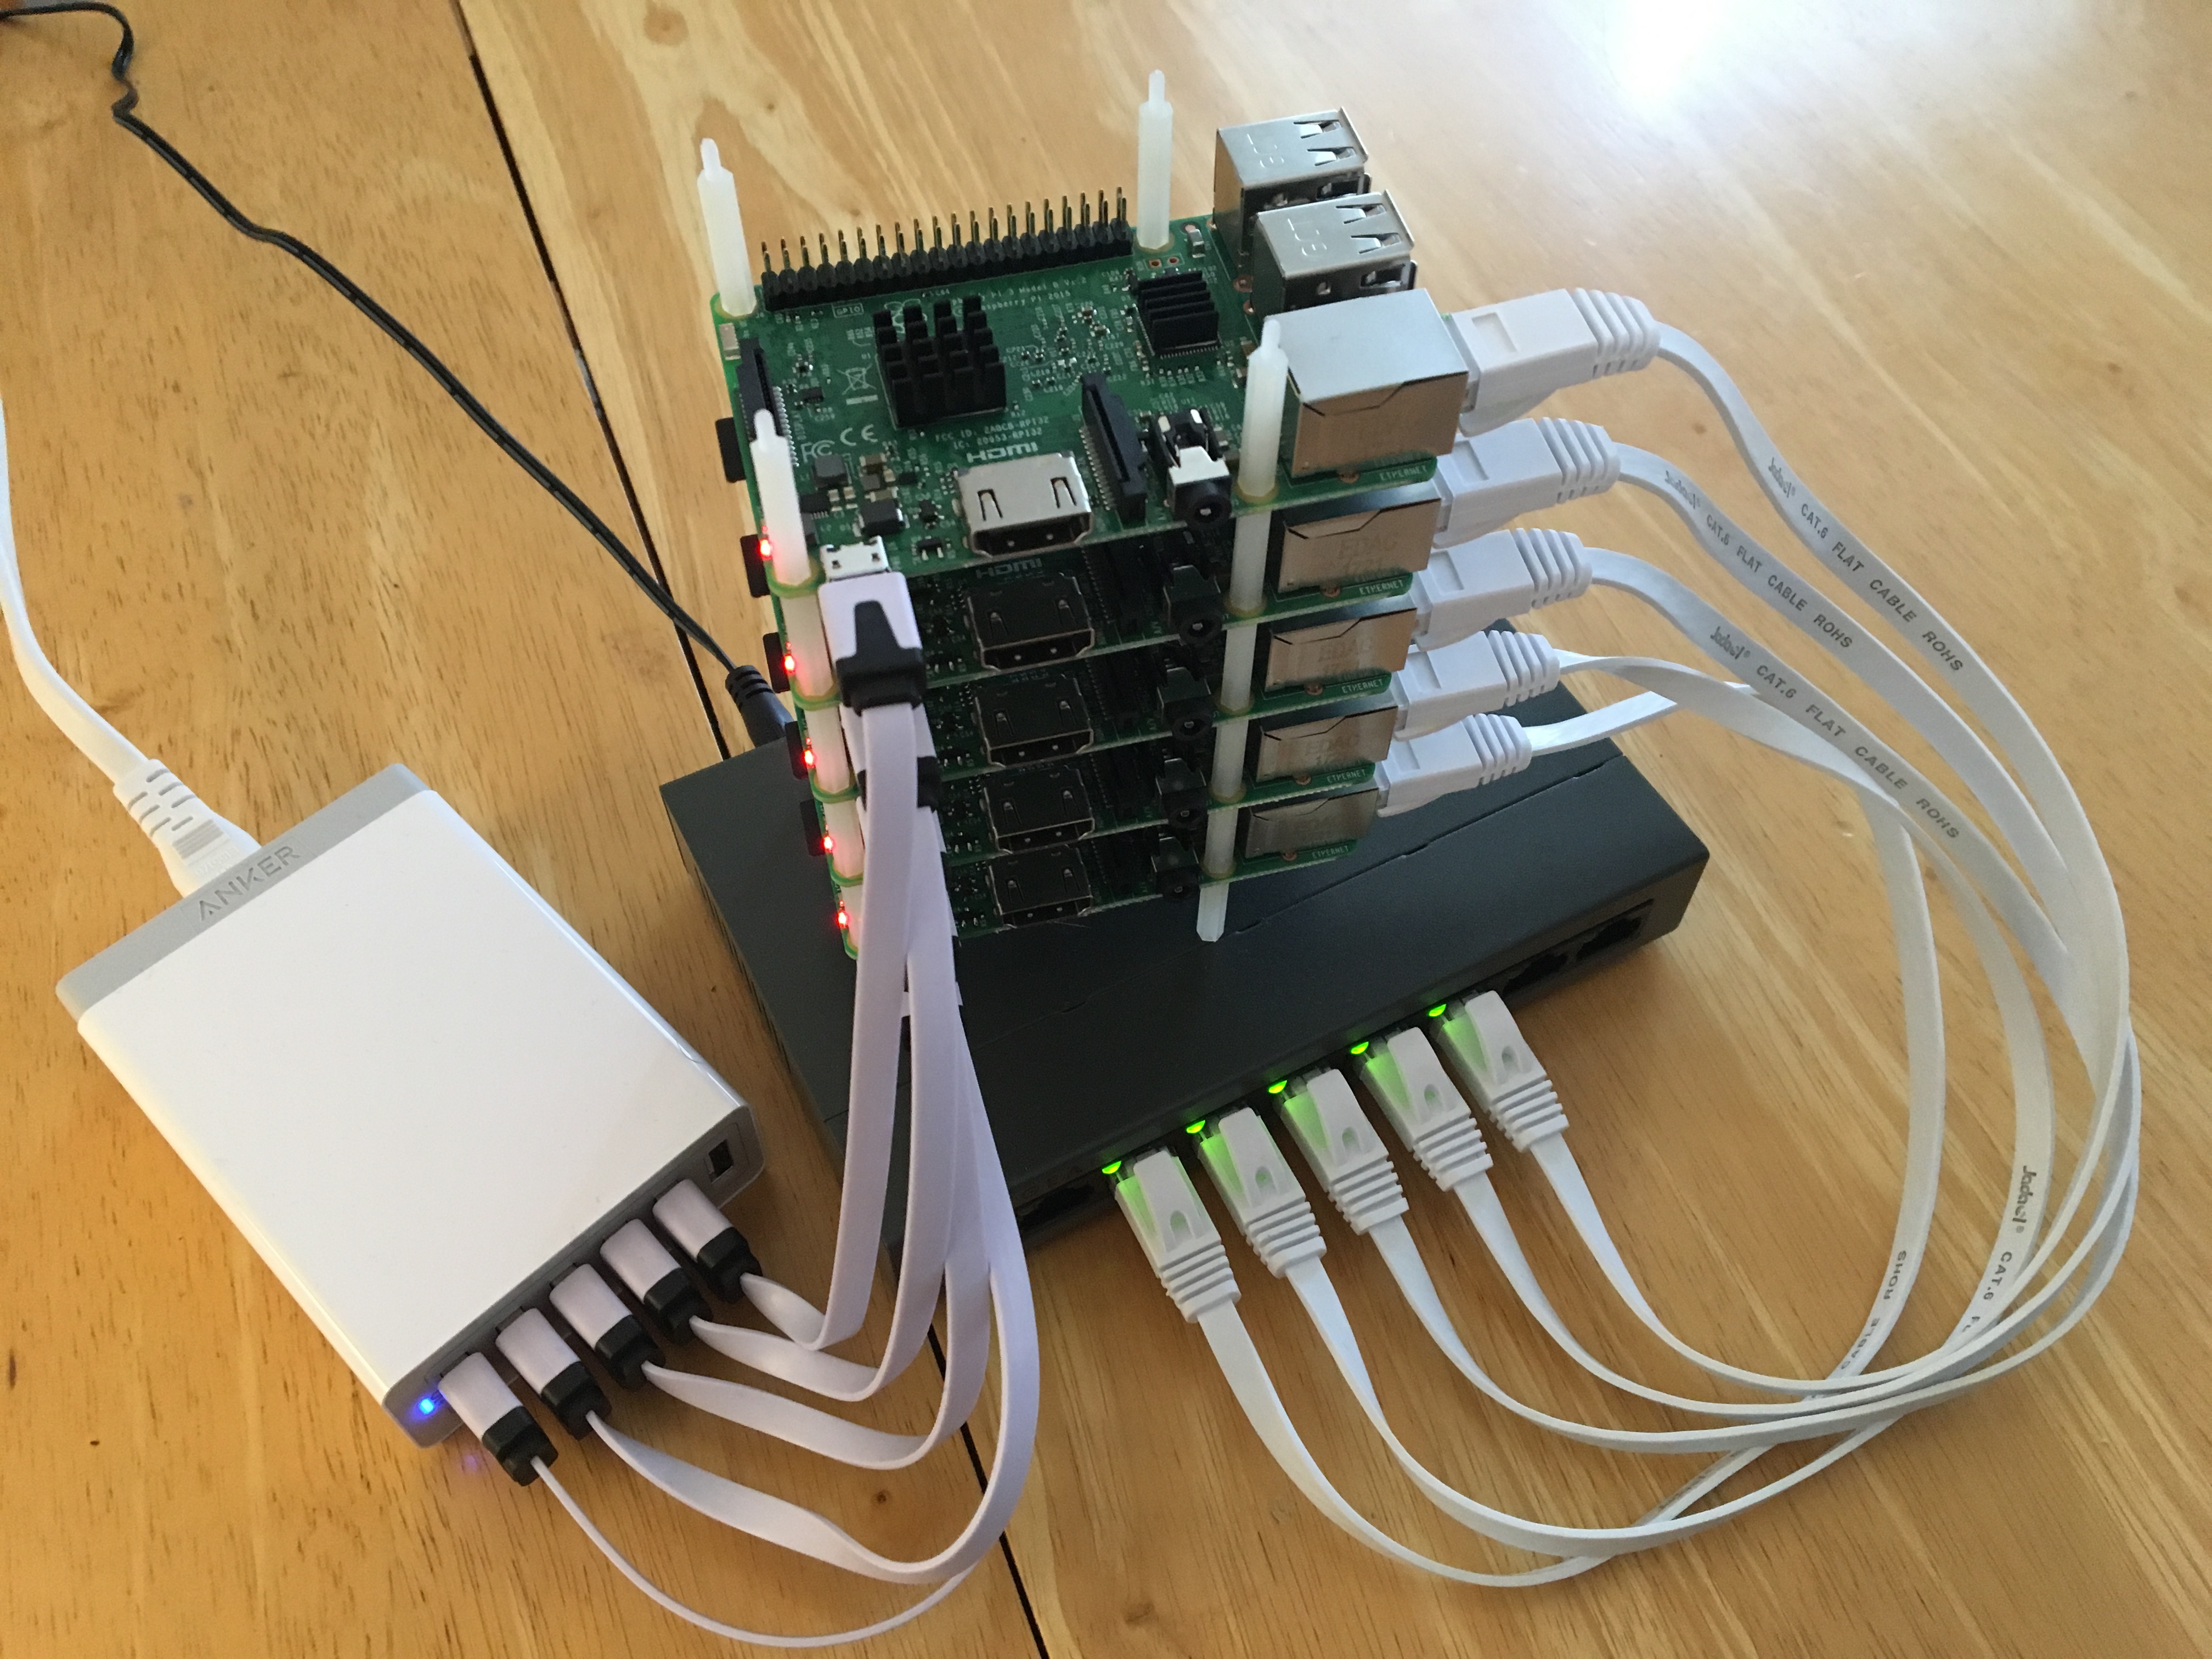 | Each node of the cluster is then attached to the switch using an Ethernet cables and to the power supply using a USB cables. The fully wired cluster is shown. |
Virtual Raspberry Cluster
It is possible to create a virtual raspberry PI cluster while for example using virtual box. This requires two steps. First the deployment of a virtualized Raspberry PI. There are many resources on the internet that describe how to do that. Some of them are
- https://raspberrytips.com/run-raspberry-in-virtual-machine/
- http://dbakevlar.com/2015/08/emulating-a-raspberry-pi-on-virtualbox/
The next step includes the deployment of multiple VMs emulating Raspberry’s. Naturally each should have its own name so you can distinguish them. Instead of just using the GUI, it would be important to find out how to start them from a command line as a shell script as well as tear them down.
Next you will need to make sure you can communicate from the Pi’s to each other. This is naturally the same as on a real cluster
Note: We recently set up such a cluster and found it was extremely slow on an older MacBook Pro with 16GB memory. Thus make sure you have up to date hardware and lots of memory. For this reason we recommend doing a hradware version. Also remember that some software does require a lot of memory to be allocated to the VM. Make sure that you plan ahead before you start the virtualization route. It will be frustrating to work on a real slow virtual cluster.