Windows
Warning
Before you install make sure that you have an up-to-date version of Python installed. We recommend you use 3.8.2 or newer. Python can be downloaded and installed from https://www.python.org/downloads/. On Windows you may also need to install the C++ command line build tools as some cryptographic libraries need to be recompiled in 3.8.2 or newer. The installation of cls is optional and only needed for encryption.
Prerequisites for Windows
First, check if any of these commands are not installed. If they are not, please install them first. To check if they are available use the where command to check the following commands must return a valid path:
where cls
where ssh
Prerequisite |
Check in CMD.exe |
Link for installation document |
|---|---|---|
cls |
C:> where cls
|
|
ssh |
C:> where ssh |
|
python 3.8.2 (or newer), 64 bit |
C:> python –version |
Please also run the check if you have the 64 bit vesrsion of python which must return True:
`C:> python -c 'import sys;print("%x" % sys.maxsize, sys.maxsize > 2**32)'`
Install
Note
Likely the code will work with earlier versions starting from 3.7.4. We know that Python 3.6 has bugs and should not be used. Although cloudmesh previously was supported in Python 2.7 and newer, we have removed Python 2 as a supported platform.
On Windows 10 you can install cloudmesh by either using
a Windows native installation,
a Linux Subsystem installation,
a Docker installation,
approach.
In case you use the docker install you must use the professional or the educational version of Windows, as the Home edition is not supporting it.
Windows Container Approach
The user container for cloudmesh shell is called cmsd (cloudmesh shell docker). It can be installed with pip as follows
pip install cloudmesh-cmsd
Please note that in order for you to develop cloudmesh you need to do this within the container. However, we do recommend that Windows developer use the Windows native cloudmesh approach. However regular users will have very transparent access to cloudmesh as most commands are just passed along to the container.
The manual page for cmsd is located at ../cmsd
Linux Subsystem Installation Approach
See our separate section on this.
venv Setup on Windows CMD.EXE
On Windows, you run the following command from your home directory at C:UsersUSERNAME:
python -m venv ENV3
source ENV3\Scripts\activate
python -m pip install --upgrade pip
Next, create a Windows system variable named ENV3 and update the variable value to C:UsersUSERNAMEENV3Scriptsactivate.
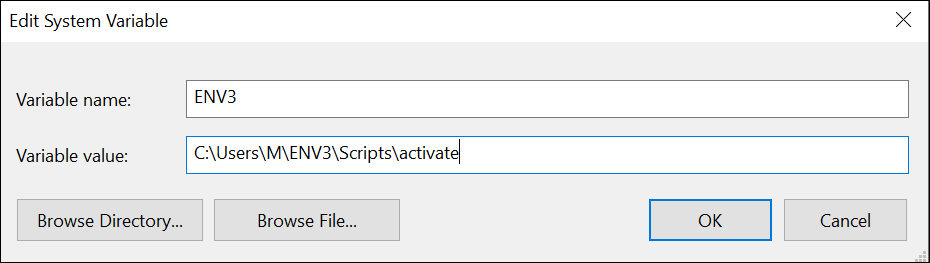
Figure: Setting the ENV3 variable
Then add the ENV3 variable name to the Path variable.
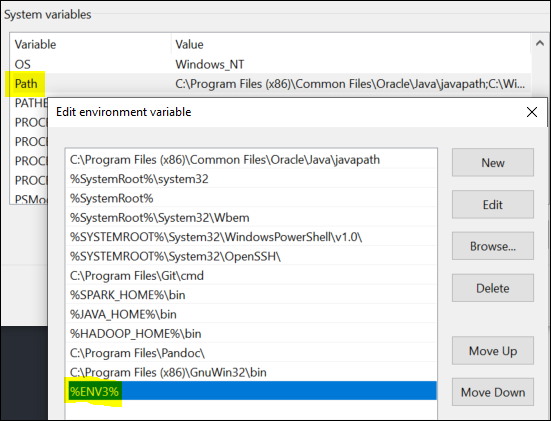
Figure: Add the variable to the path
Lastly, to simplify the venv activation call, create a new ENV3.bat file under the default directory, and add the following content to the file.
C:\Users\USERNAME\ENV3\Scripts\activate.bat
Note
The same can be done in Windows Powershell by creating an ENV3.ps1 to reference the activation command.
Test the venv activation
We recommend that you test the venv activation. In a command prompt, type ENV3 while under the home directory; or if the bat file was not created, simply reference the system variable %ENV3%.
Example using bat file activation:
C:\Users\USERNAME> ENV3

...

(ENV3) C:\Users\USERNAME>
Example using Windows environment variable:
C:\Users\USERNAME> %ENV3%

(ENV3) C:\Users\USERNAME>
In both cases, you will see the command prompt starting with (ENV3).
Validate Python and Pip Version in venv
Check if you have the right version of python and pip installed with
python --version
pip --version
Now you are ready to install cloudmesh.